Contents
This page explains what you can do on Guest Check-in screen on Acall Portal.
What is guest check-in?
The following items are listed in the Guest Check-in screen.
- Workspace reservation (internal/external) information
- Visitors Information about invitation passes on Acall Reception and visitors without appointments
NOTE
・Spot reservation information will not be displayed.
・Immediate use on Acall Meeting will not be displayed.
・Depending on your company settings, reservation details and permissions, some information may not be displayed.
Guest check-in screen
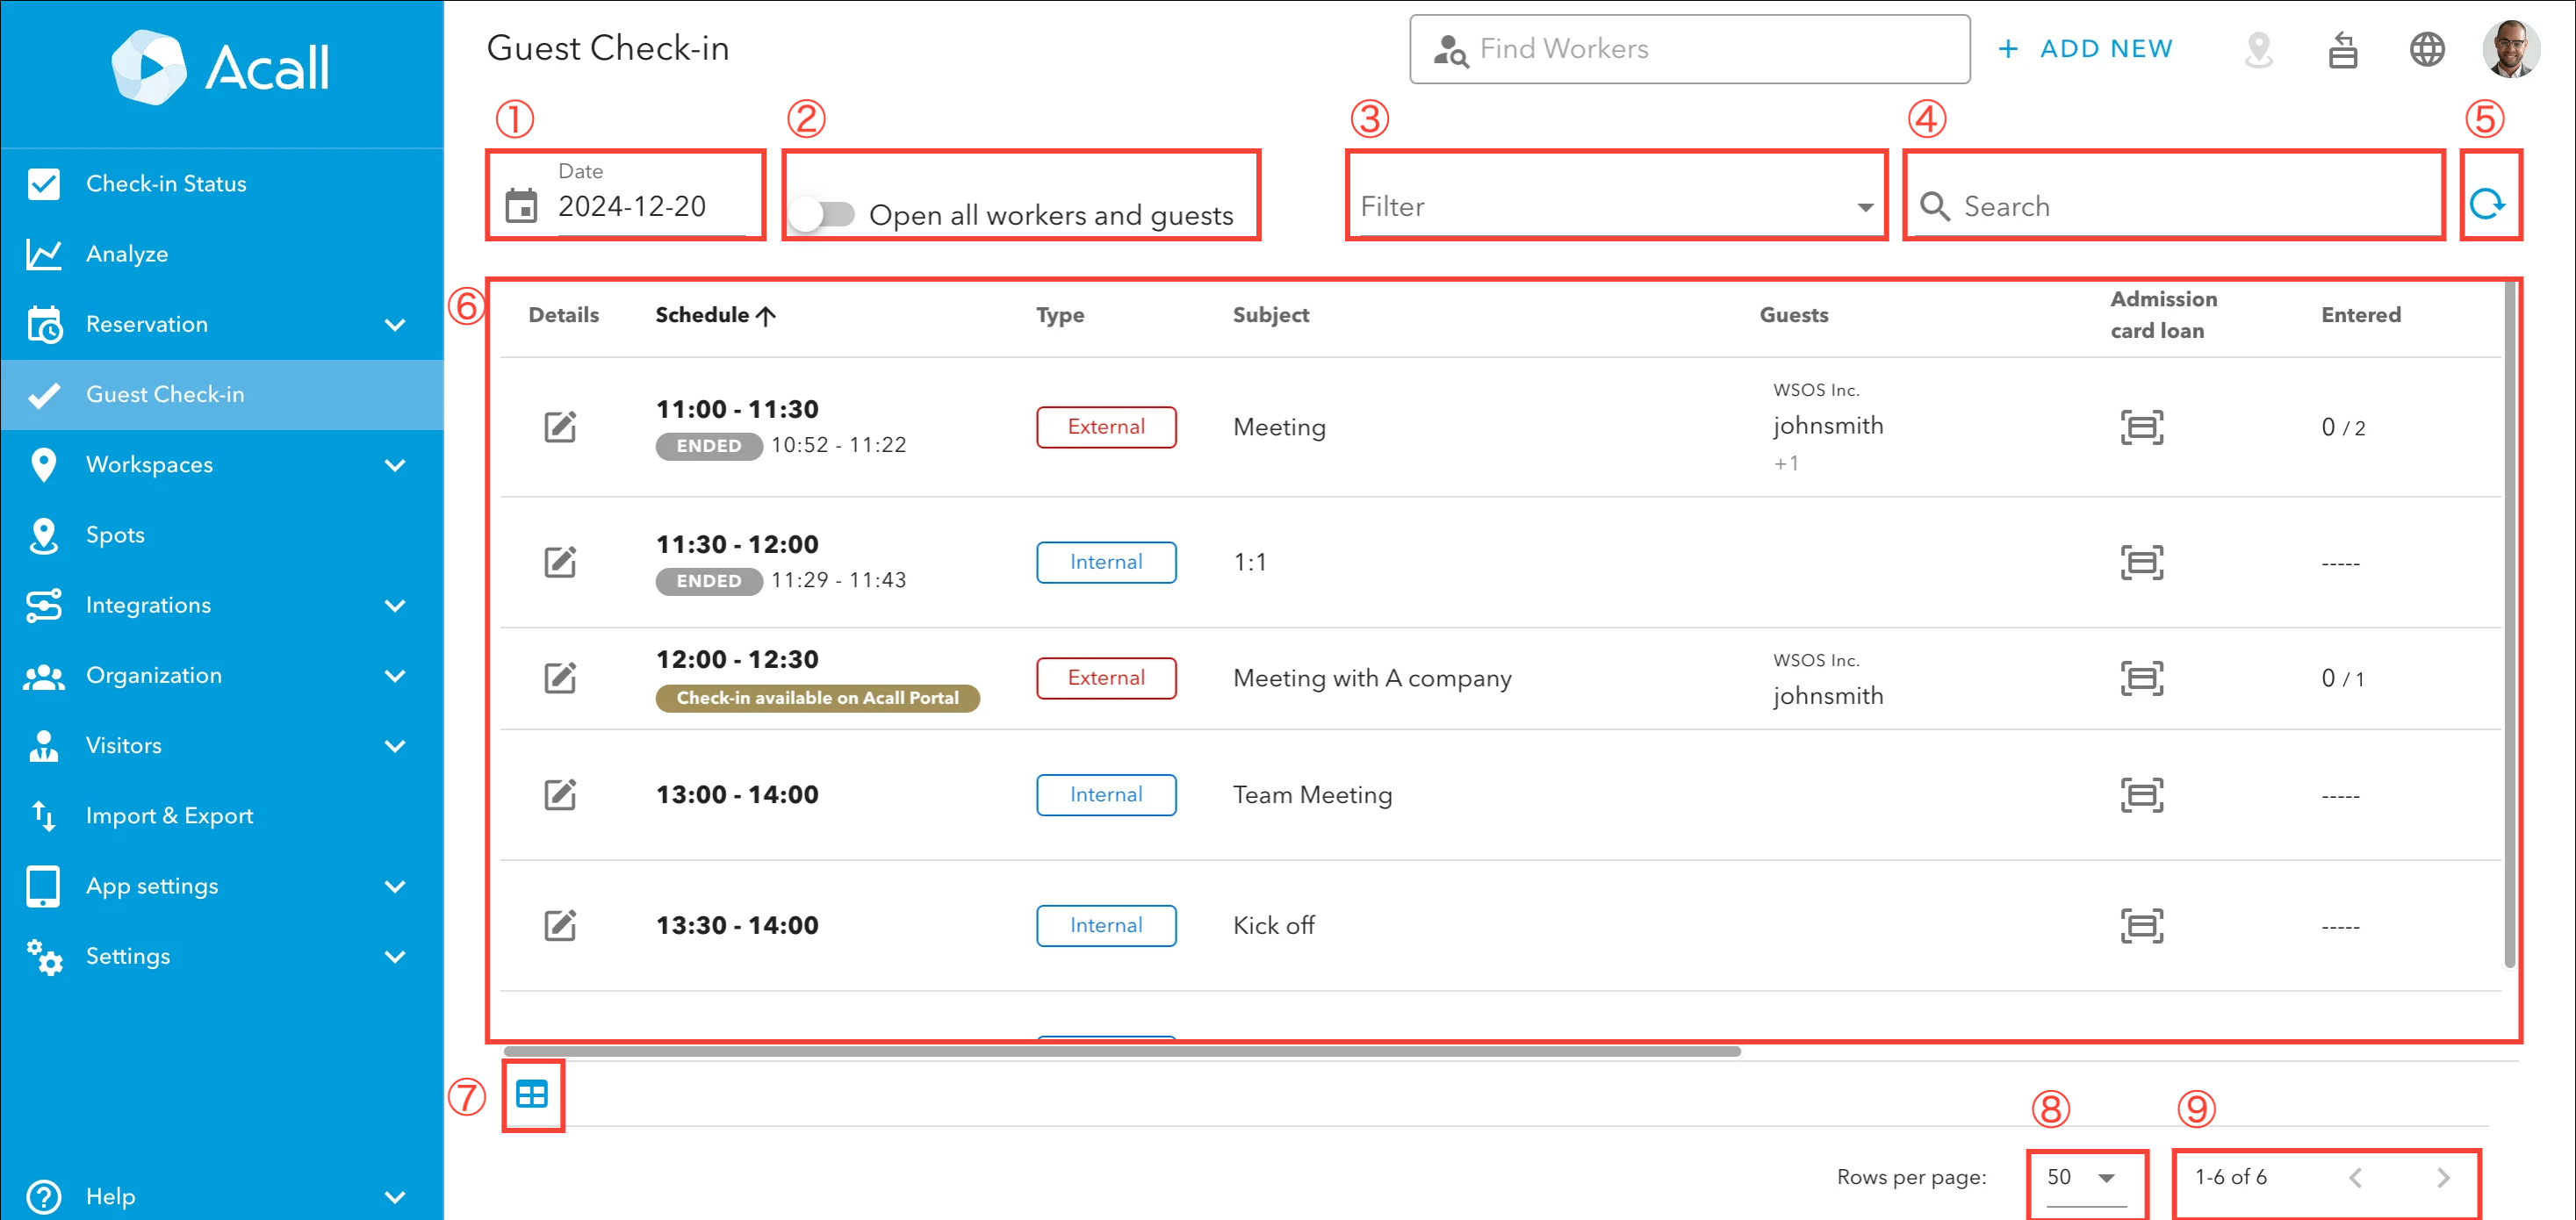
| Item | Description |
| ① |
Filter reservations by date. |
| ② |
Switch the display of guests/persons in charge ON: Display all the guests and persons in charge. ※ON/OFF is retained even if the screen is refreshed. |
| ③ |
Filter by data type (Internal/External/Cancelled/No appointment/invitation pass/Only mine). ※Filter is retained even if the screen is refreshed. |
| ④ |
Filter the list of data by any keyword for the following items. Title, guest's company name, guest name, guest email address, meeting room/equipment, name of the person in charge |
| ⑤ |
Reload to display the latest data. |
| ⑥ | Results of narrowing down the conditions. |
| ⑦ |
Select whether to show or hide the items (columns) on the list and rearrange. Reloading the screen will reset this settings. |
| ⑧ |
Set the maximum number of rows on a single page. |
| ⑨ |
The number of data. |
Items for guest check-in
| Item | Description |
|
Date of Creation ※1 |
Internal/External: Date/time of the appoint creation.
No appointment: Date/time of when the guest called on Acall Reception.
|
|
Schedule ※1 |
Internal/External: Start and end time of the appointment.
No appointment: No data is displayed.
If it is a repeat appointment, repeating icon is displayed.
 For workspaces where the "Check-in/out Method" is set, if a reservation is during an ongoing meeting (i.e., the meeting has started), "STARTED" will be displayed under the scheduled time.
Reservations that can be checked in from Acall Portal will display the following label.
|
|
Type (Internal/External) ※1 |
The type of the data.
Internal meeting External meeting
Automatically cancelled internal/external meeting which is held in a workspace connected to Acall Meeting.
Visitor with invitation pass or visitors without an appointment using Acall Reception.
Visitor used Acall Reception with invitation pass
|
|
Subject ※1 |
Internal/external: Title of the appointment. |
| Guests |
Internal/External: Guests registered for the appointment. If there are multiple guests, [number of other guests] / [close] will be displayed and click to expand / collapse. |
|
Admission card loan ※2 |
Register entrance card information. |
|
Entered ※1 |
The number of registered guests and the number of guests who actually entered. |
|
Left ※1 |
The number of registered guests and the number of guests who actually exited. |
| Staff |
Internal/External: Workers in charge of the appointment. Name of the staff and email address will be displayed by clicking the icon. |
| Approved by | Worker who first answered visitor notifications. |
| Facilities |
Internal/External: Meeting room or equipment selected when creating the appointment. |
| Edit(Pencil icon) |
Open edit screen. |
NOTE
※1 You can sort by clicking each item name.
※2 Items are displayed when you have option settings or contracts.
Check-in/out, extend reservation
Click the [Details] icon of the reservation, and in the [STATUS] tab, you can check in/check out or extend the reservation.
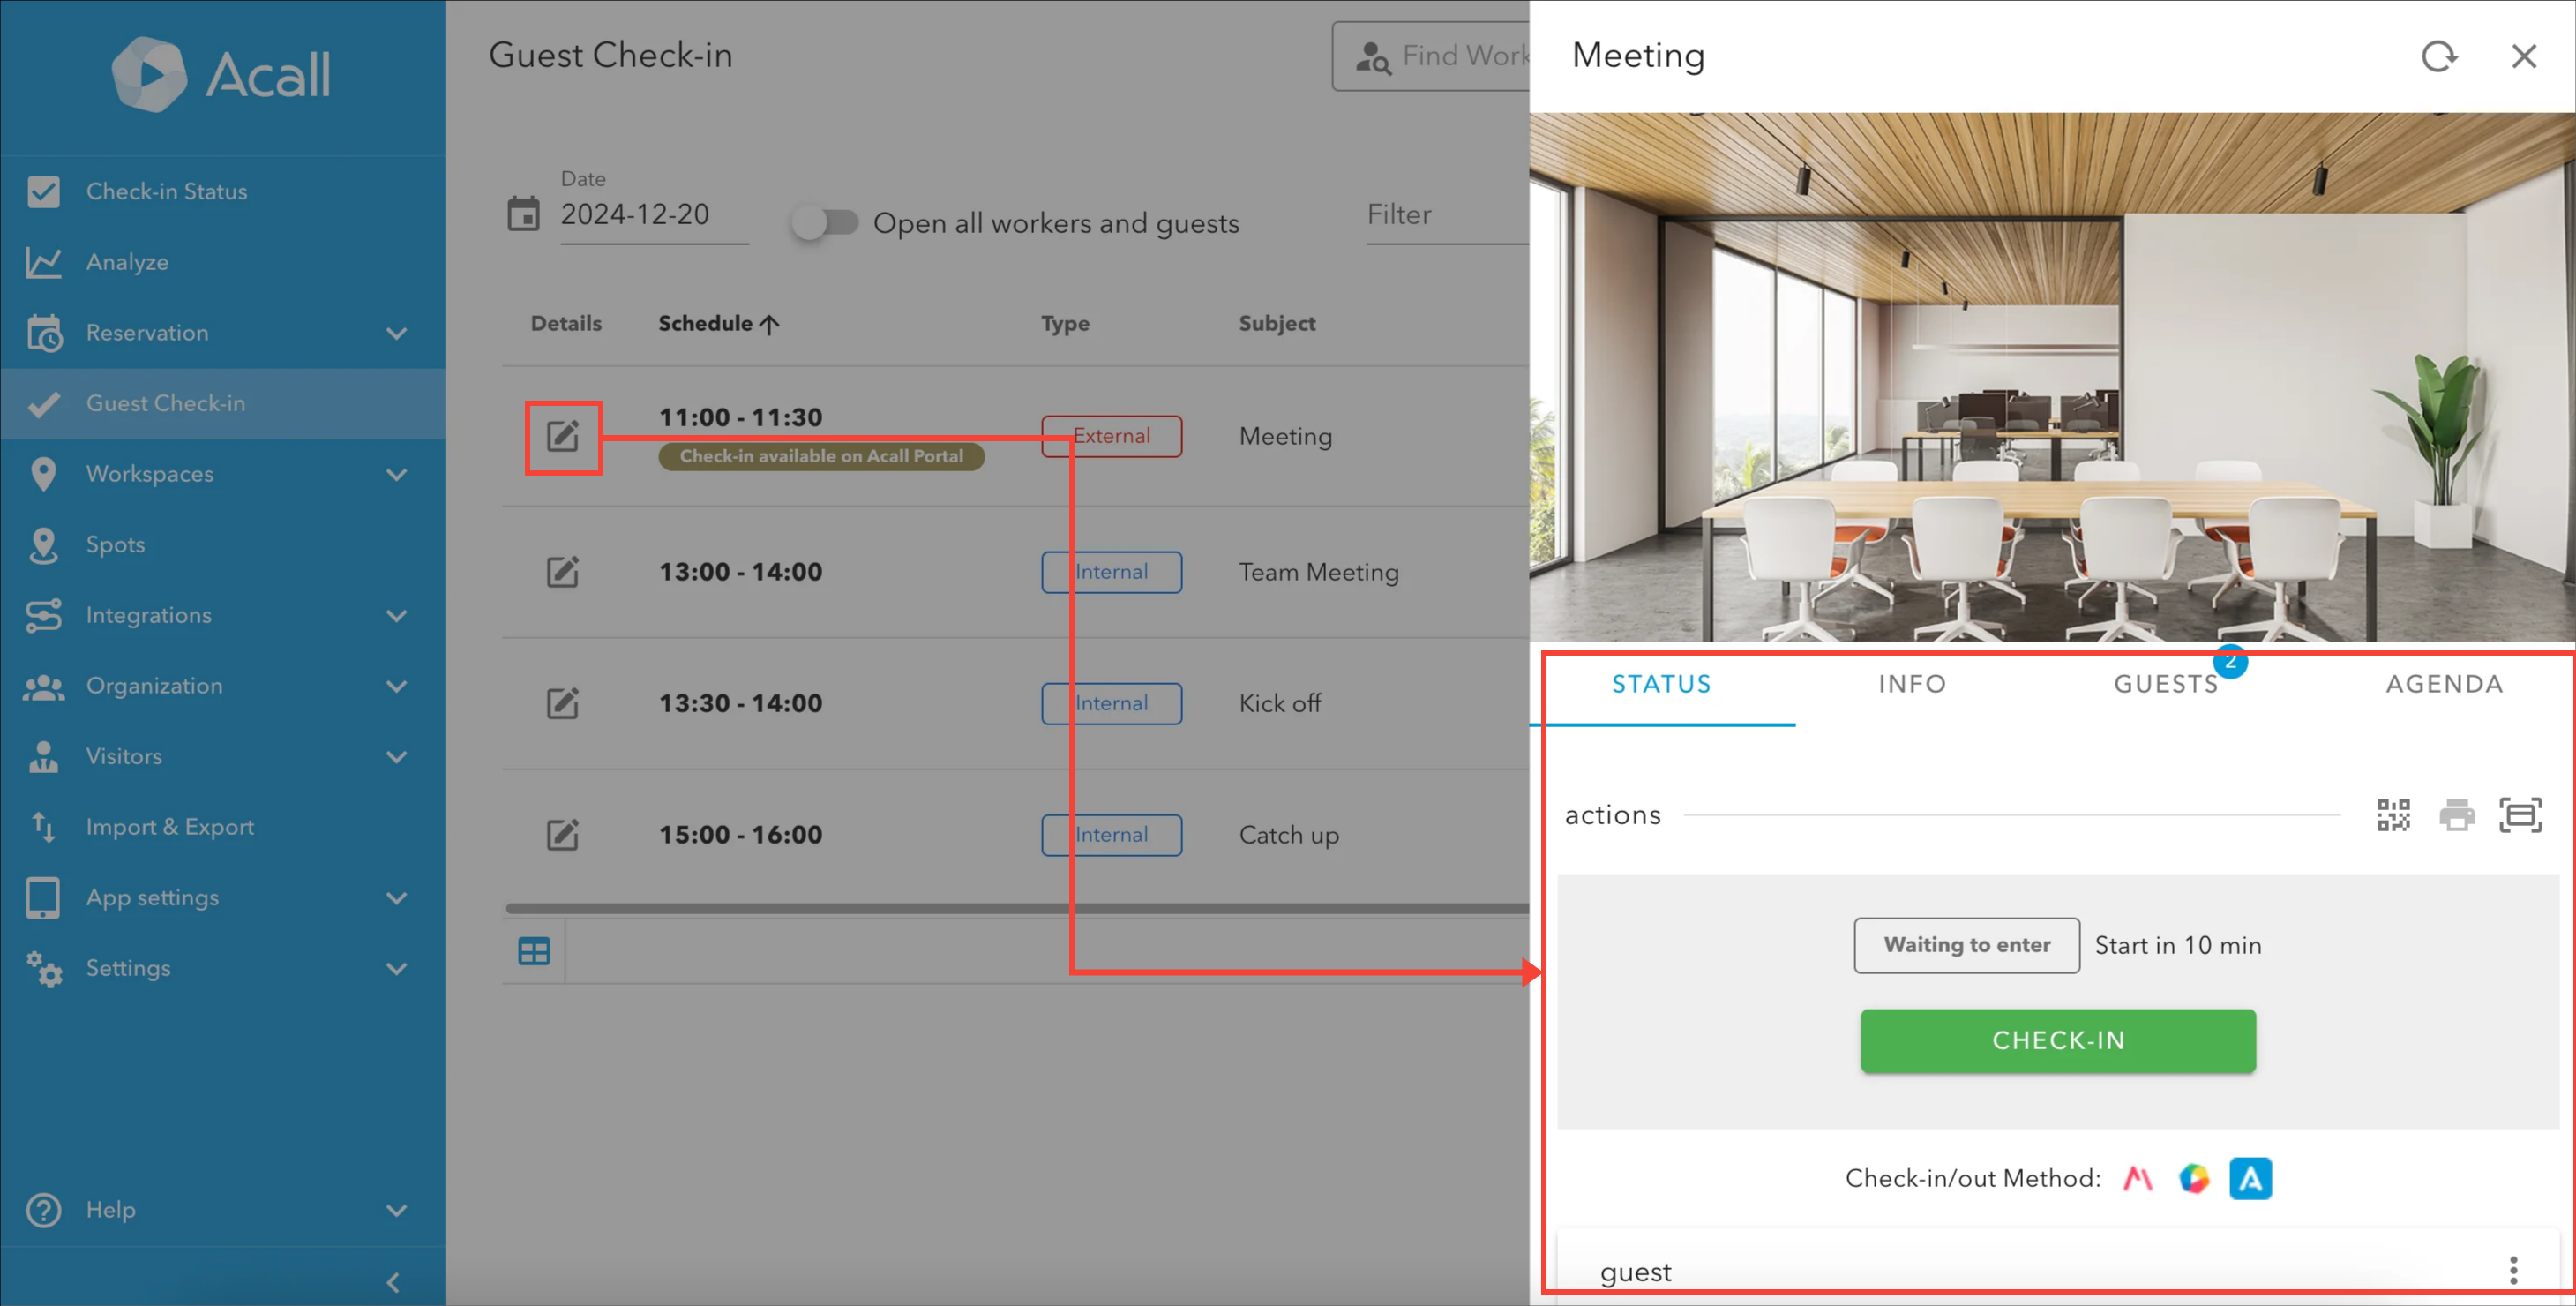
💡 Note
Please refer to "Check-in/check-out and Extend a Workspace Reservation from Acall Portal" for more details.
Edit appointments (external/internal)
NOTE
・You can edit external/internal appointments.
・Only appointments creator can edit.
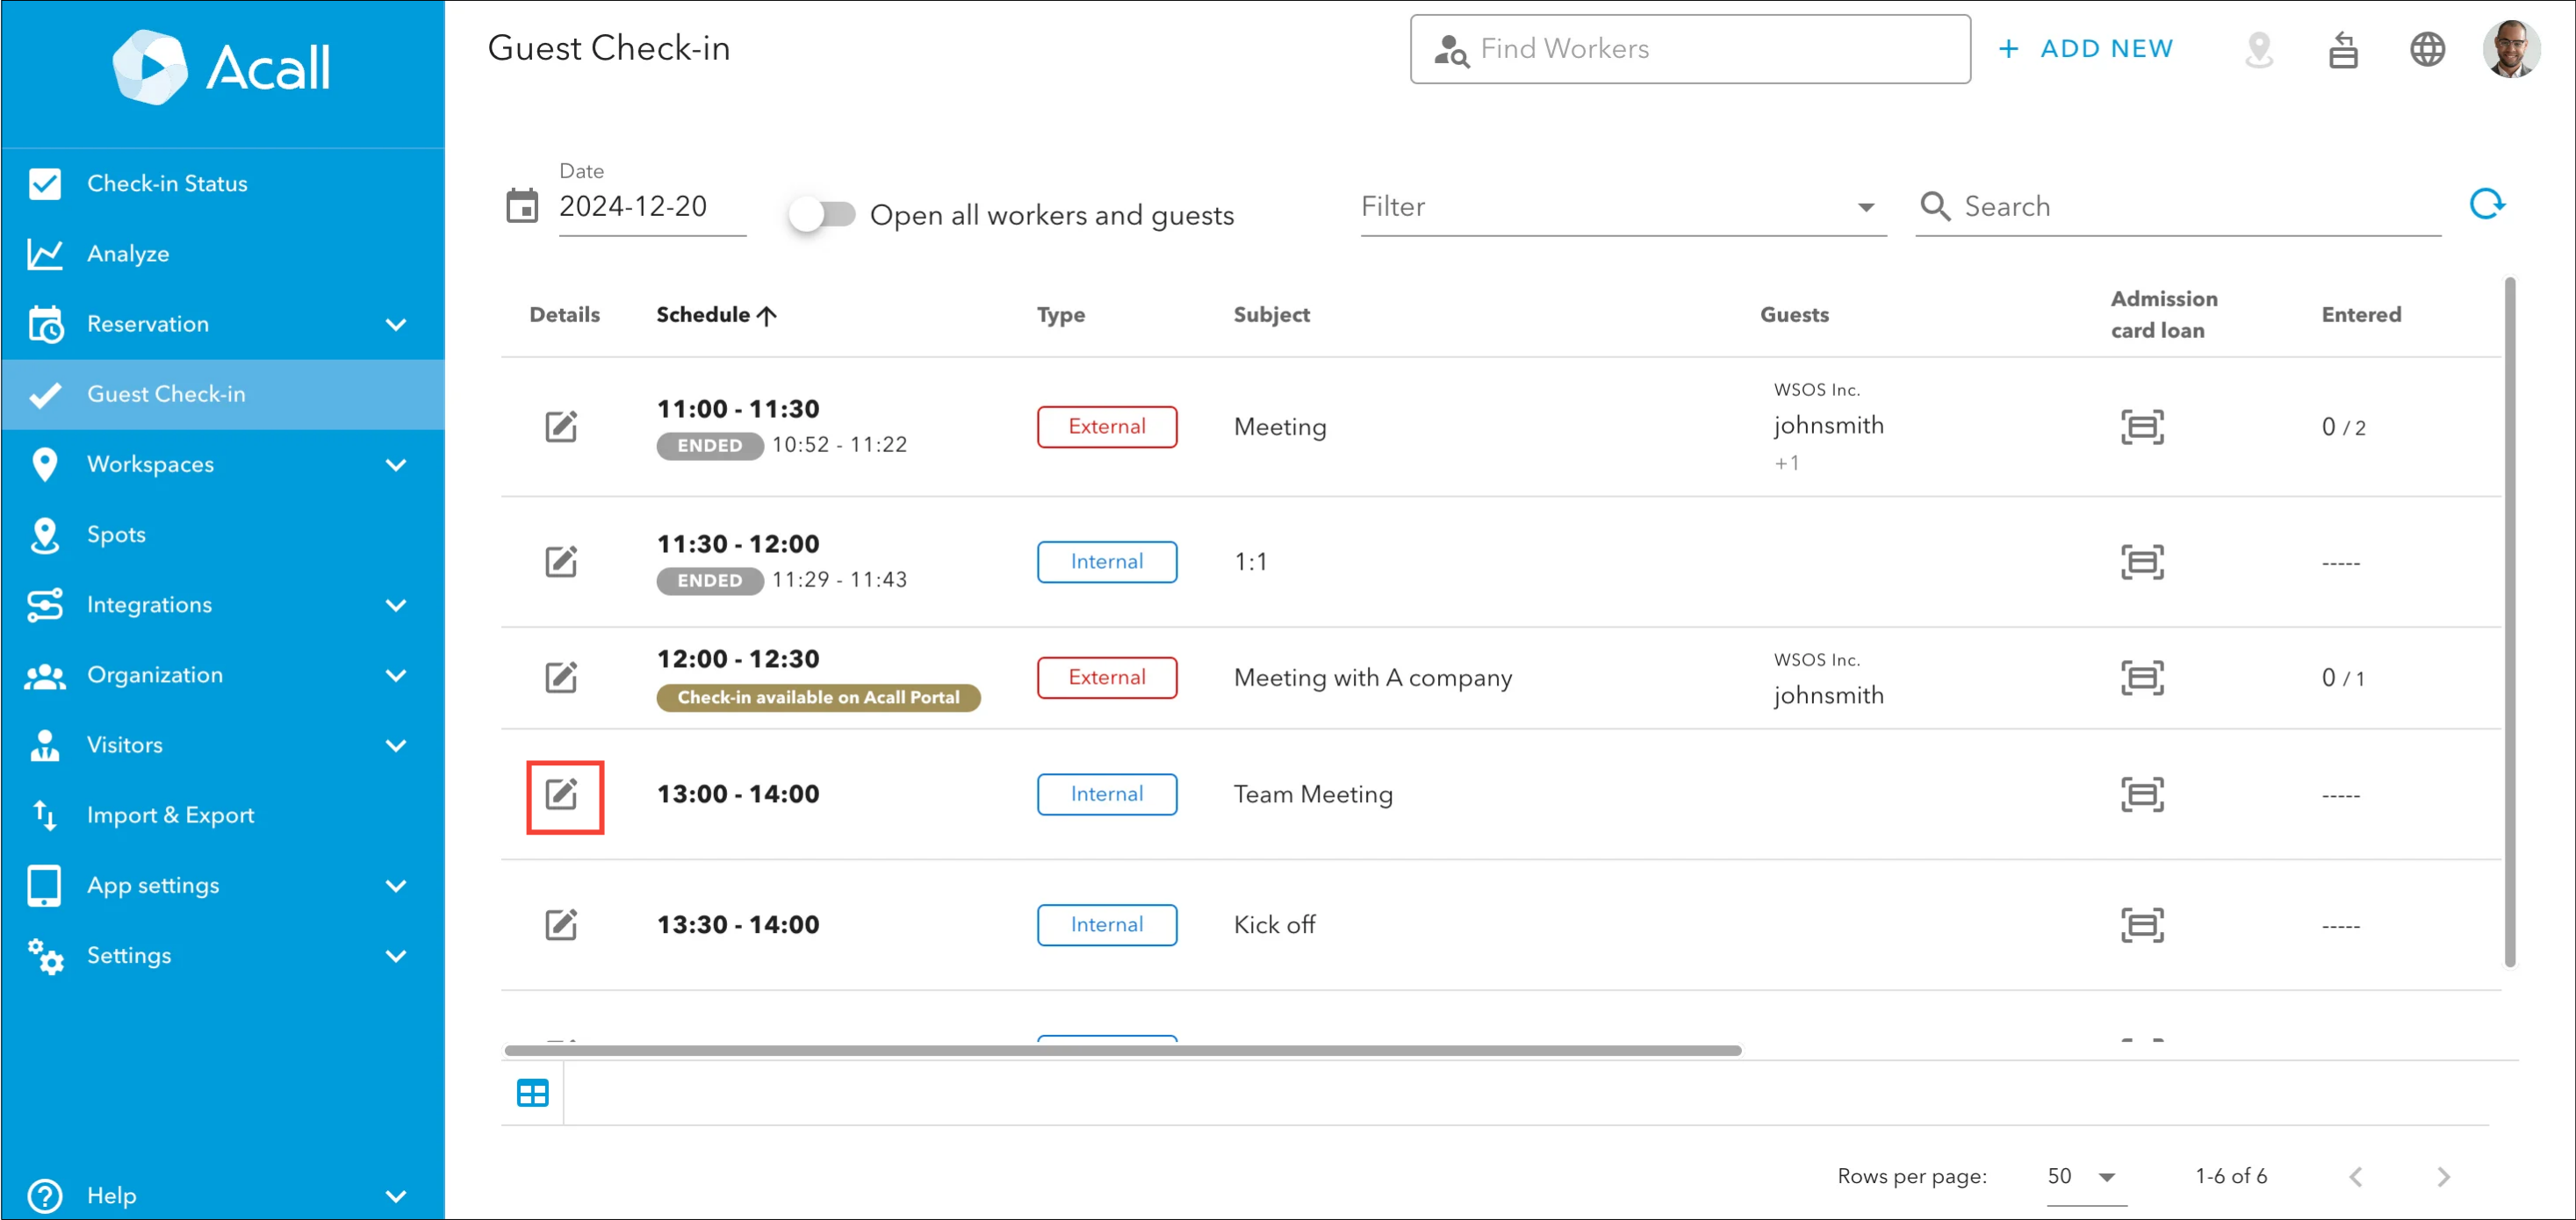
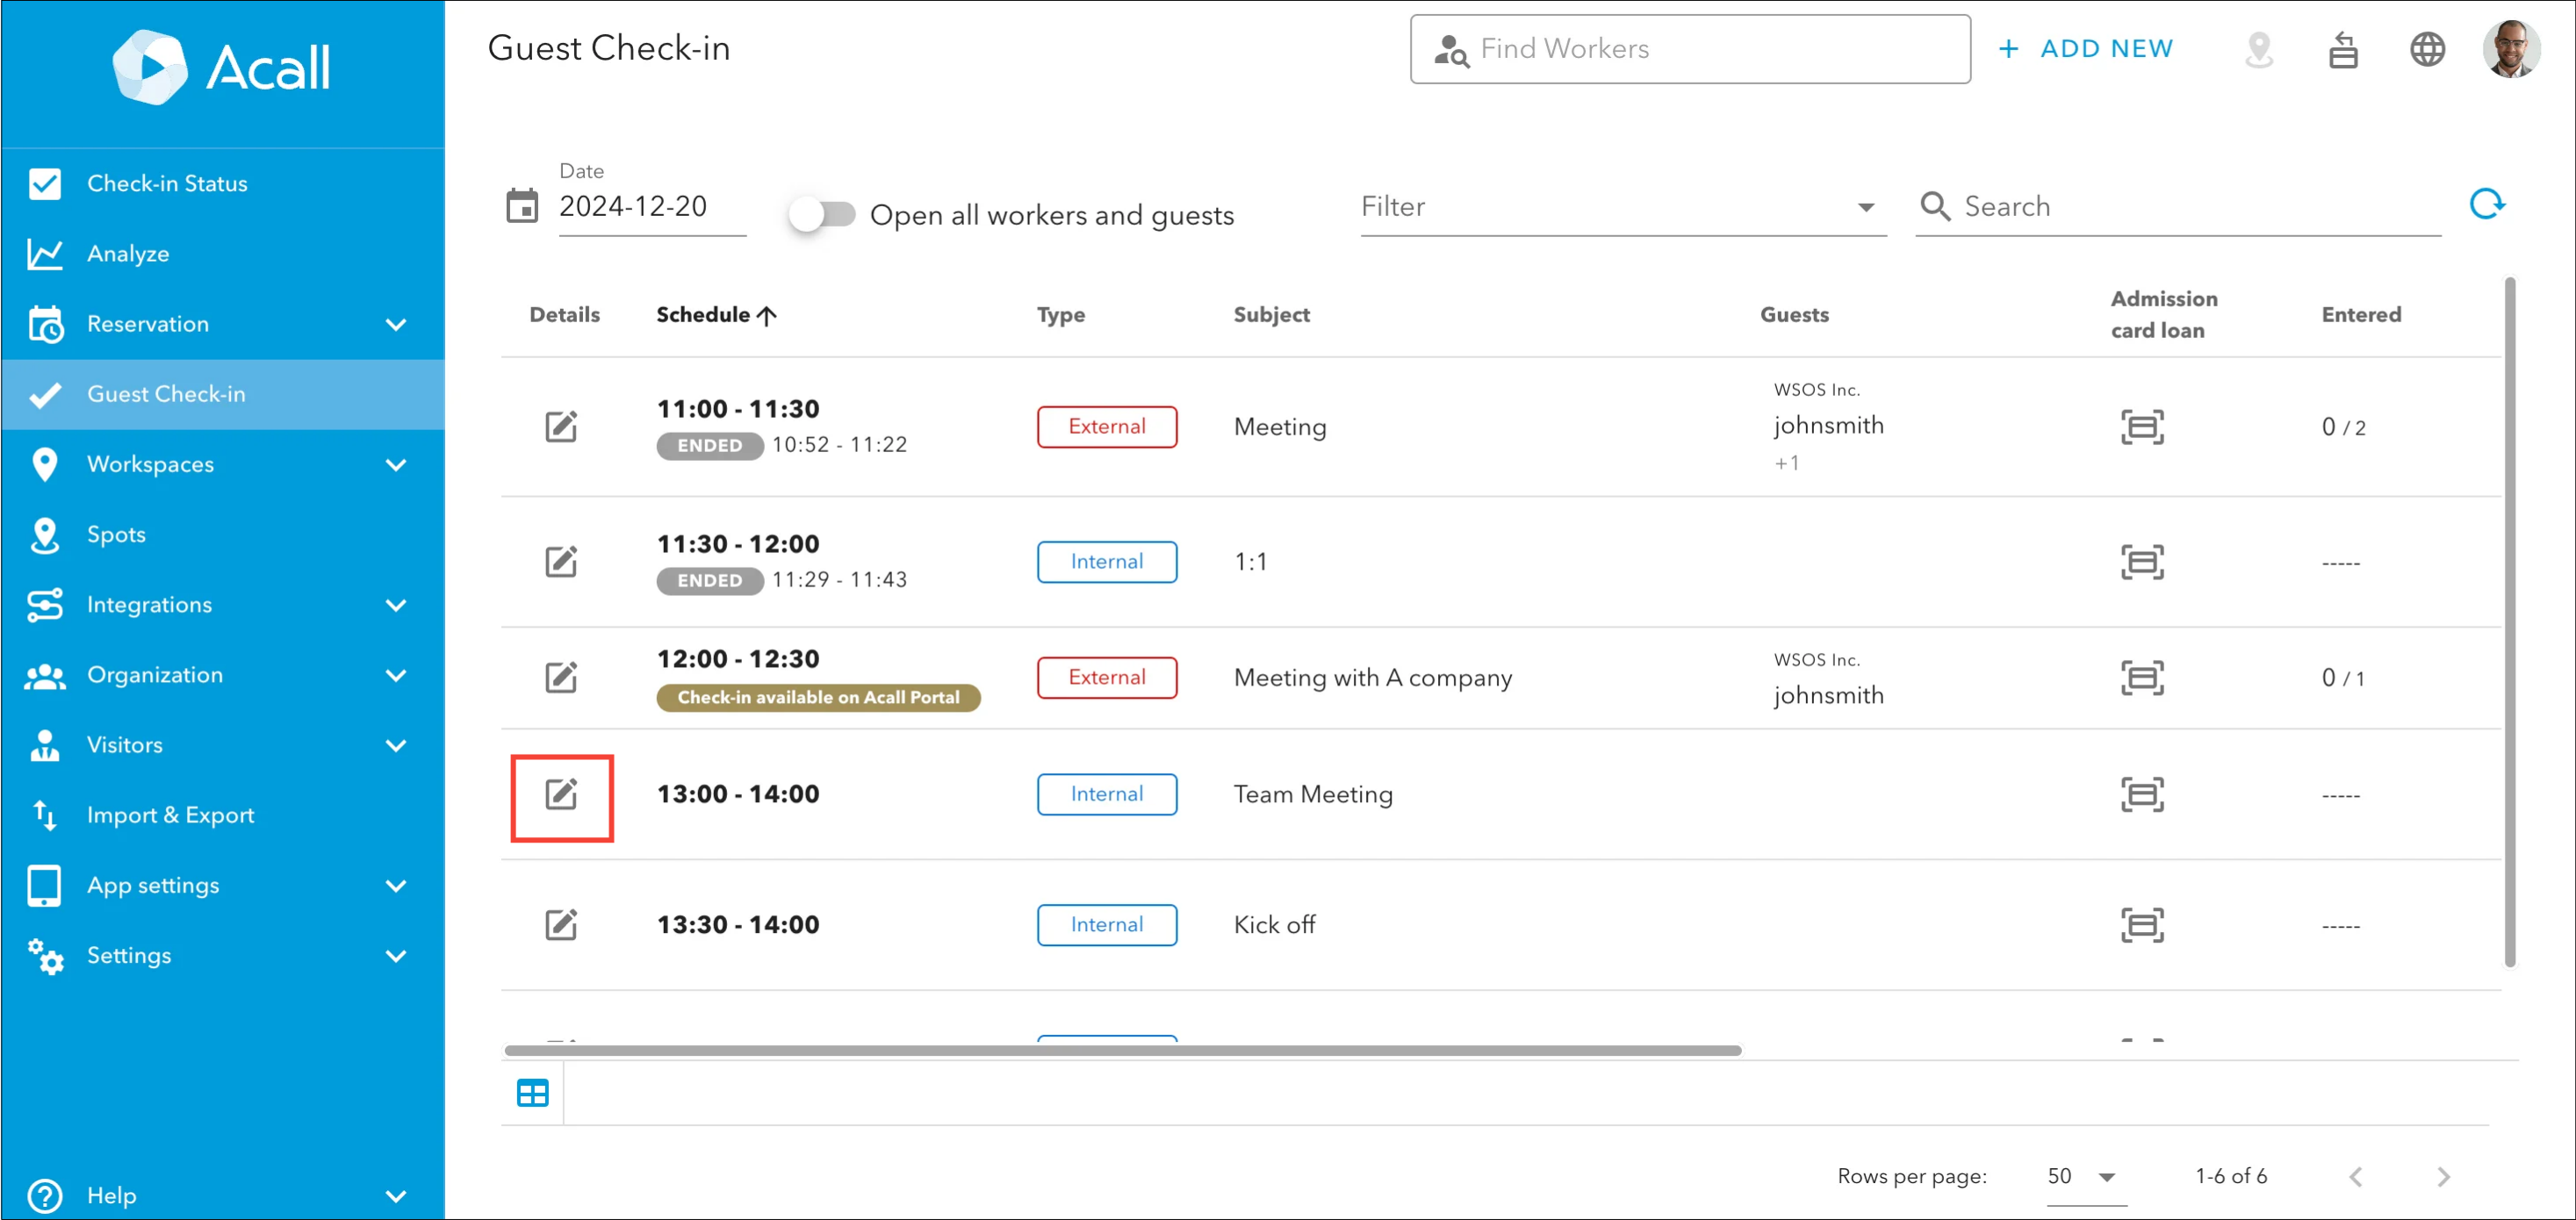
Click [Details] icon of the appointment you want to edit.
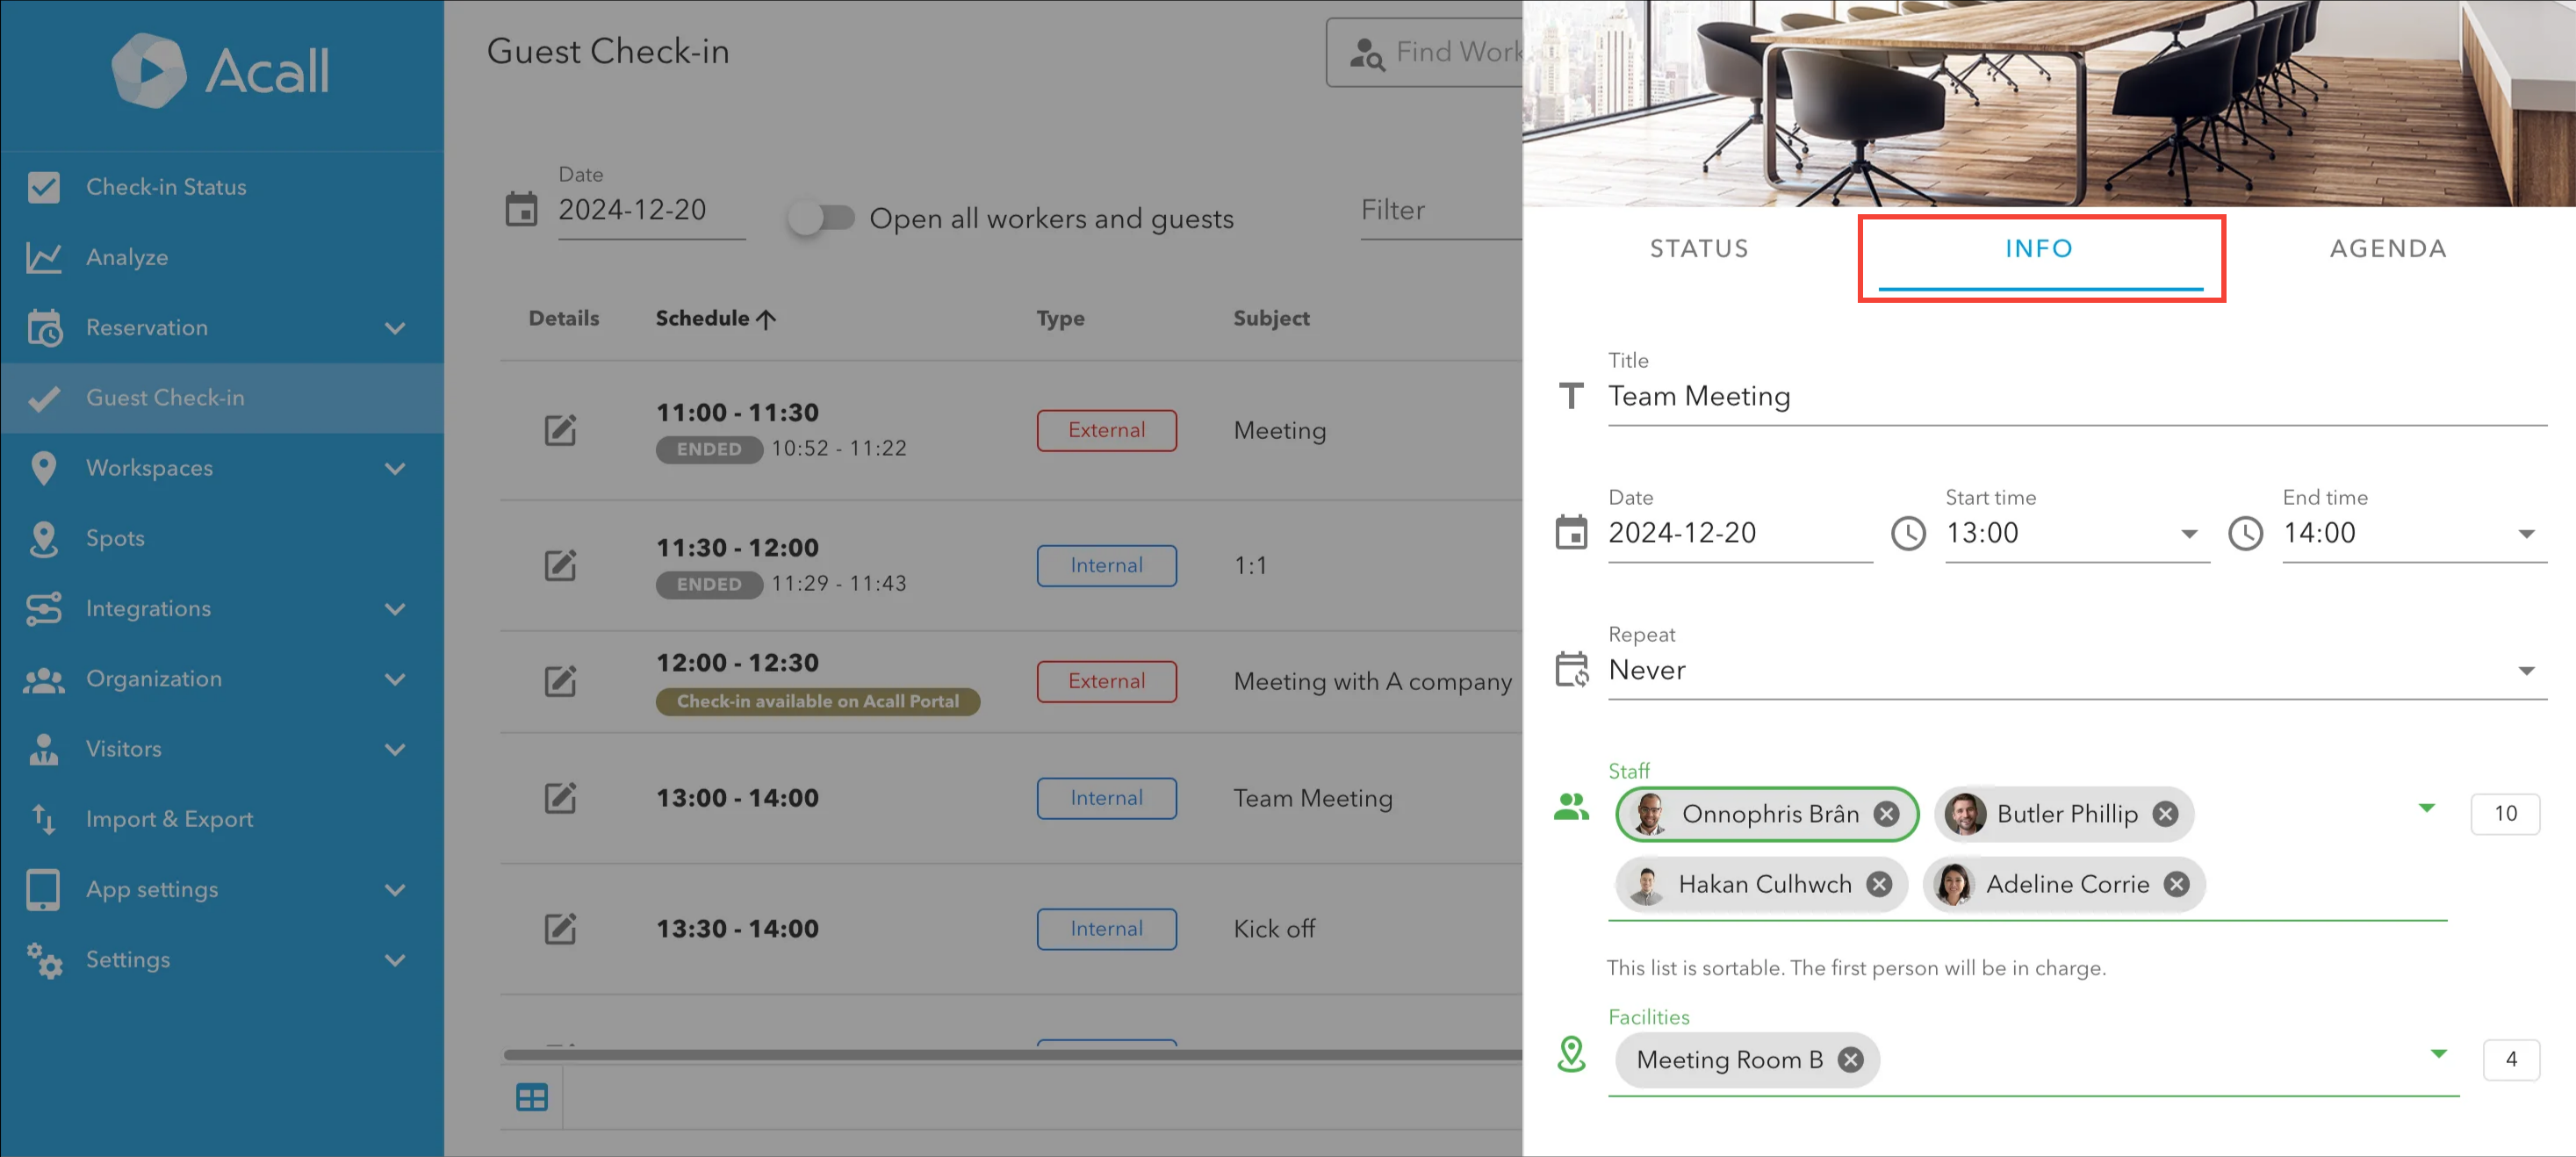
Edit the information in the. [INFO] tab.
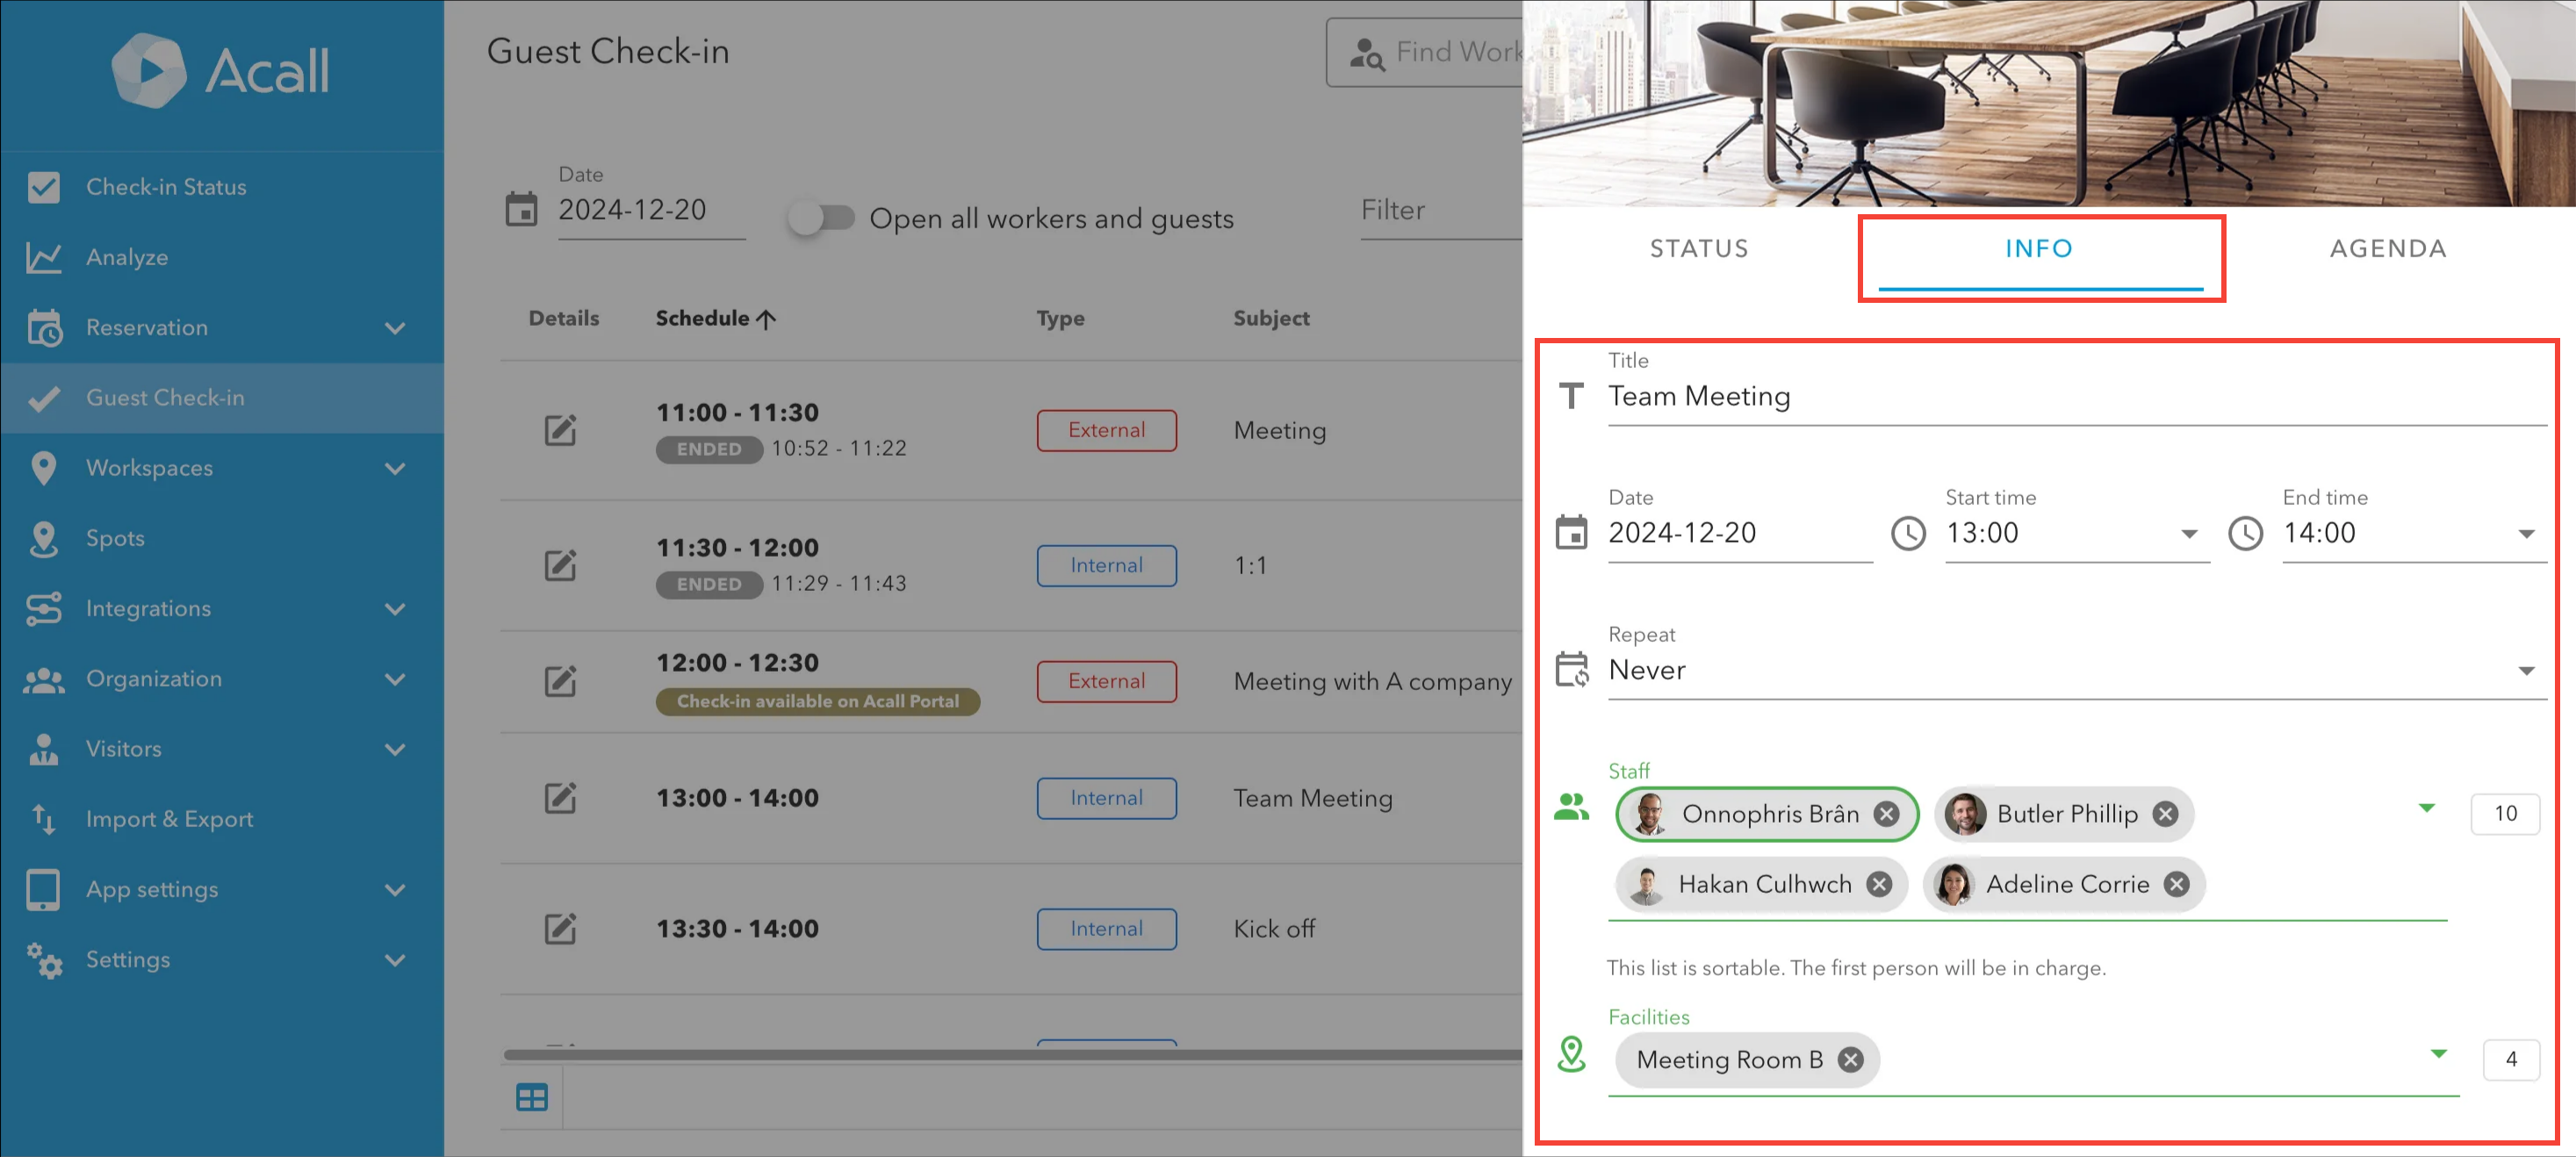
Click [UPDATE].
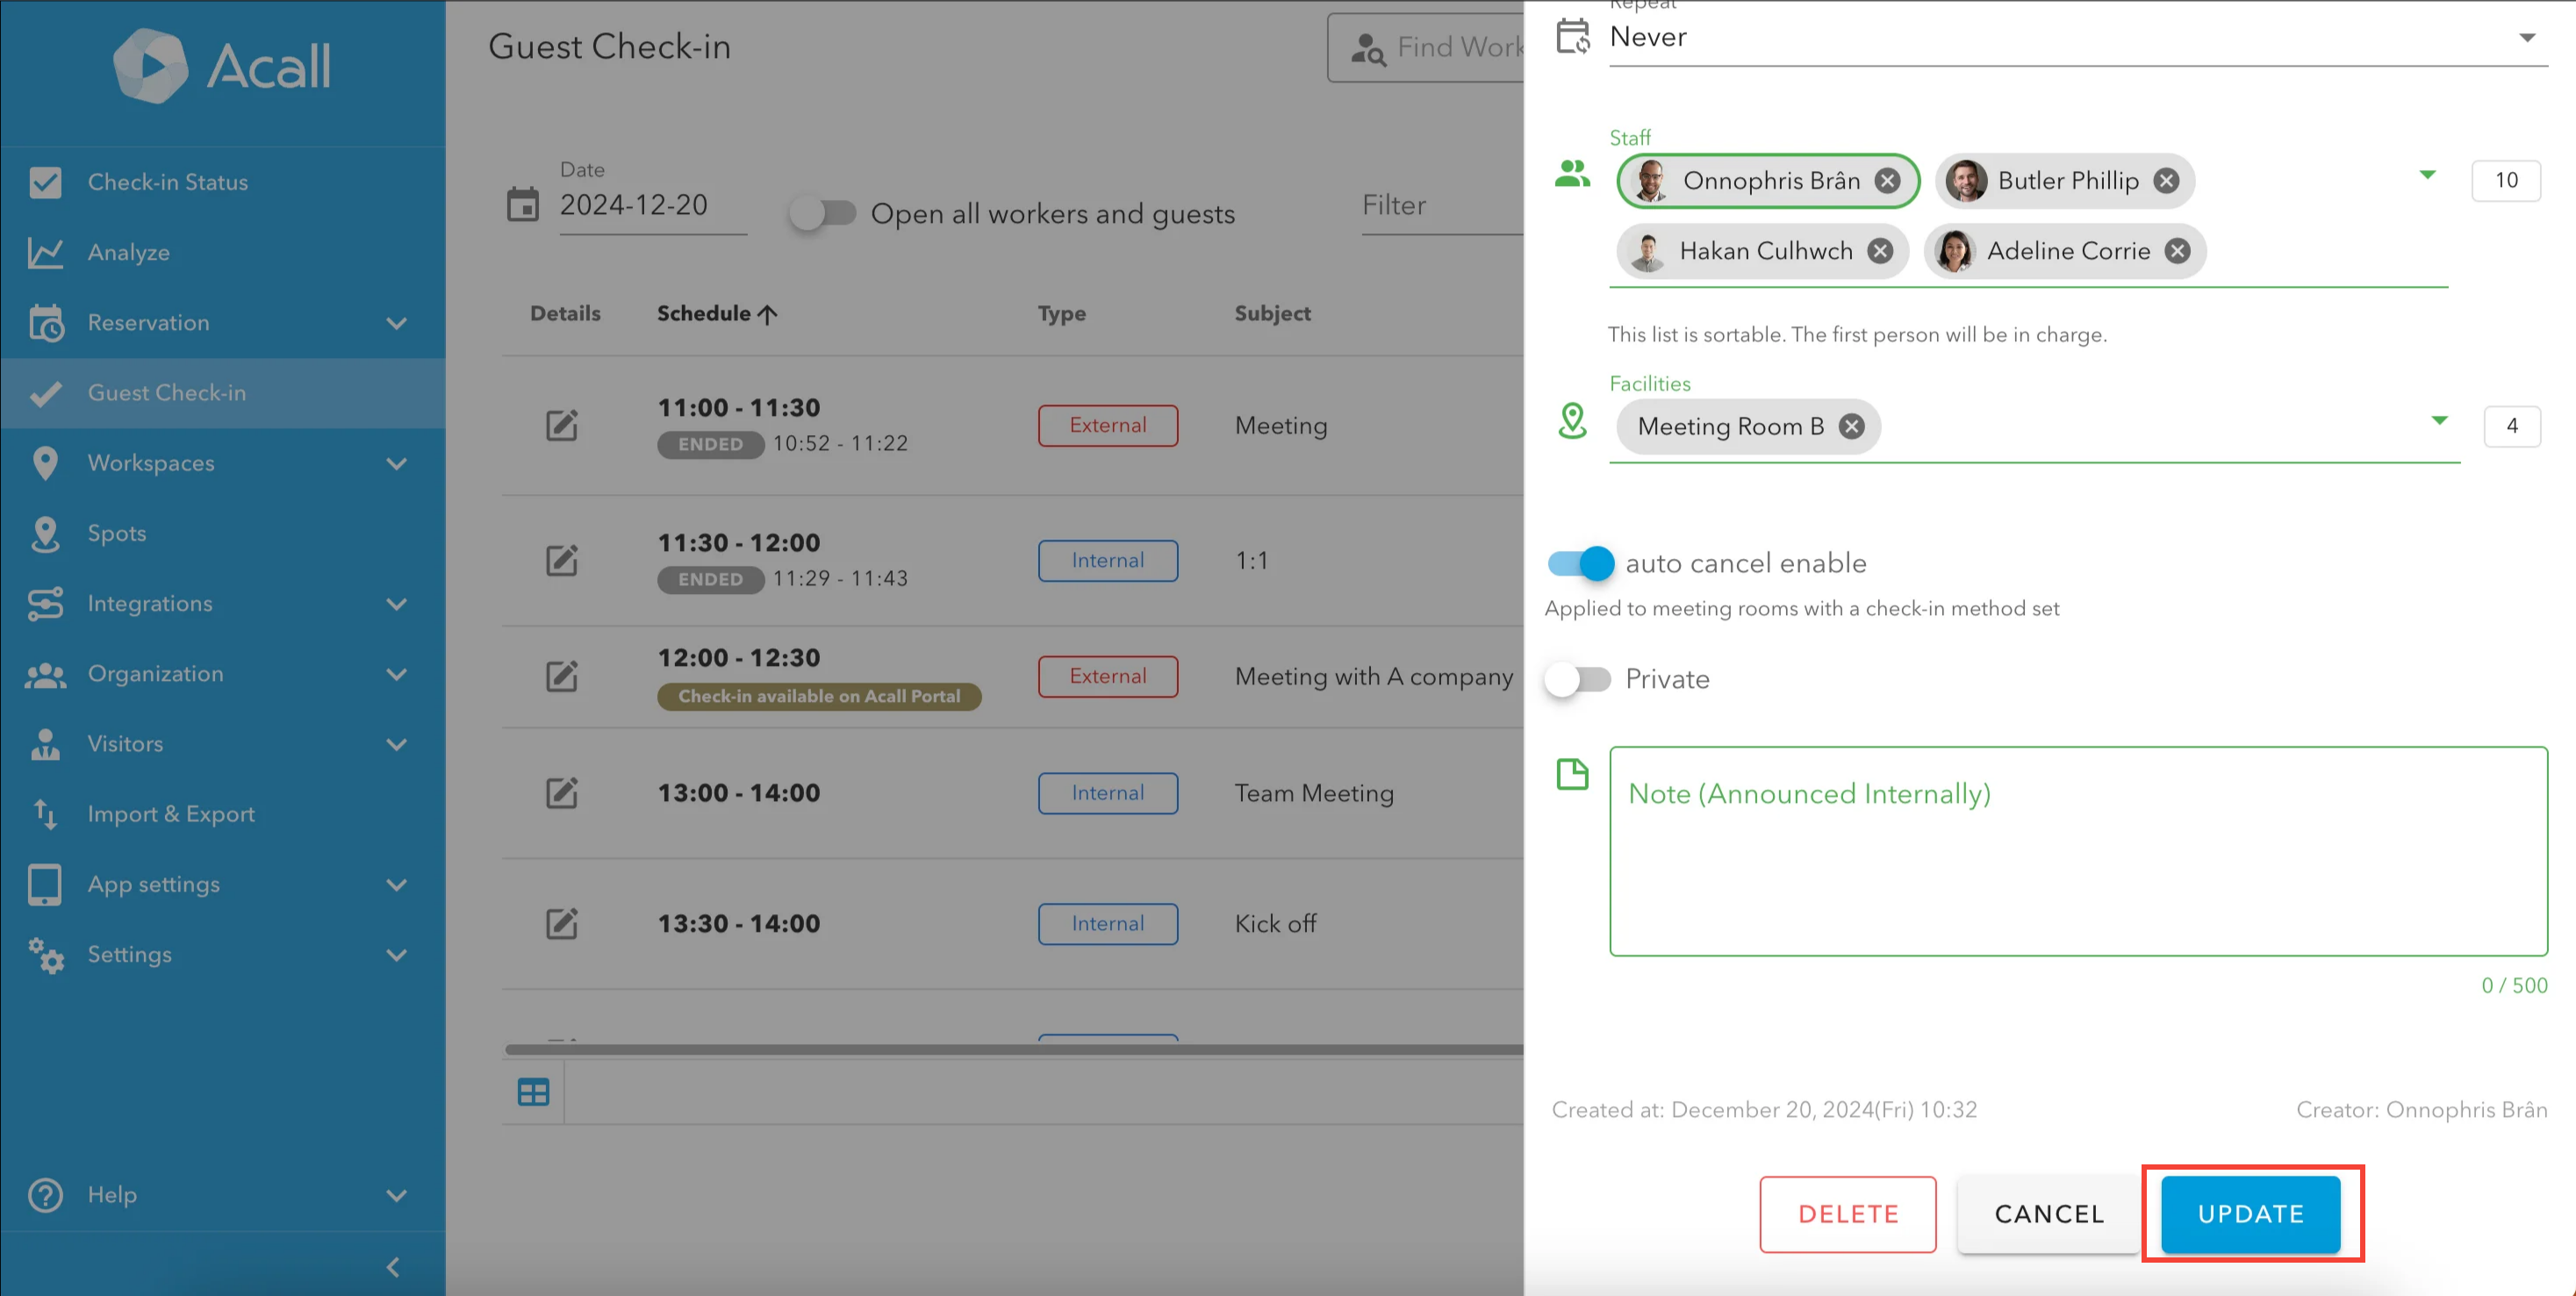
NOTE
・Please refer to [Create Reservation on Acall Portal] for input information on reservations.
Delete appointments (external/internal)
NOTE
・You can delete external and internal appointments.
・Only appointments creator can delete.
・You cannot delete past appointments.
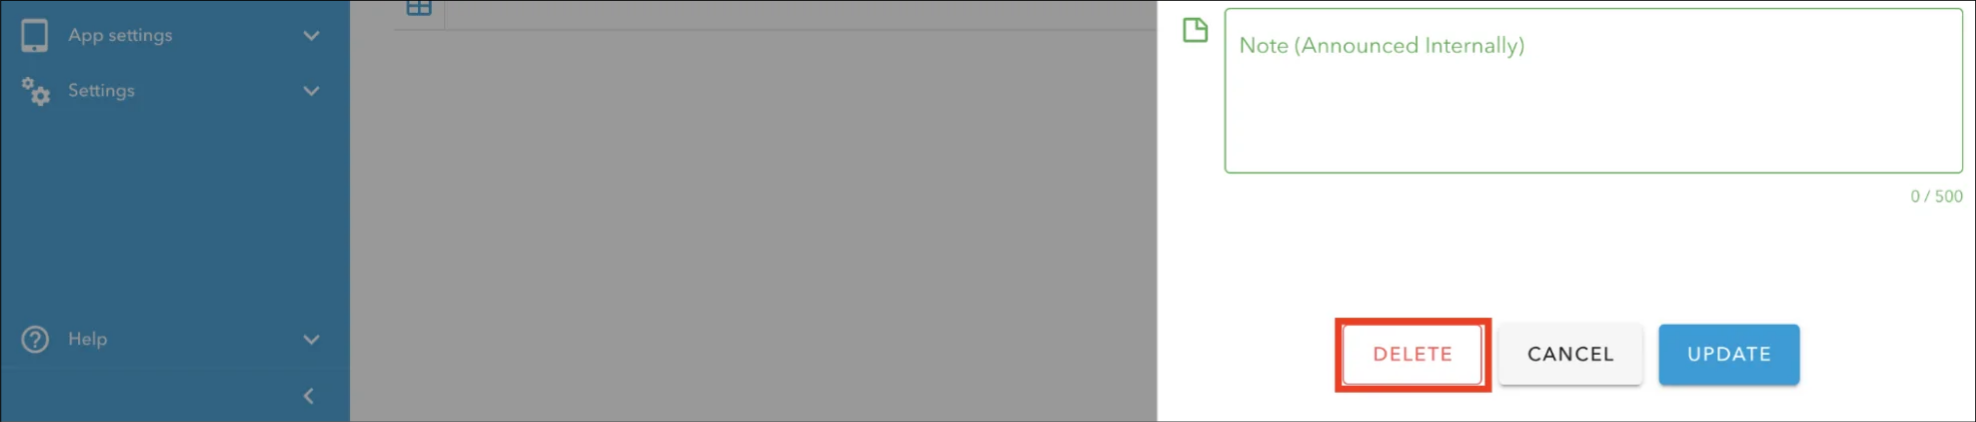
Click [Details] icon of the appointment you want to delete.
Open [INFO] tab.
Click [DELETE] and [OK].
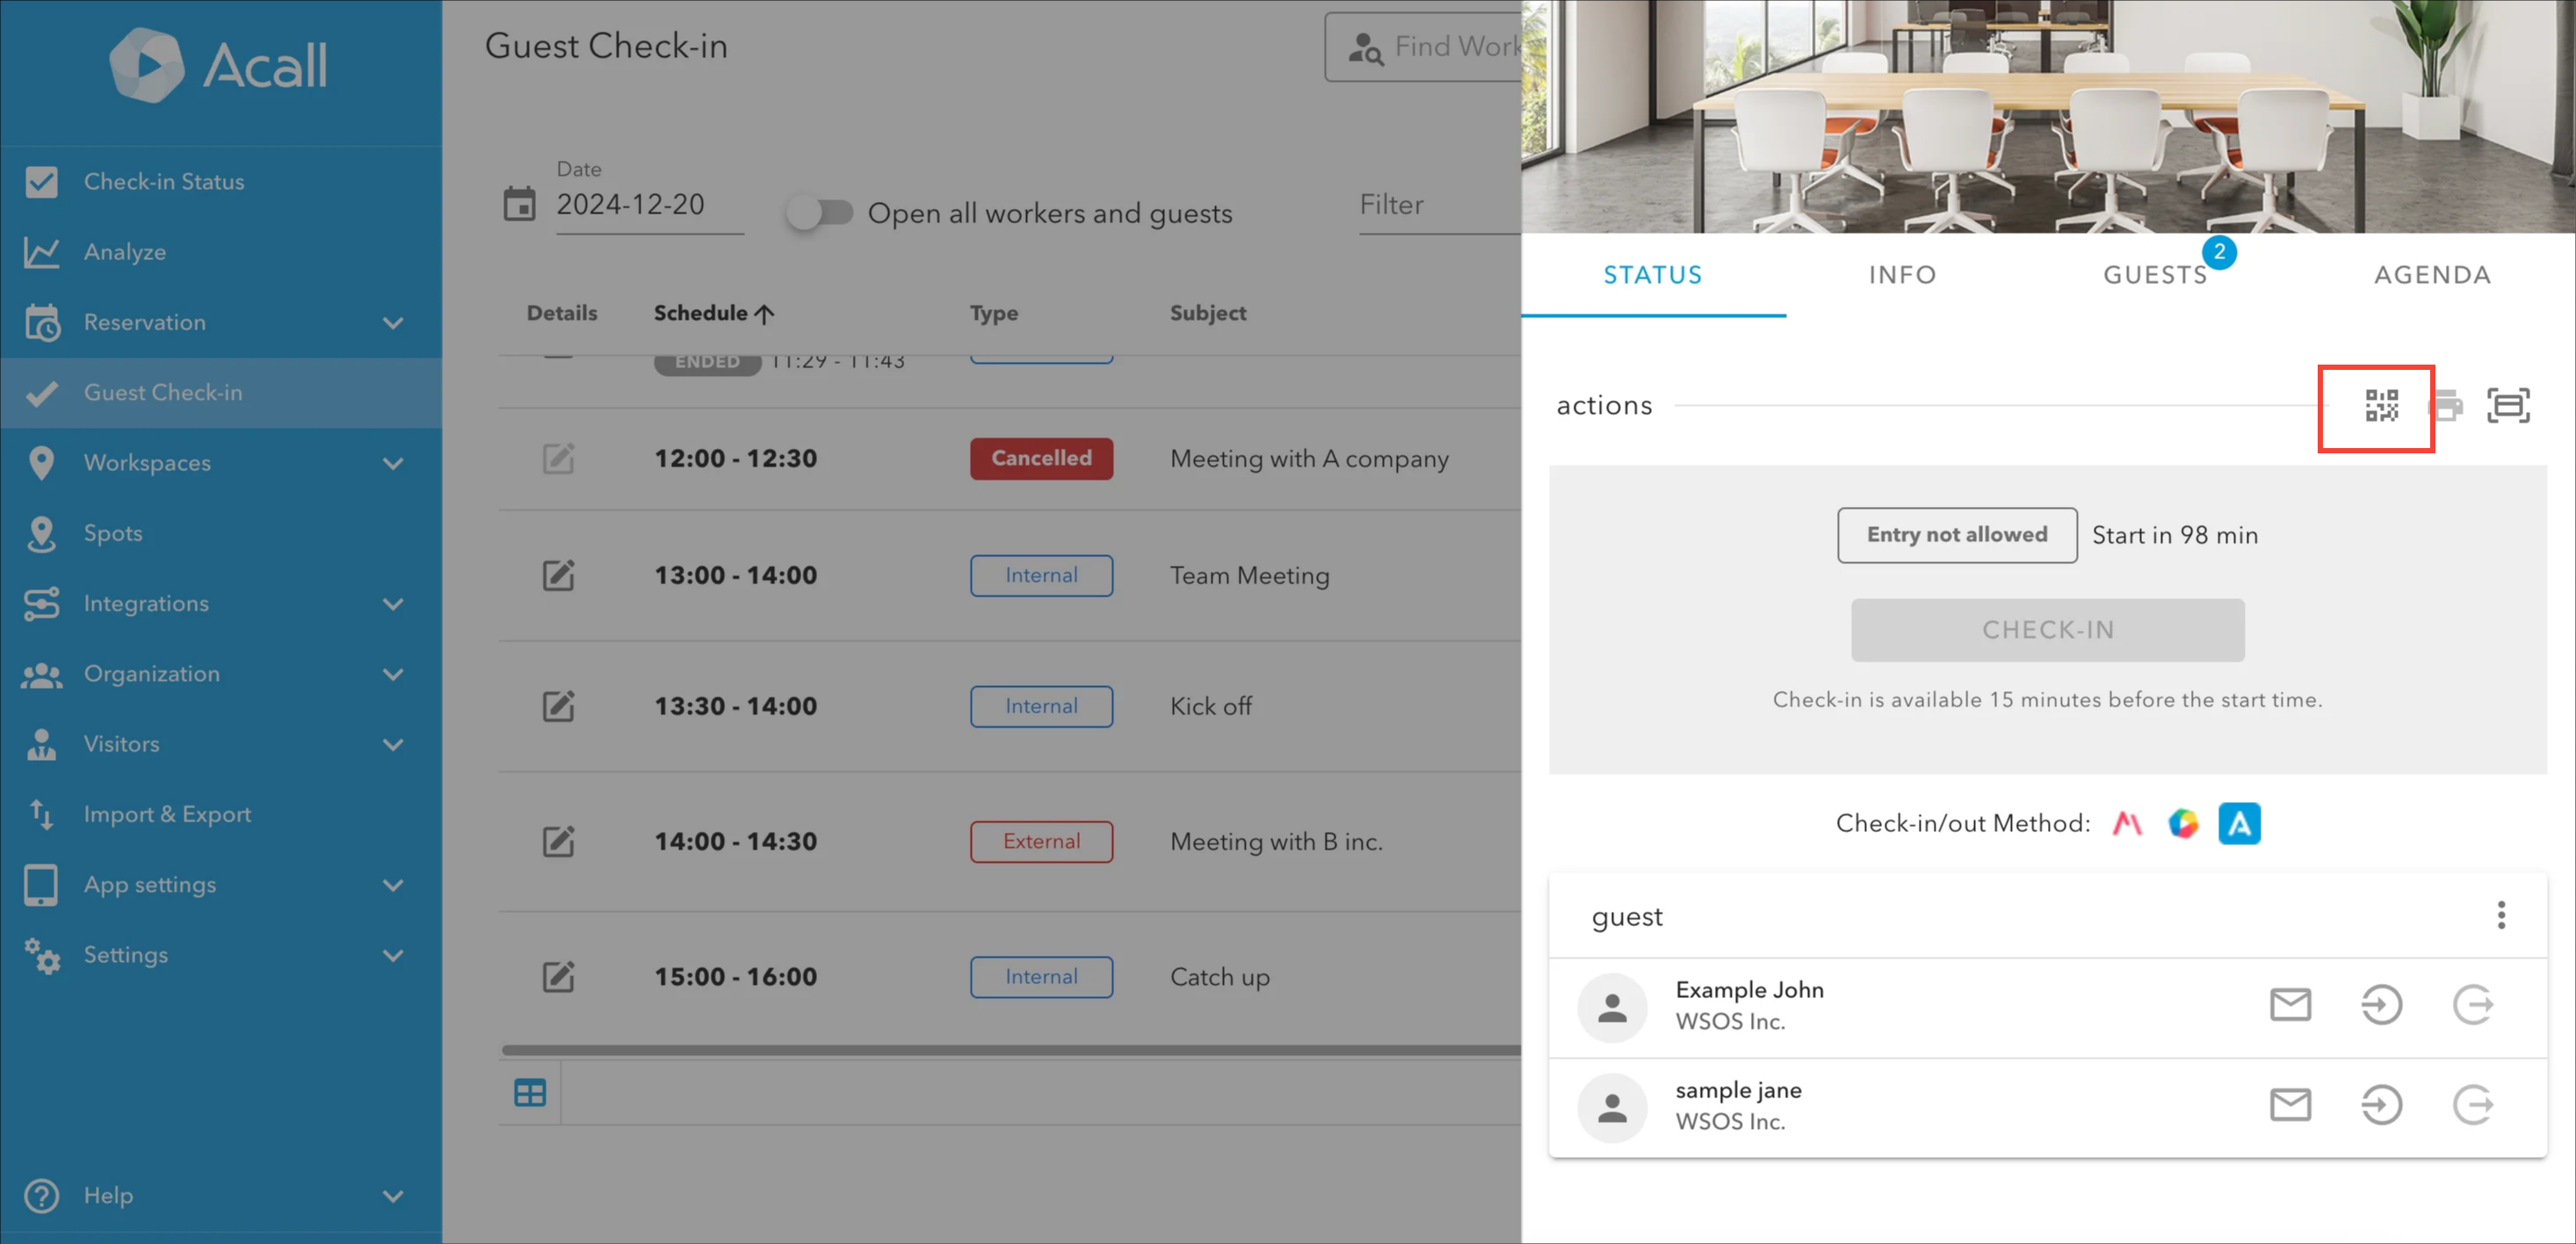
Send appointment code to the guest
NOTE
・For external appointments only.
Click [Details] icon of the appointment you want to send appoint code.
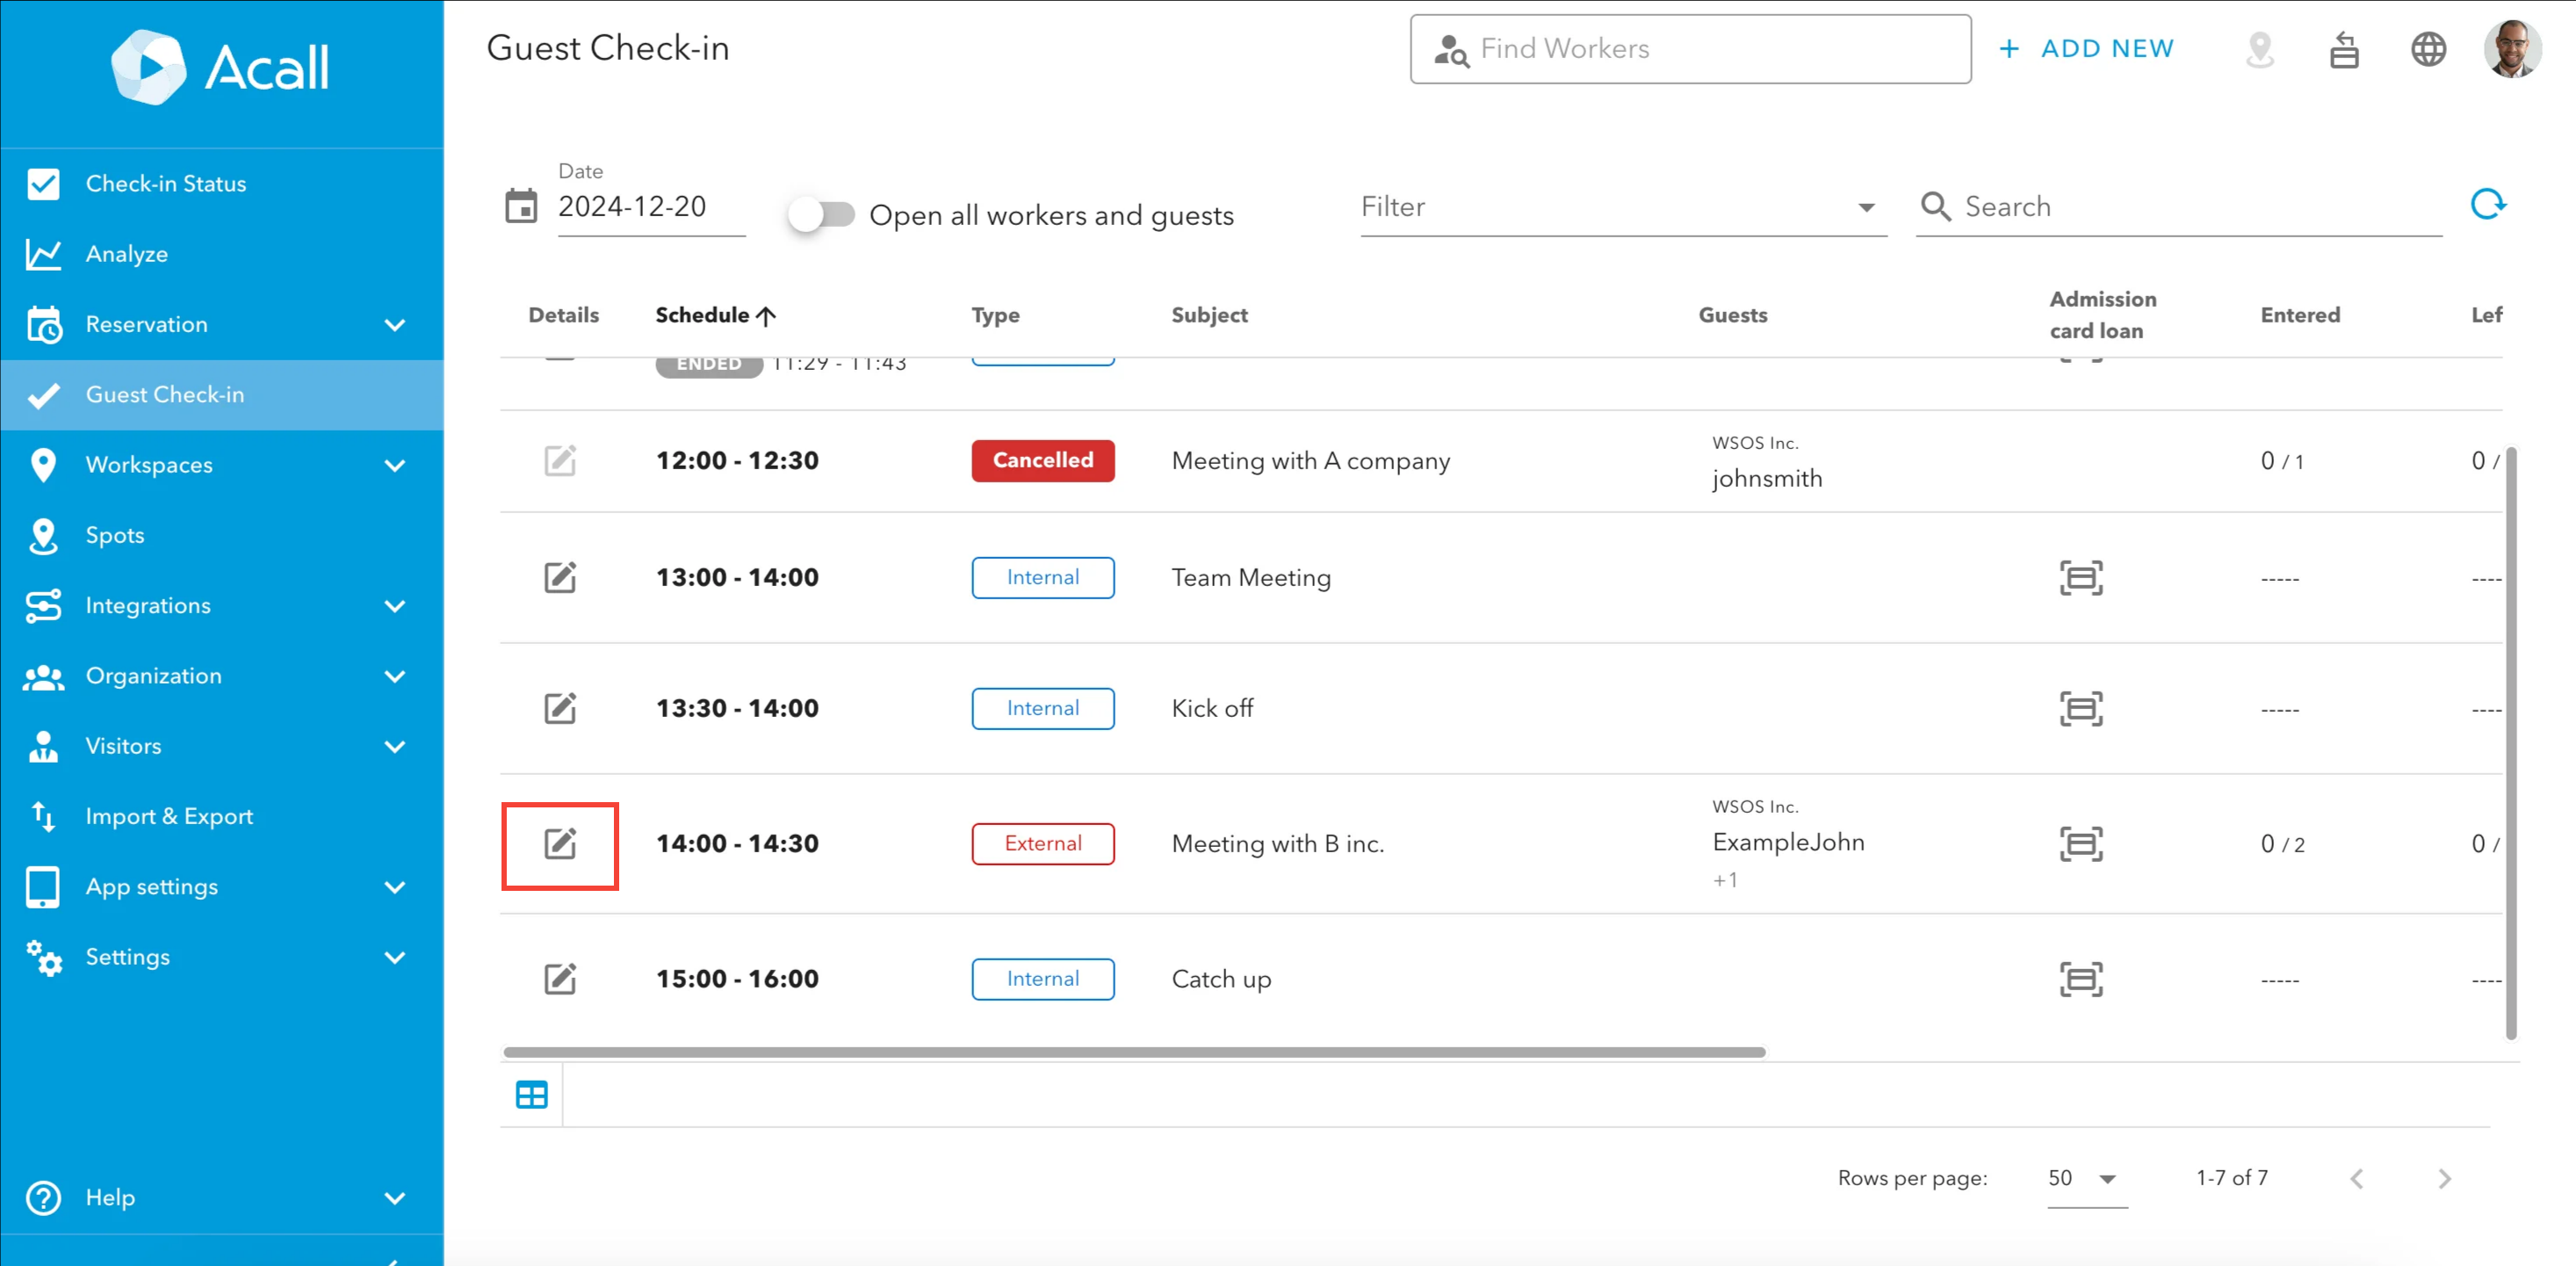
Click the email icon.
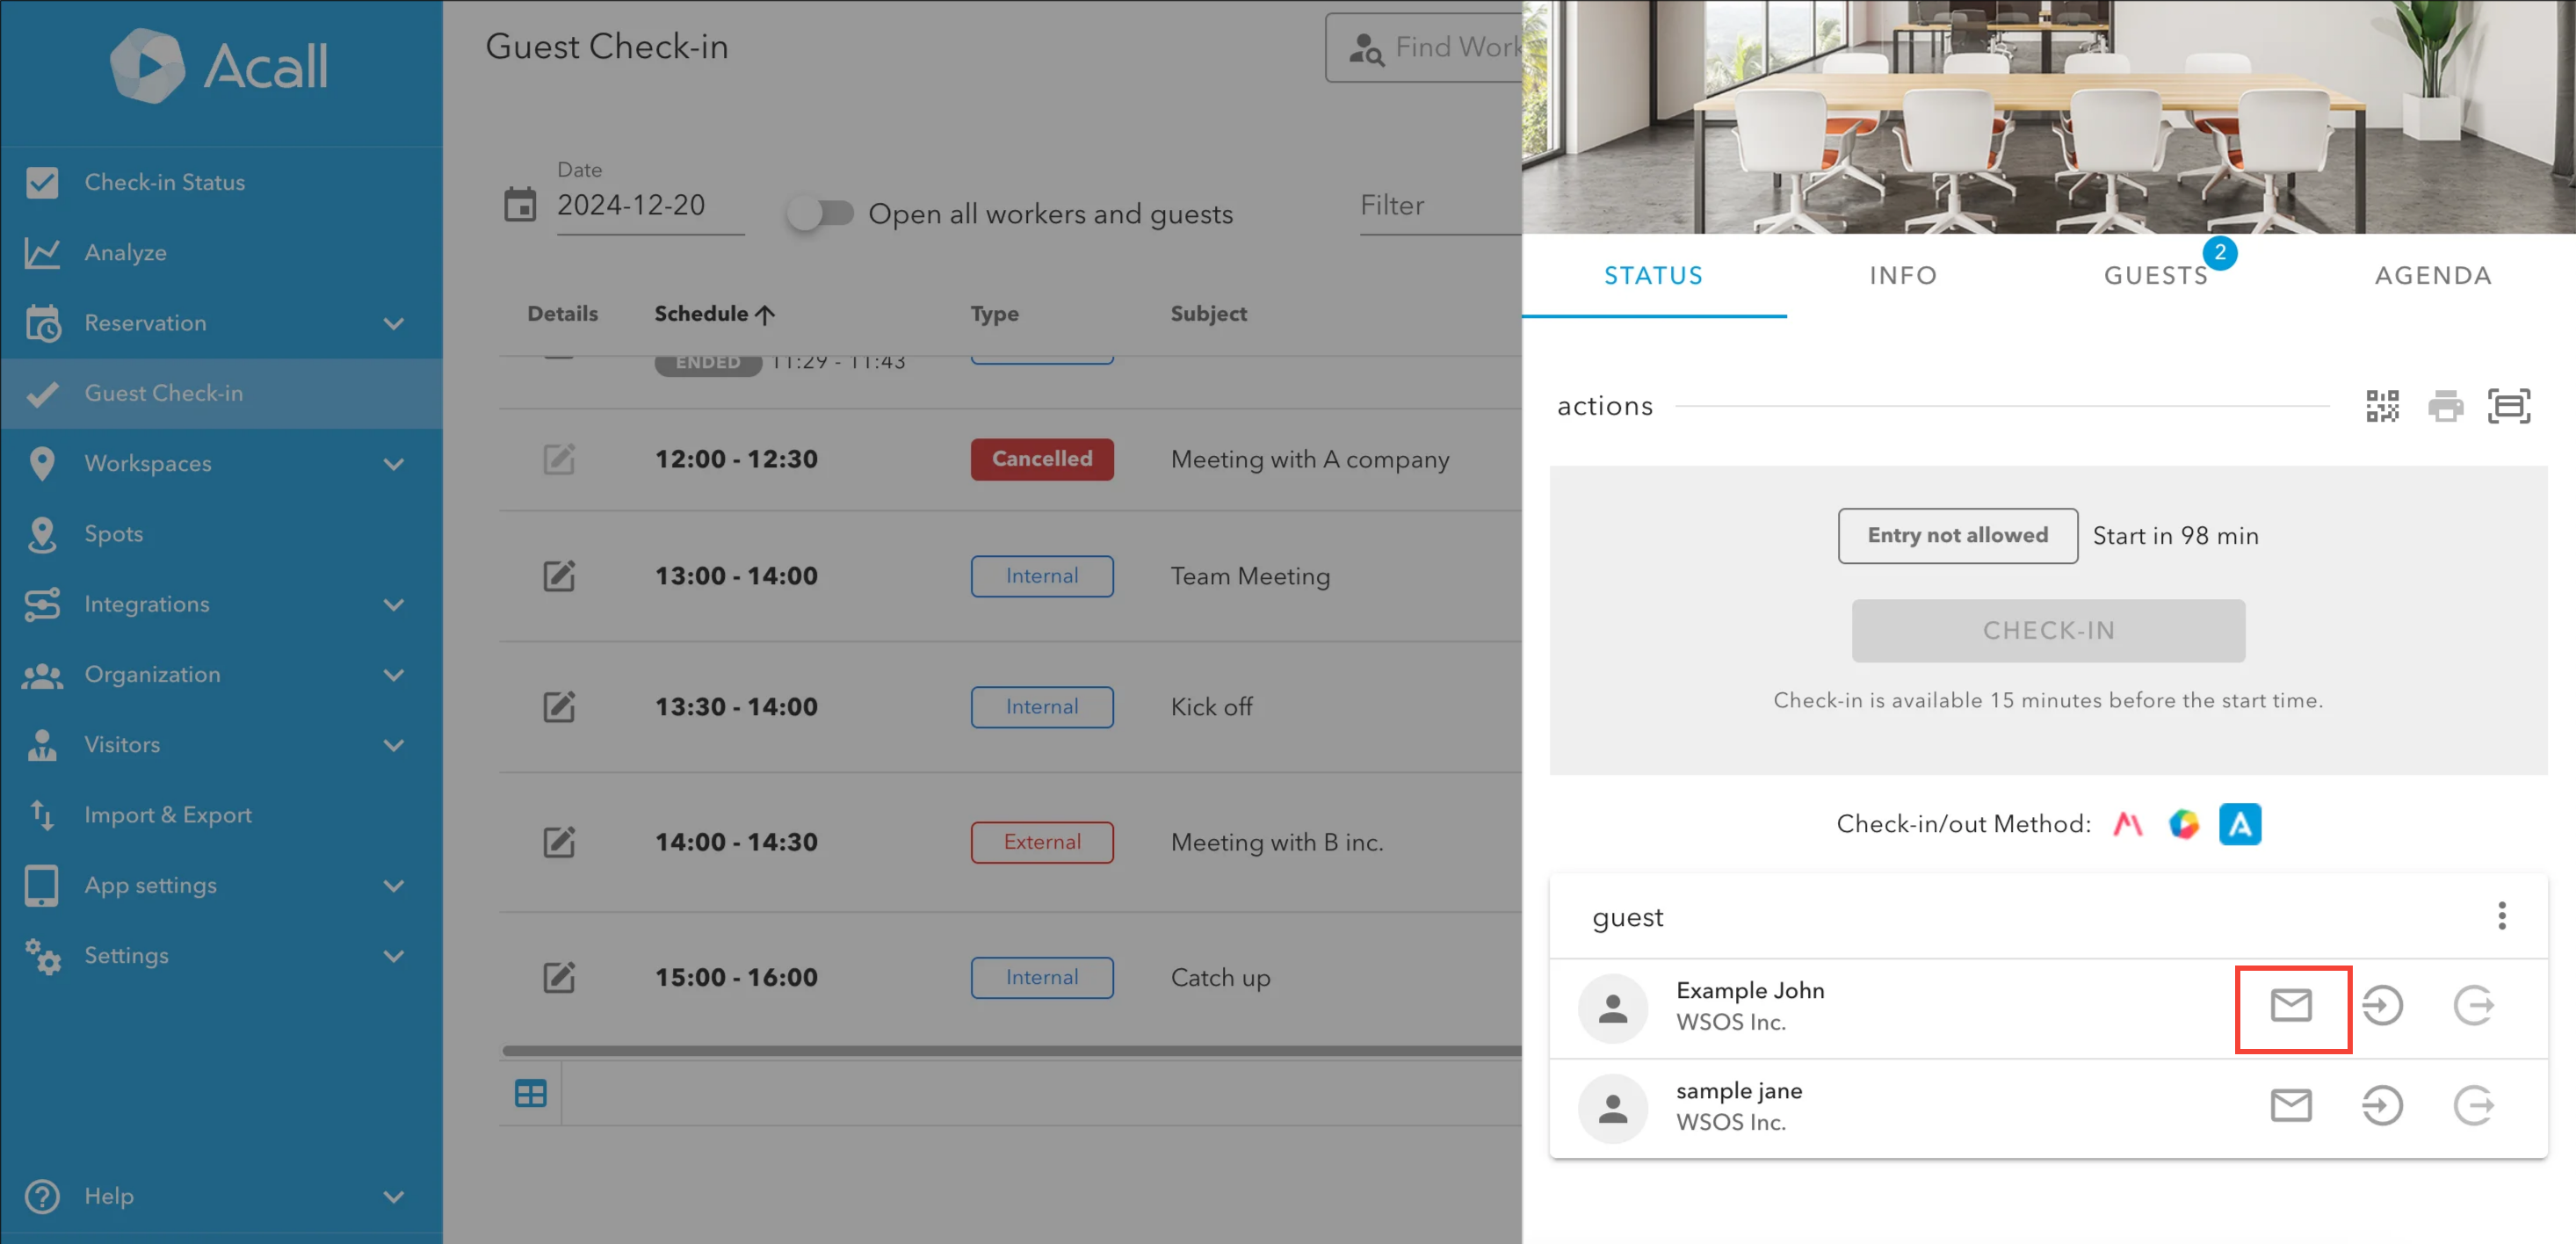
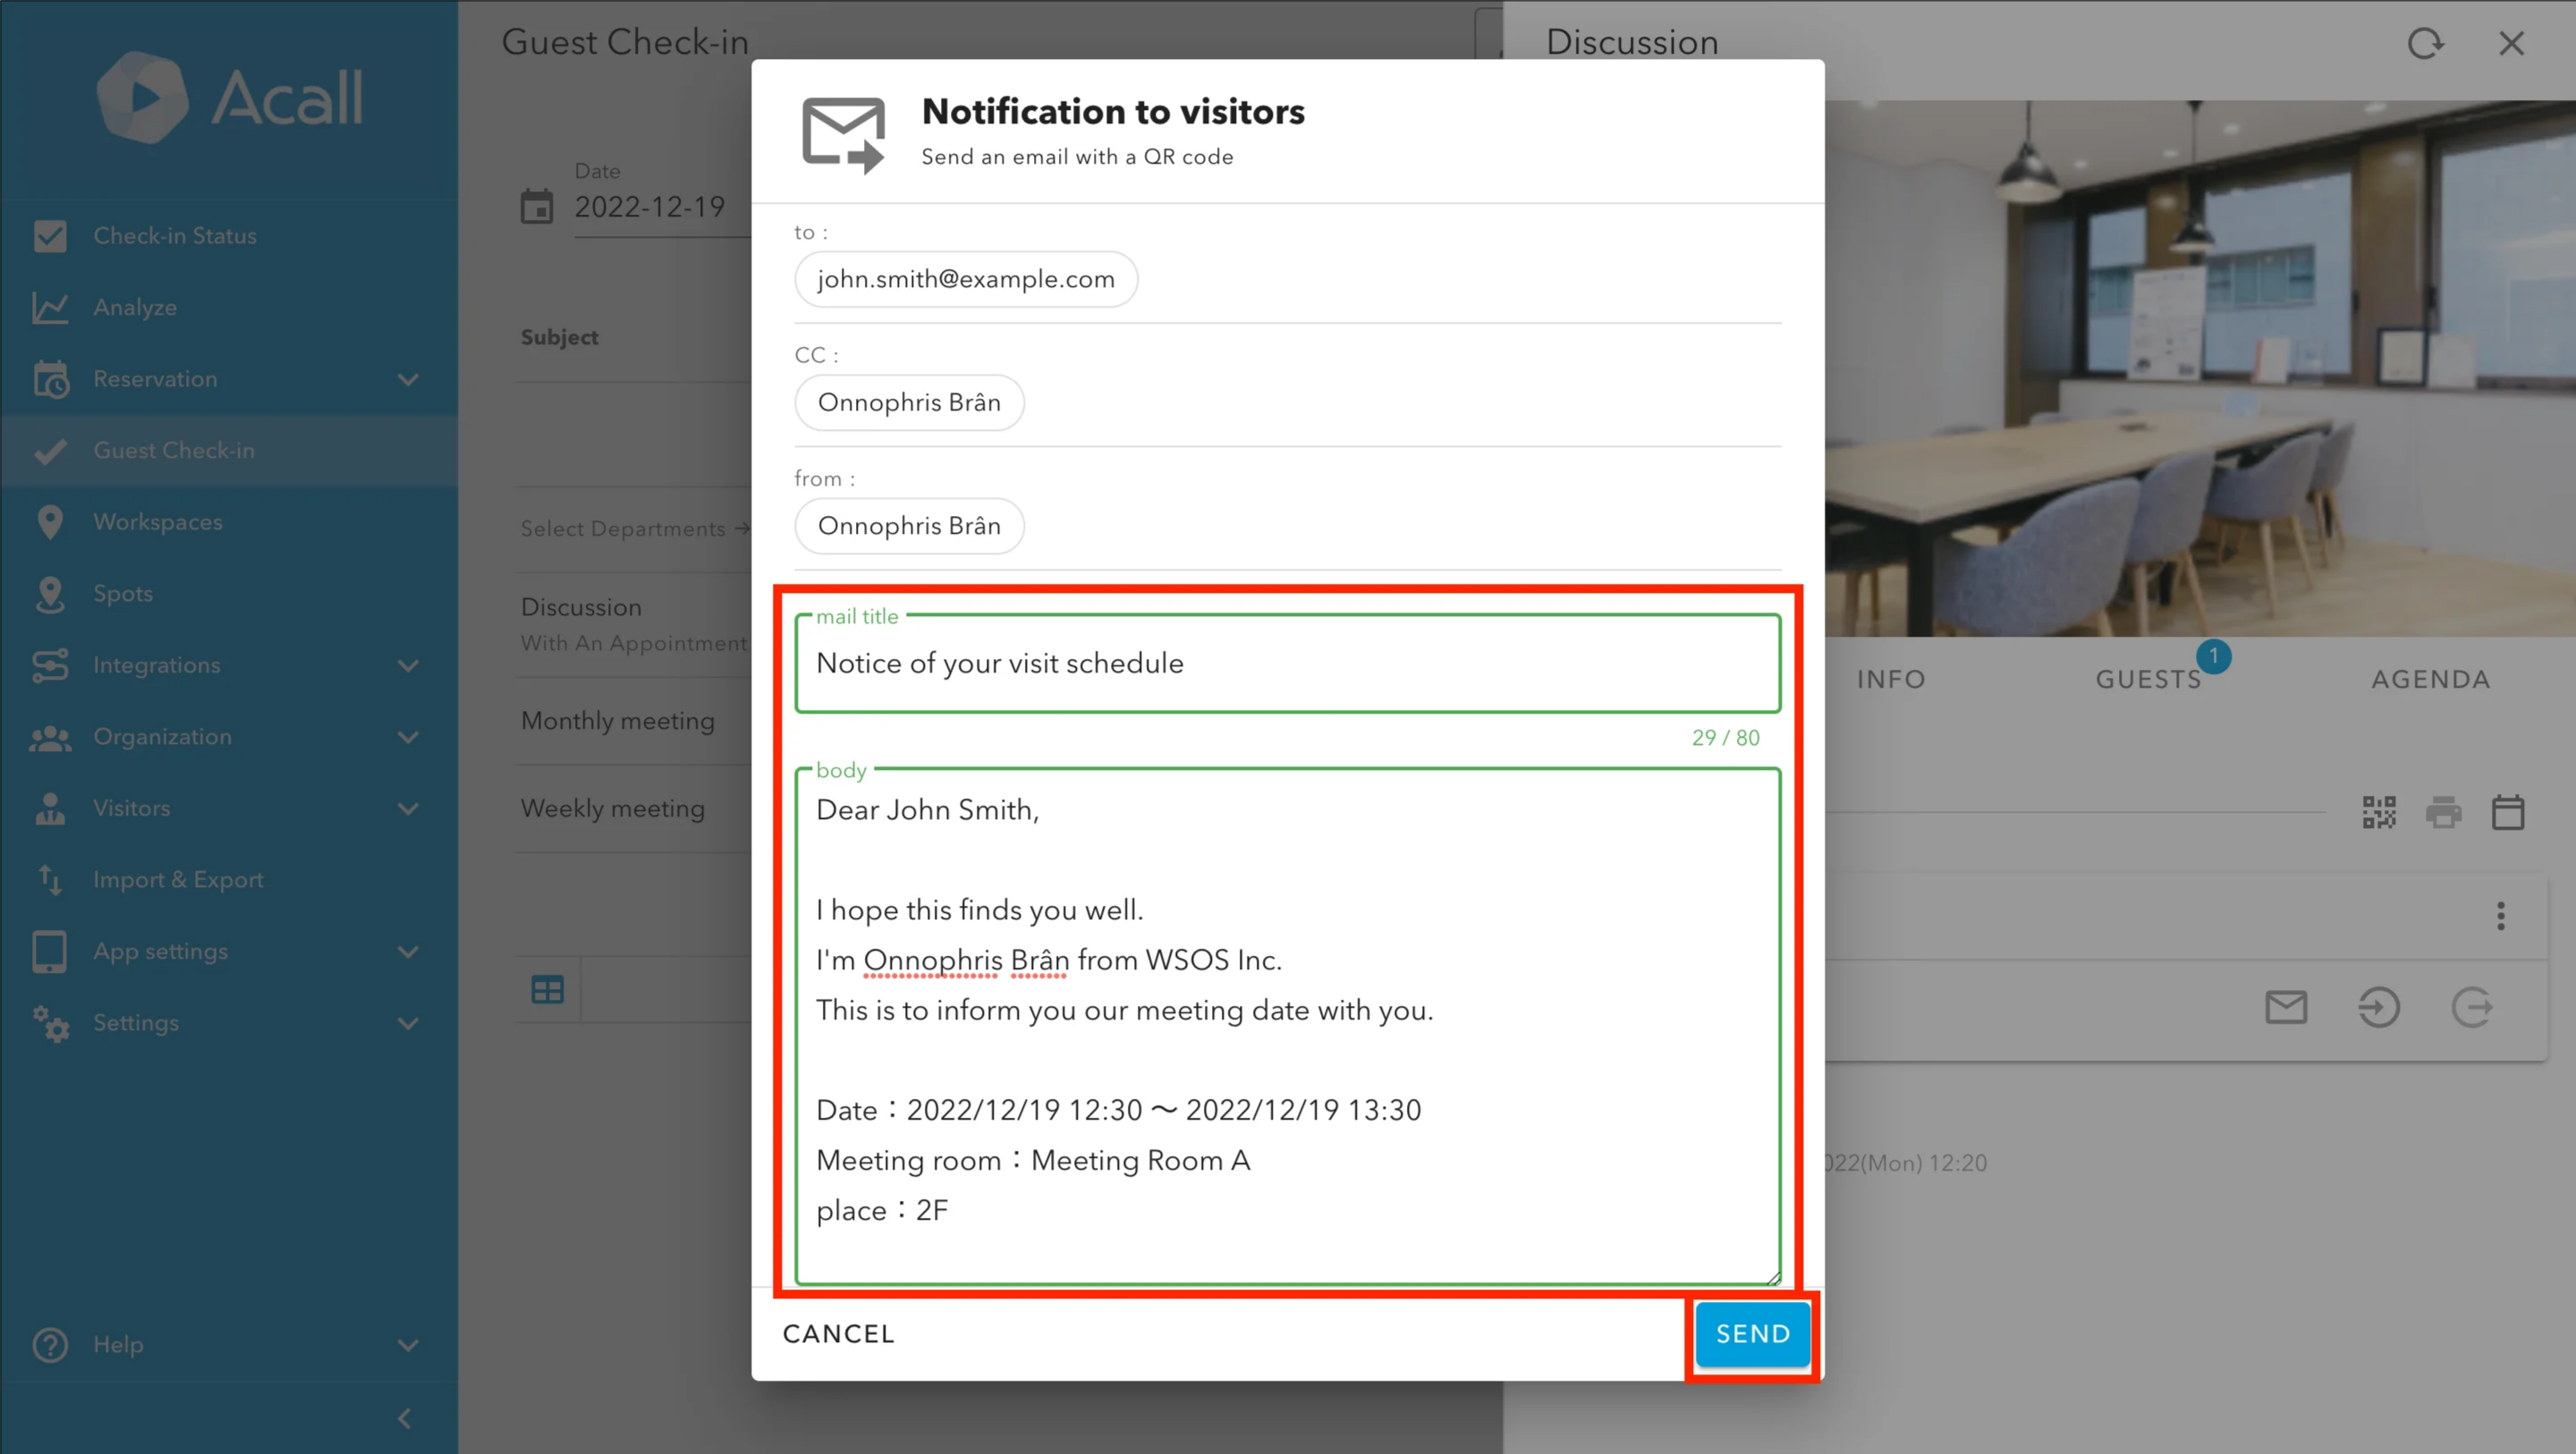
Edit the subject and body, and click [SEND].
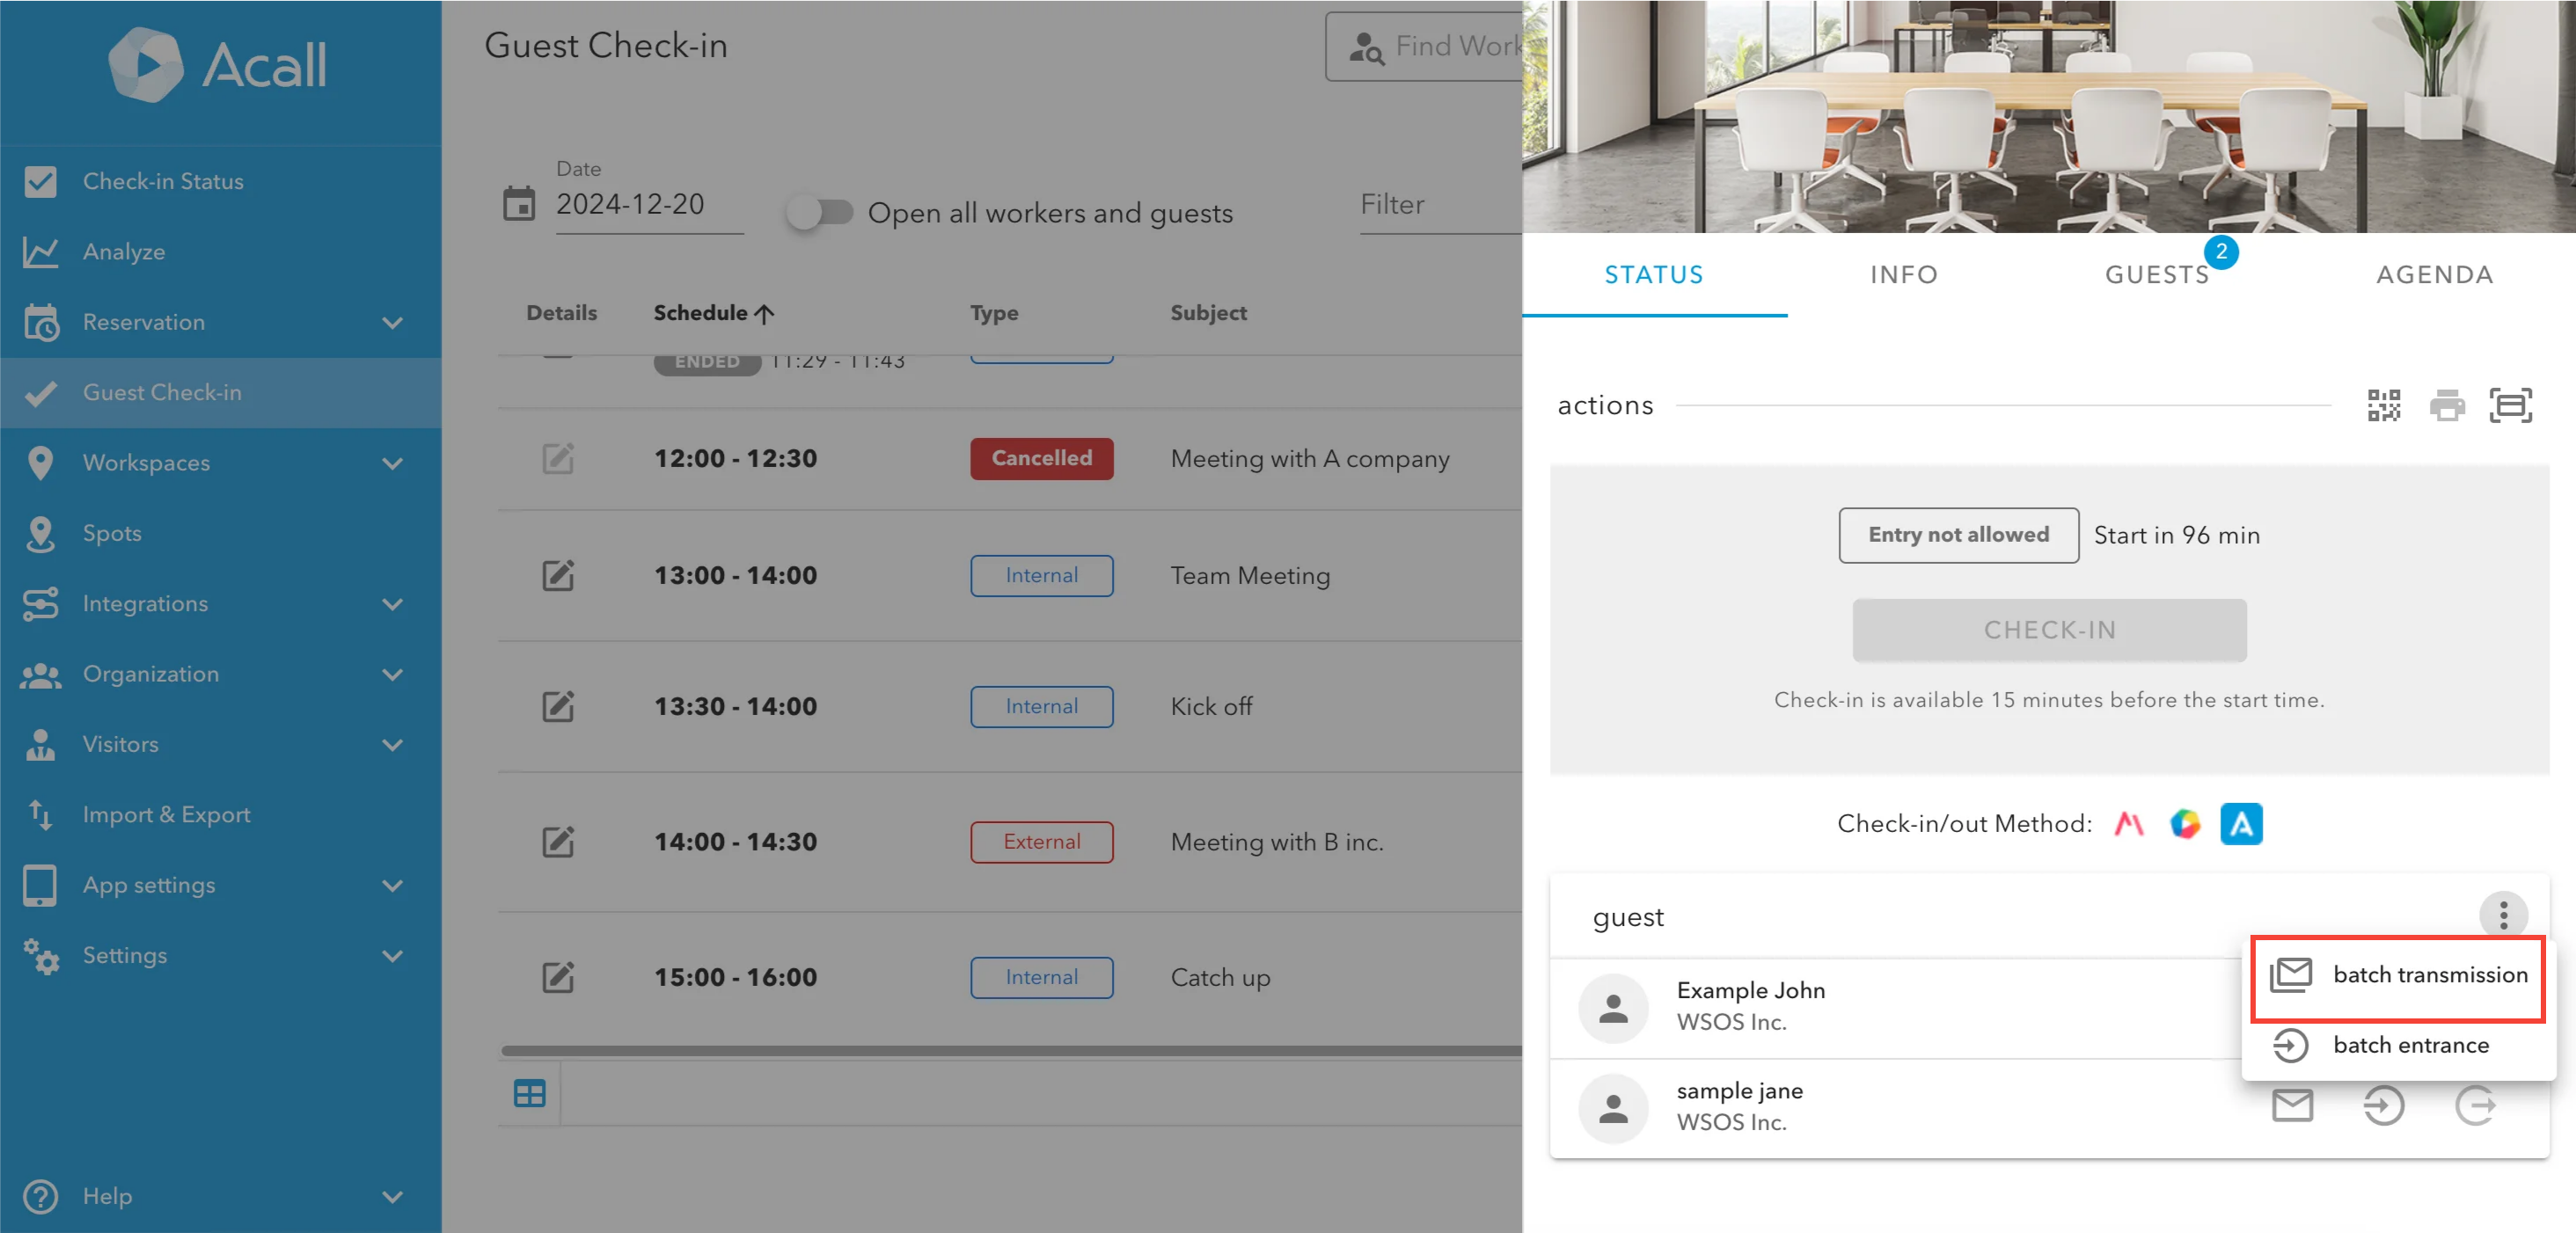
When you want to send the invitation to multiple guests, click three dots leader and choose [batch transmission].
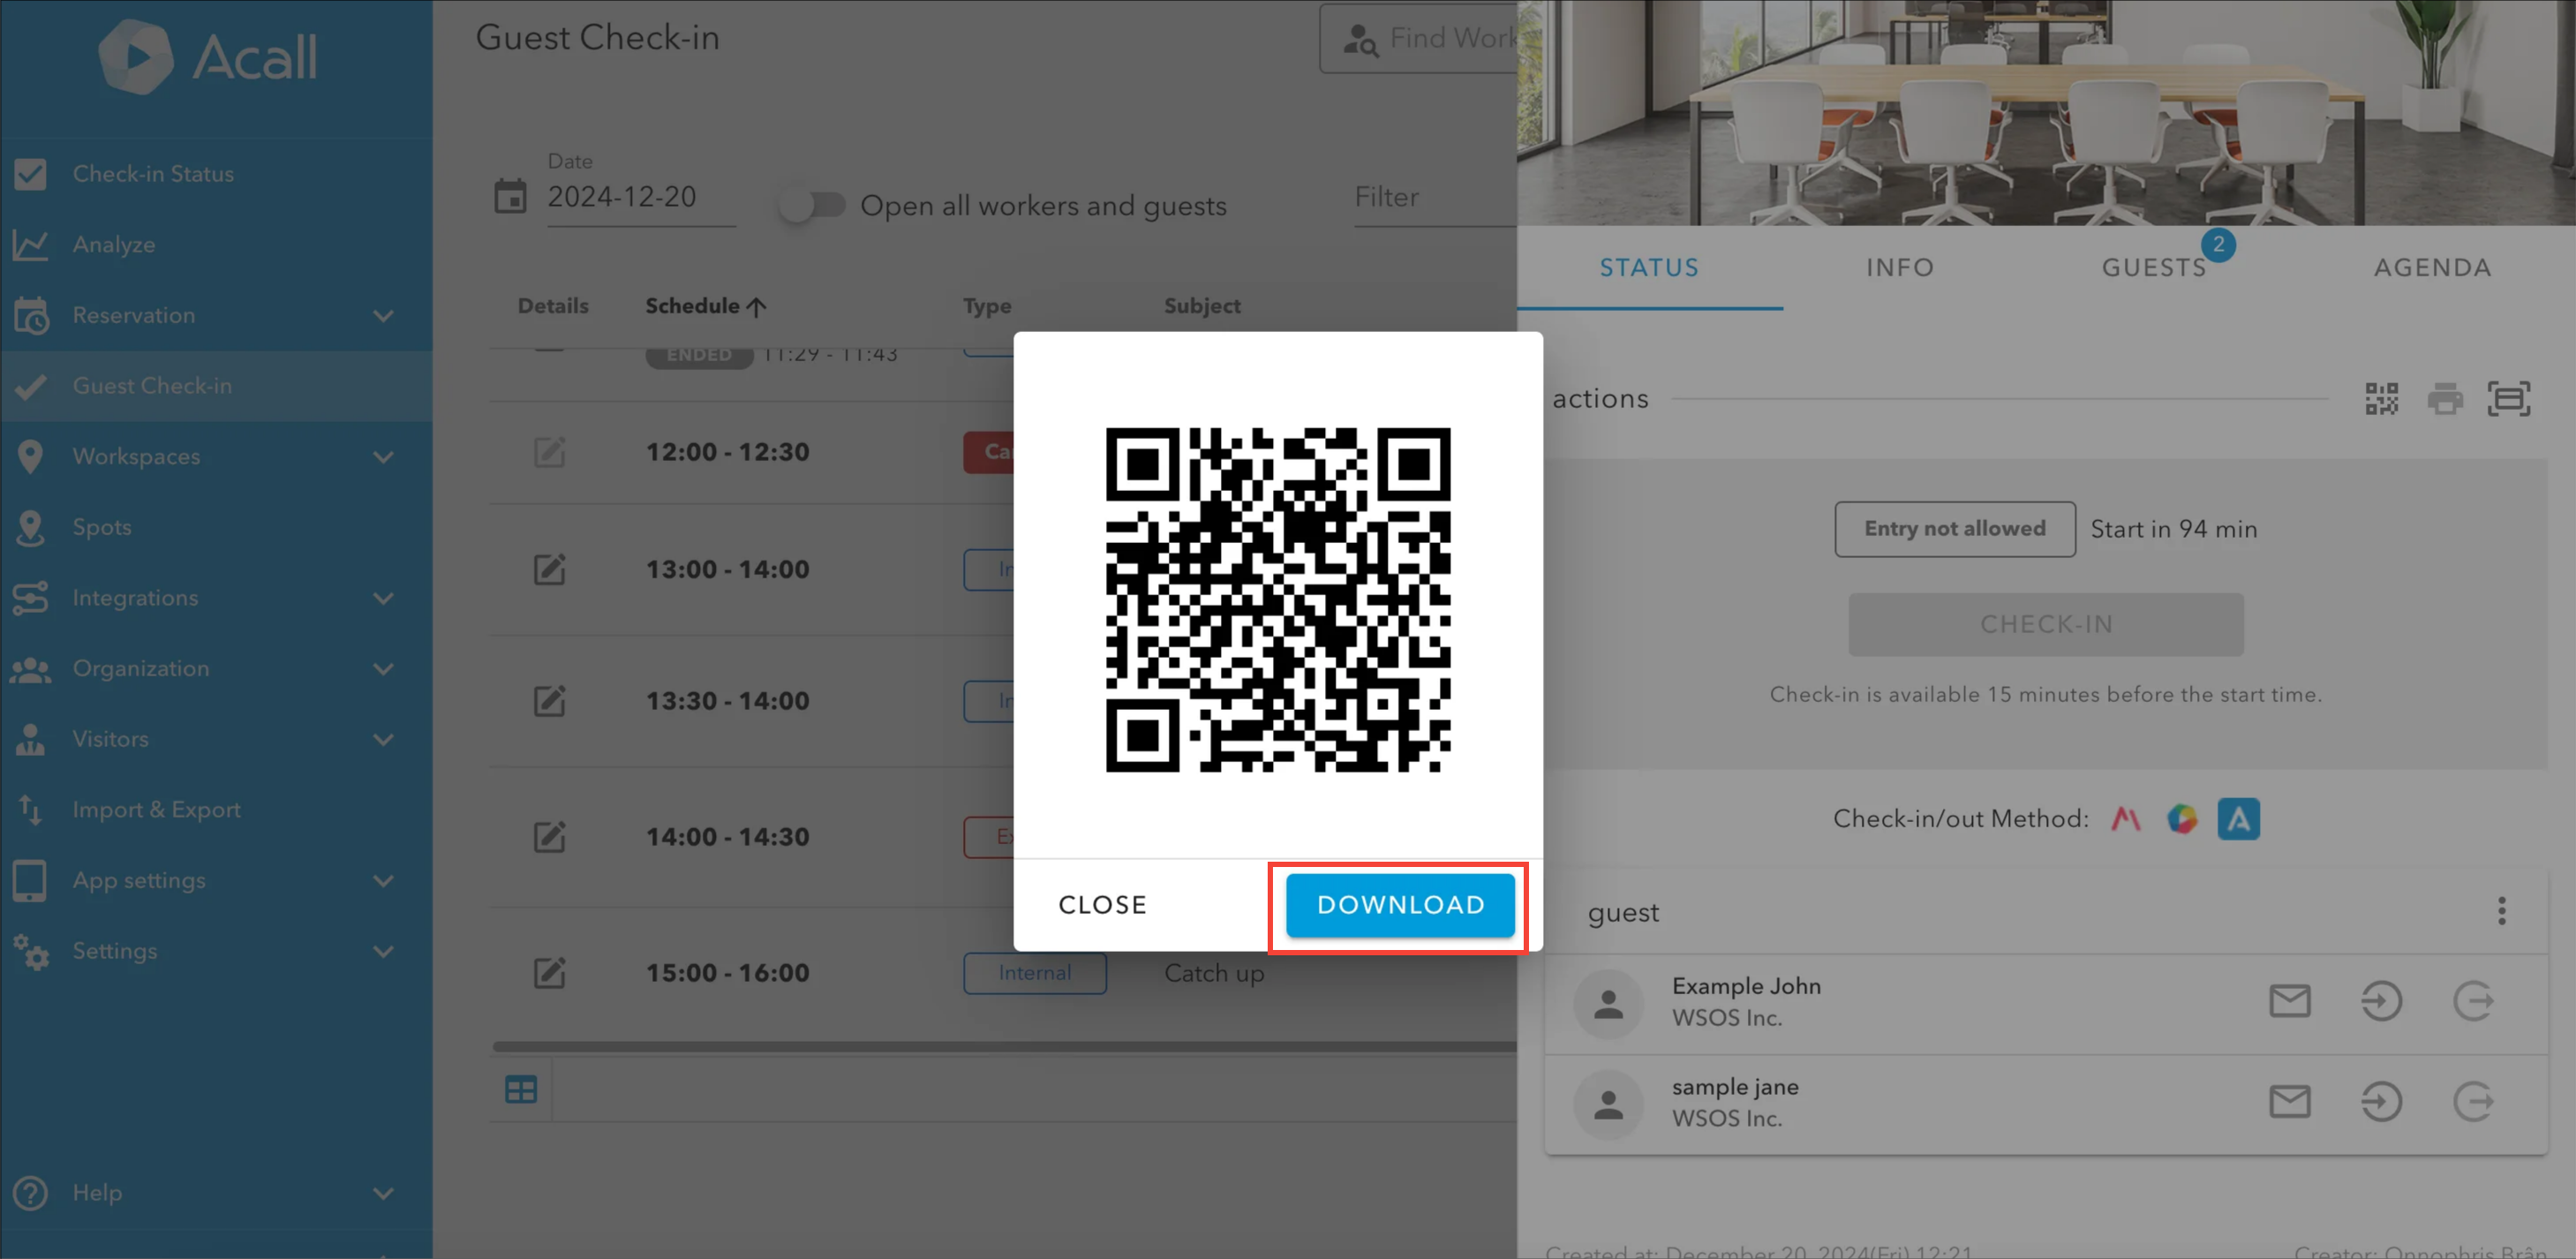
Download appointment code
NOTE
・For external appointments only.
You can download the appointment code and send to the guest manually.
Click [QR code] icon.
Click [DOWNLOAD].
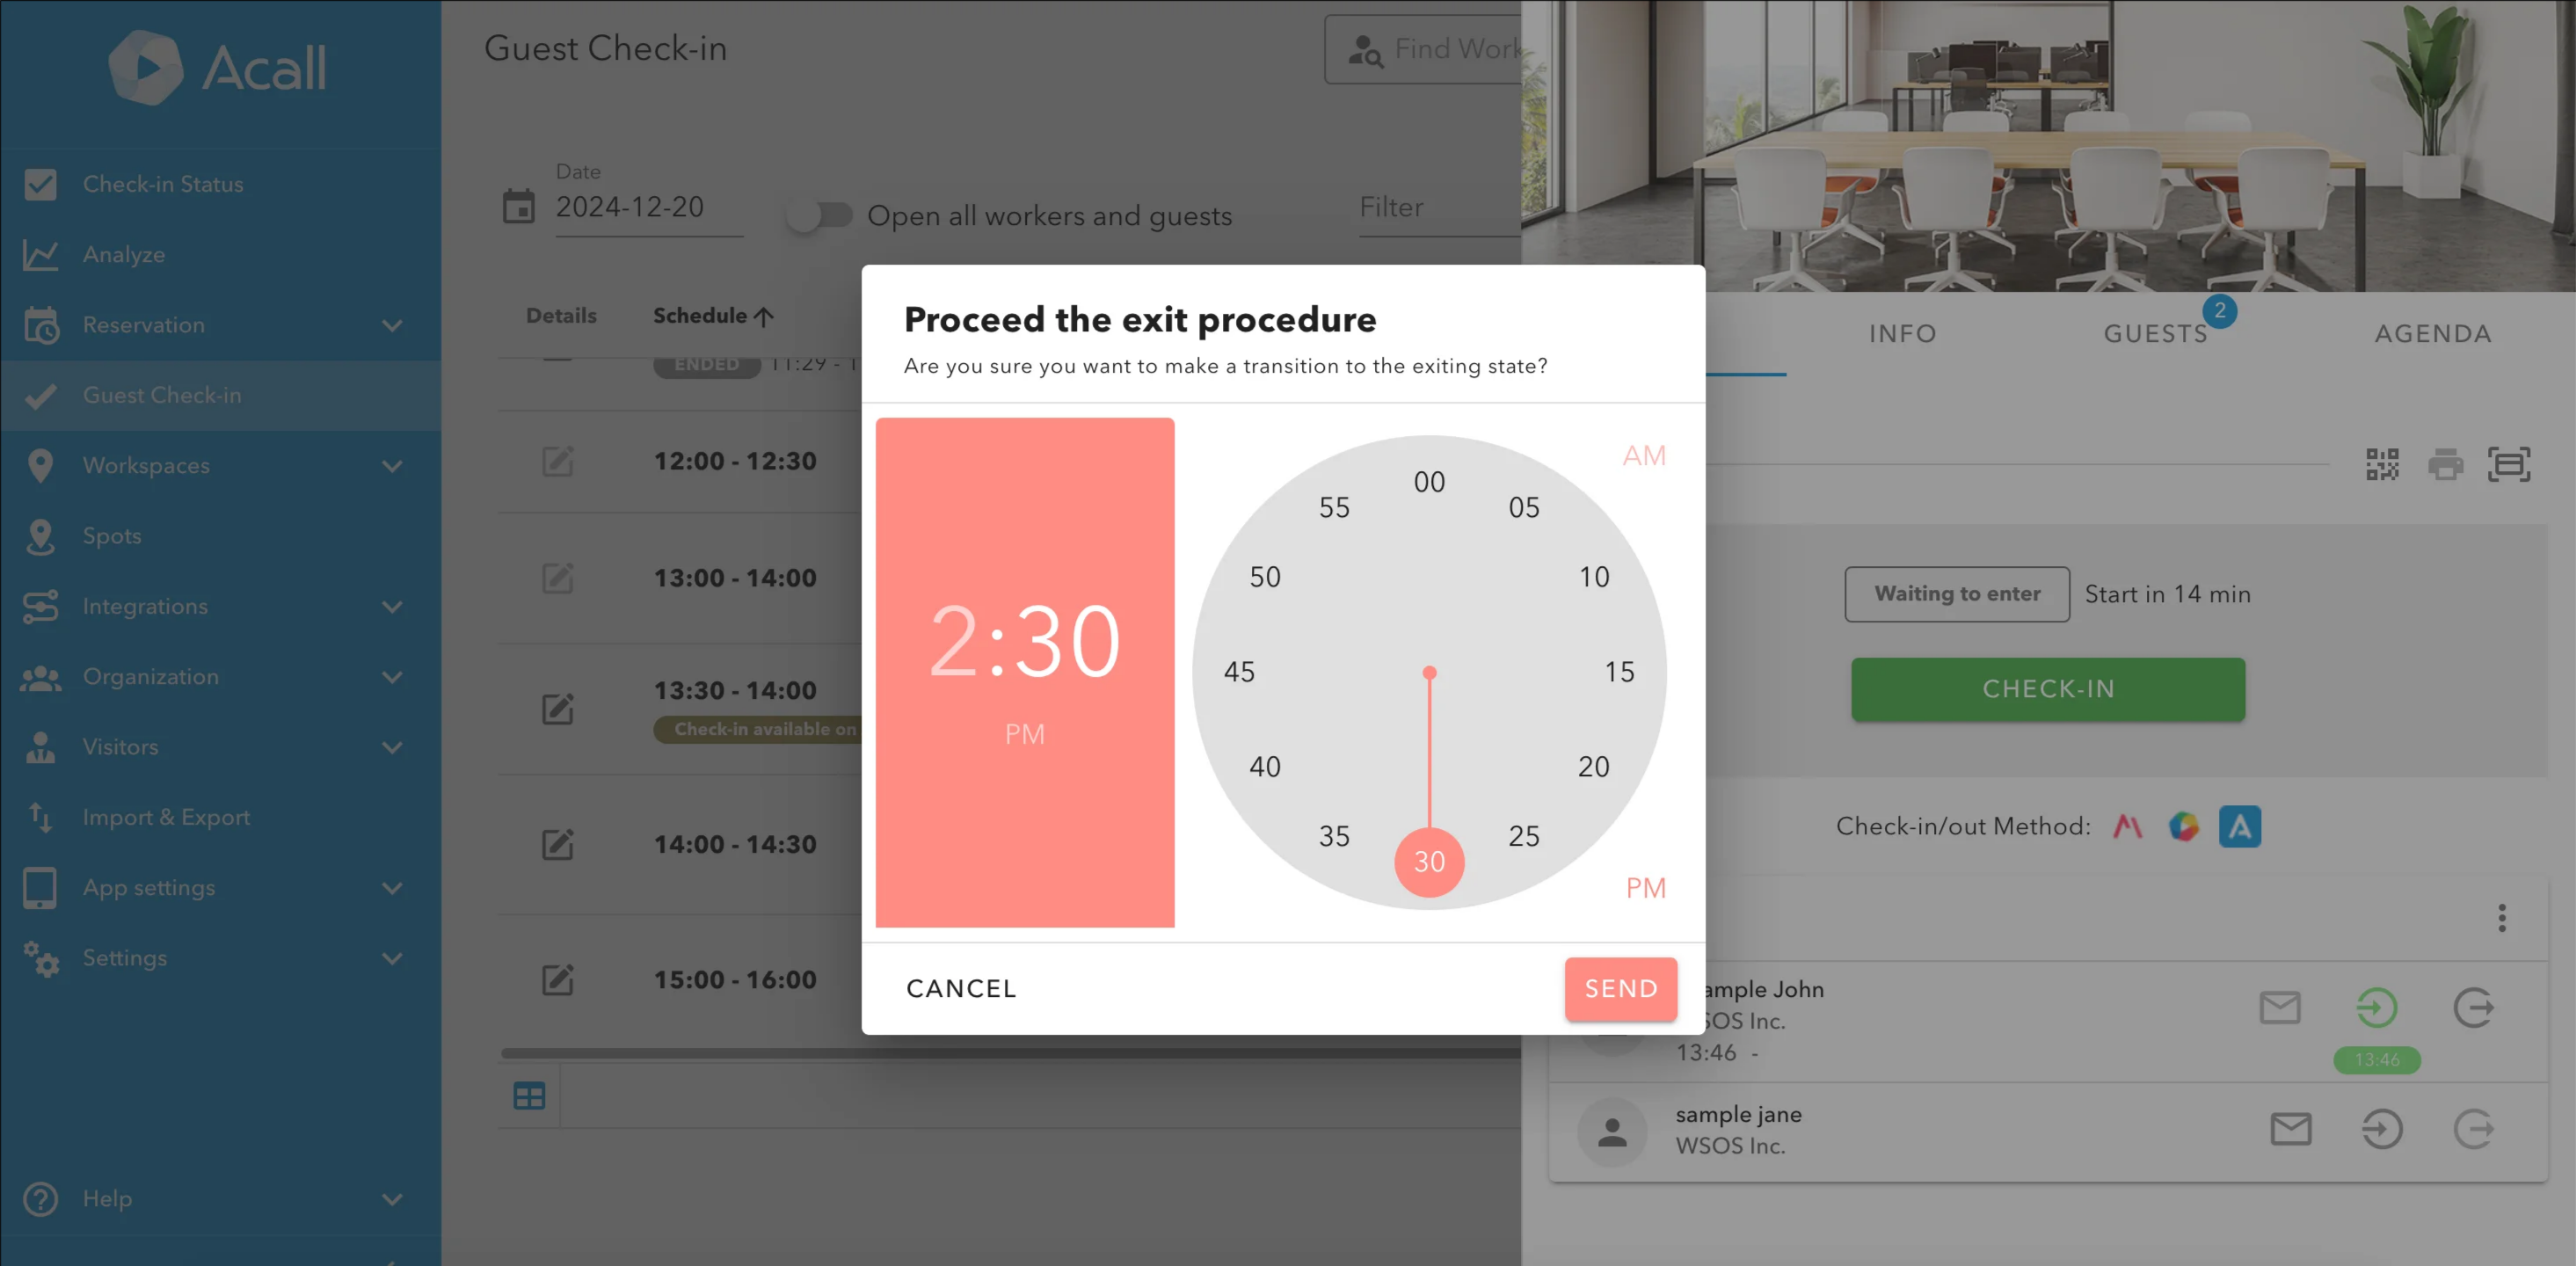
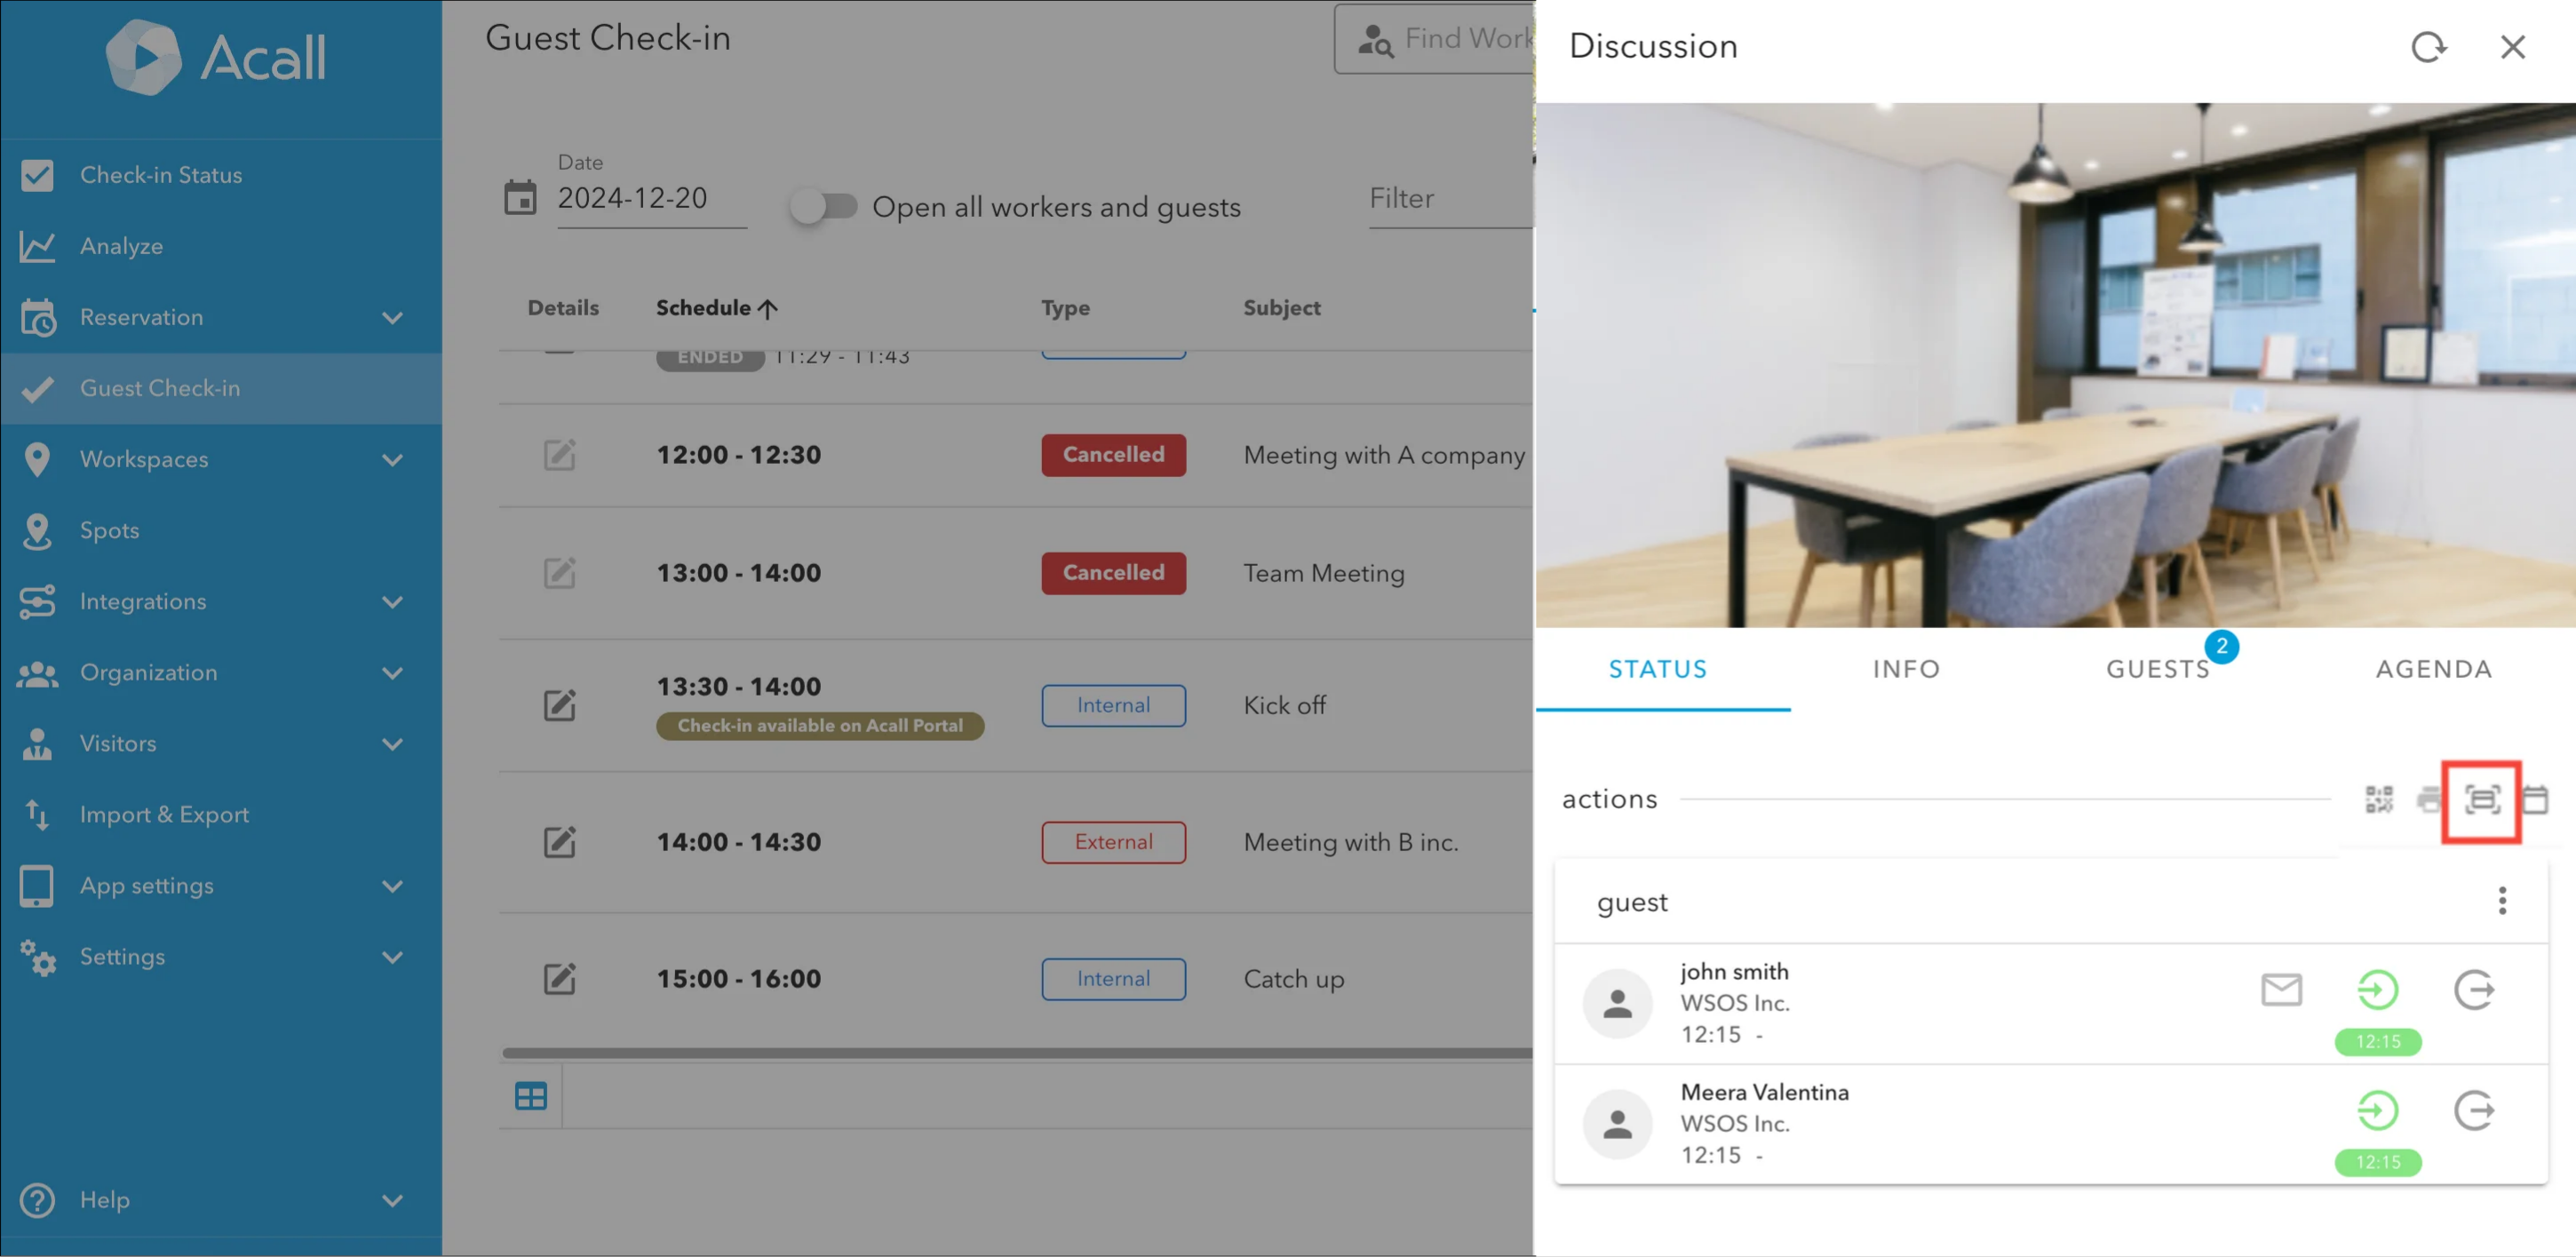
Entrance/exit procedure
NOTE
・For external appointments and no appointments only.
Click [Edit] of the appointment you want to edit.
Click "STATUS" tab. You can check the time of entry/exit and edit or record entry/exit time of the guest.
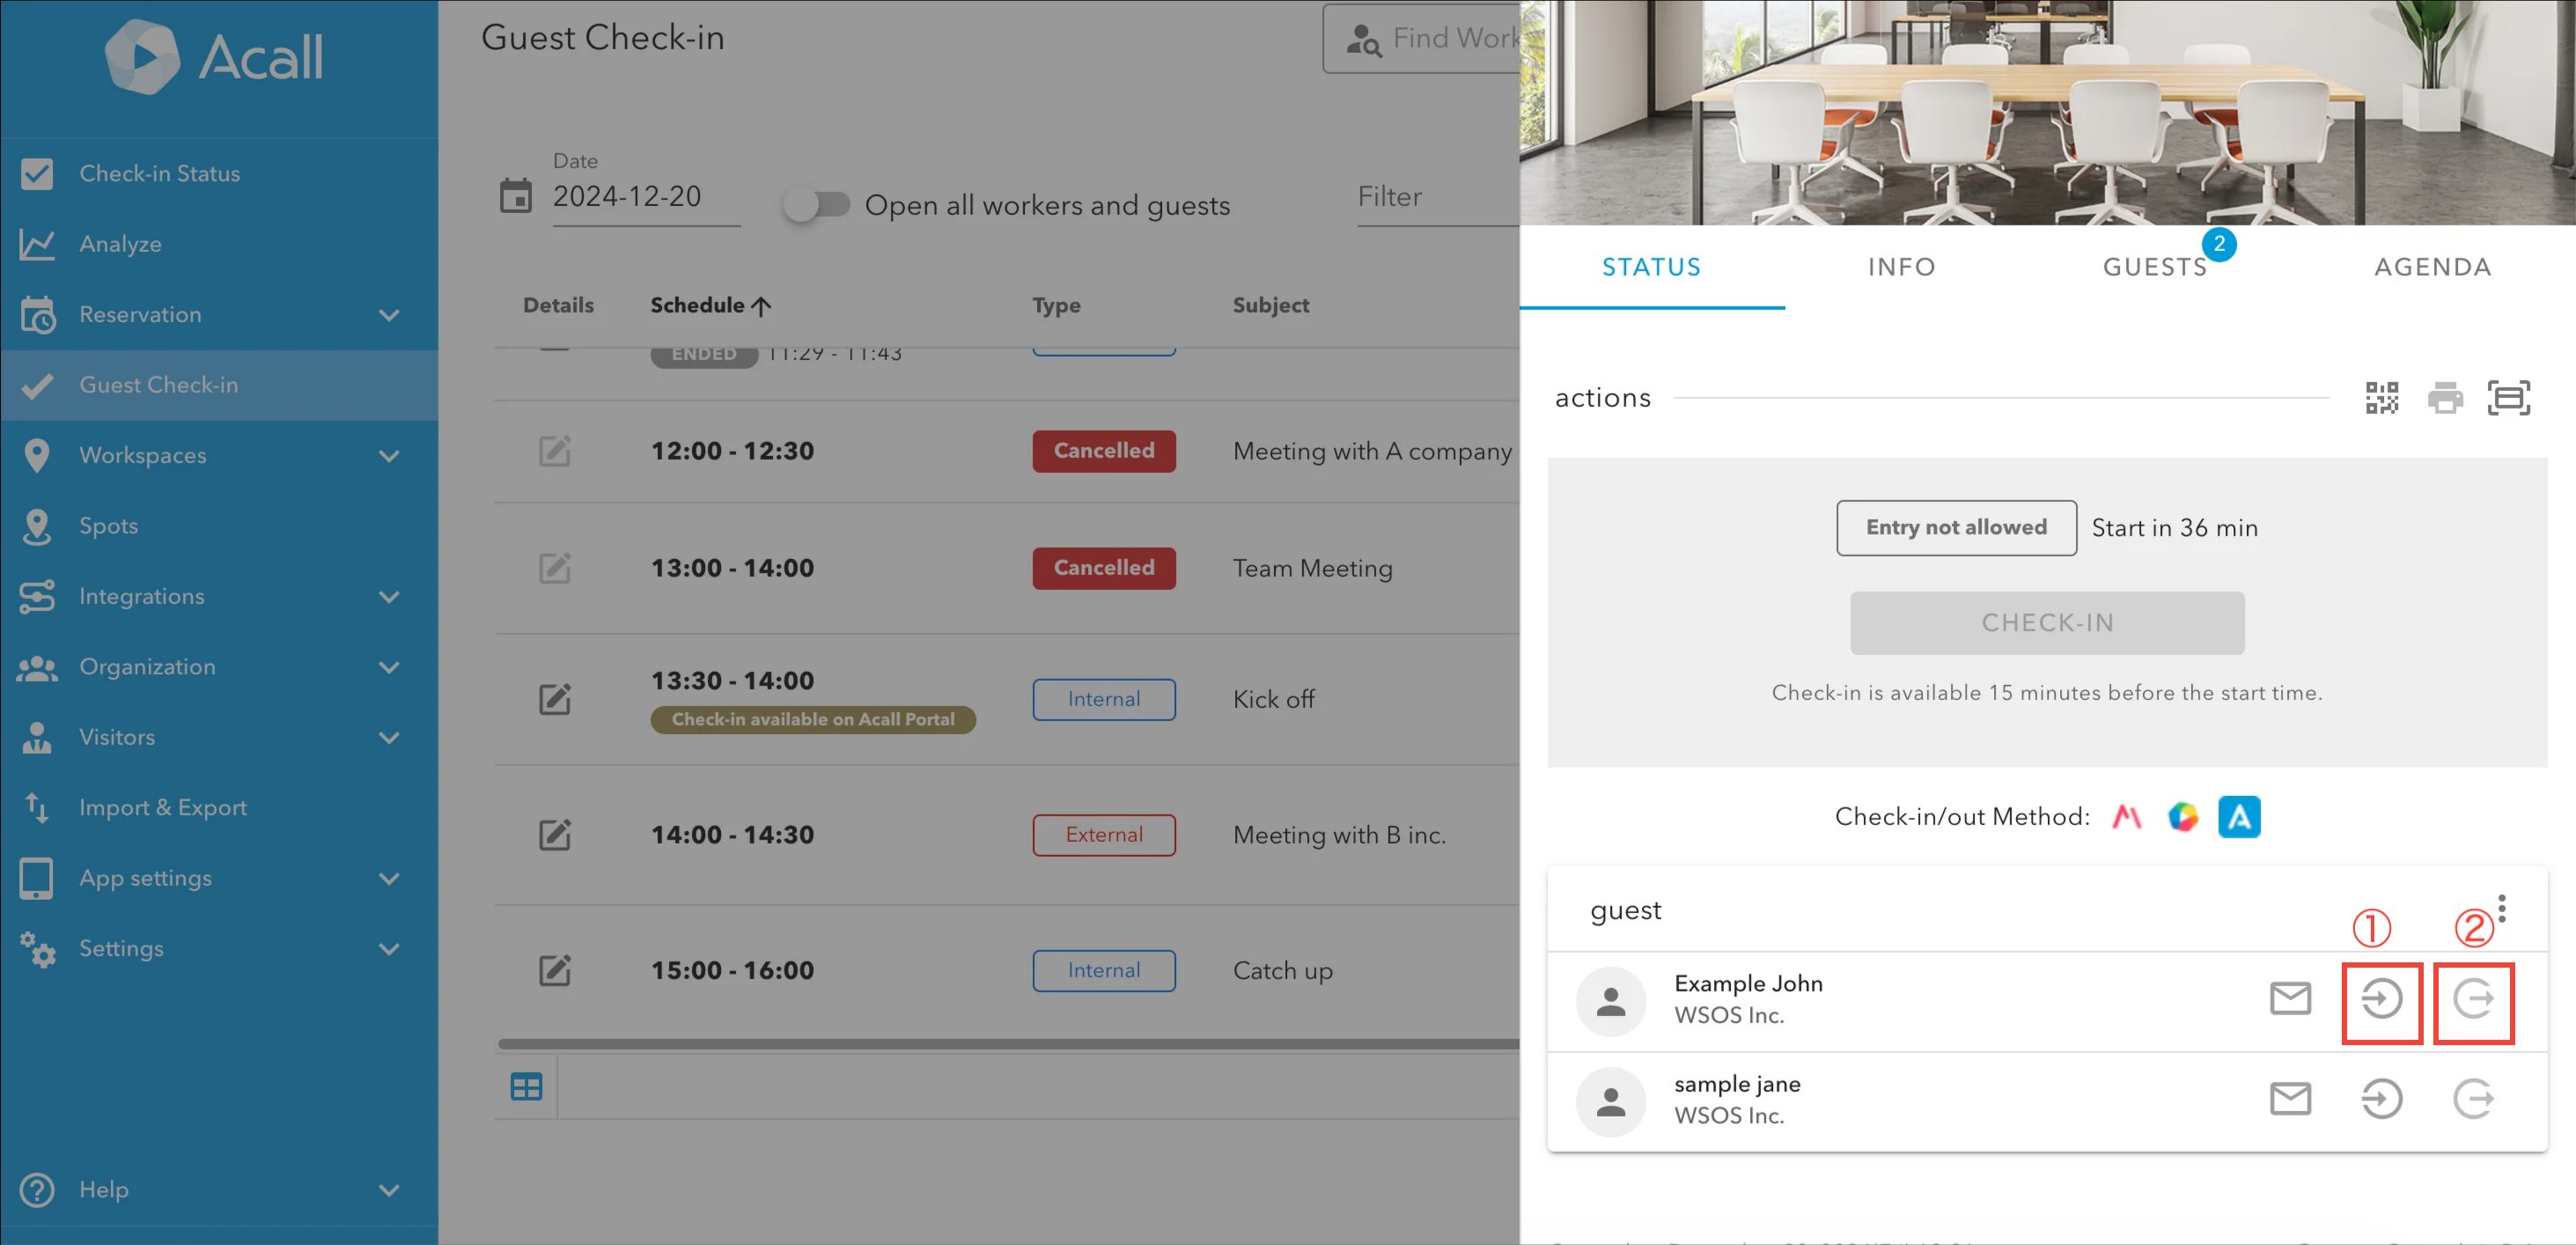
| No | Item | Description |
| ① | Record entry |
Record (edit) the entrance time of the guest. If it has already been recorded, it will be displayed in green and the entrance time will be displayed. |
| ② | Record exit |
Record the exit time. If it has already been recorded, it will be displayed in red and the exit time will be displayed. |

NOTE
・You can not edit entrance/exit time after recording the exit time.
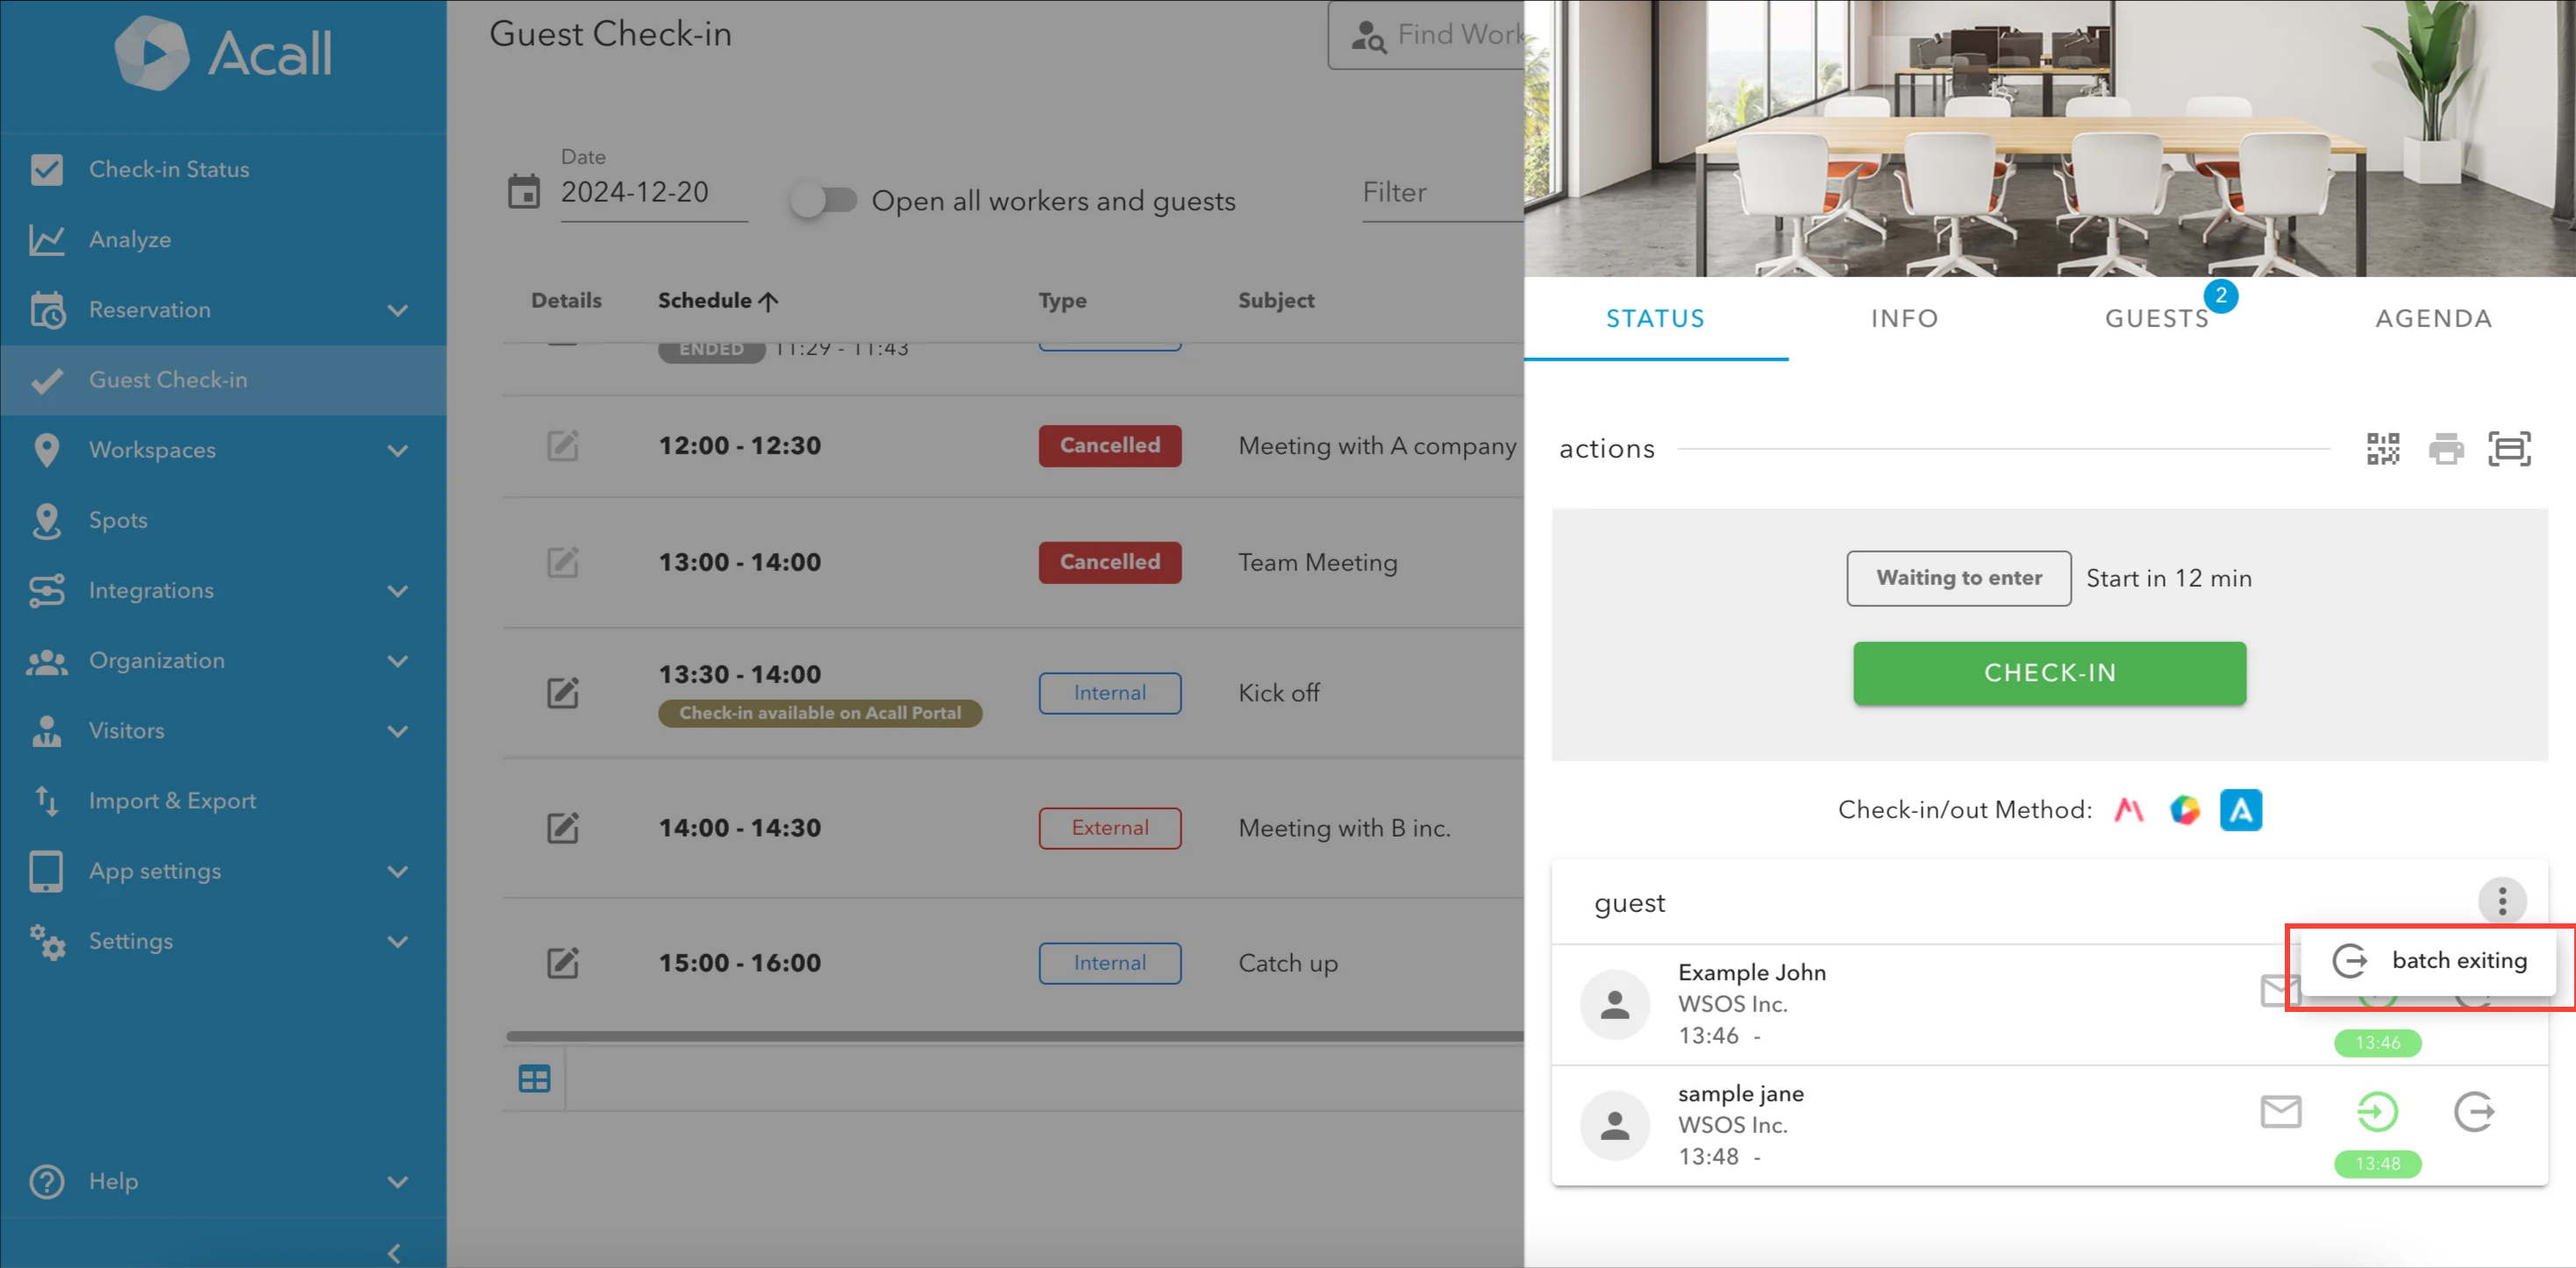
When you want to process the entry of multiple guests at the same time, click three dots leader and choose "batch entrance".
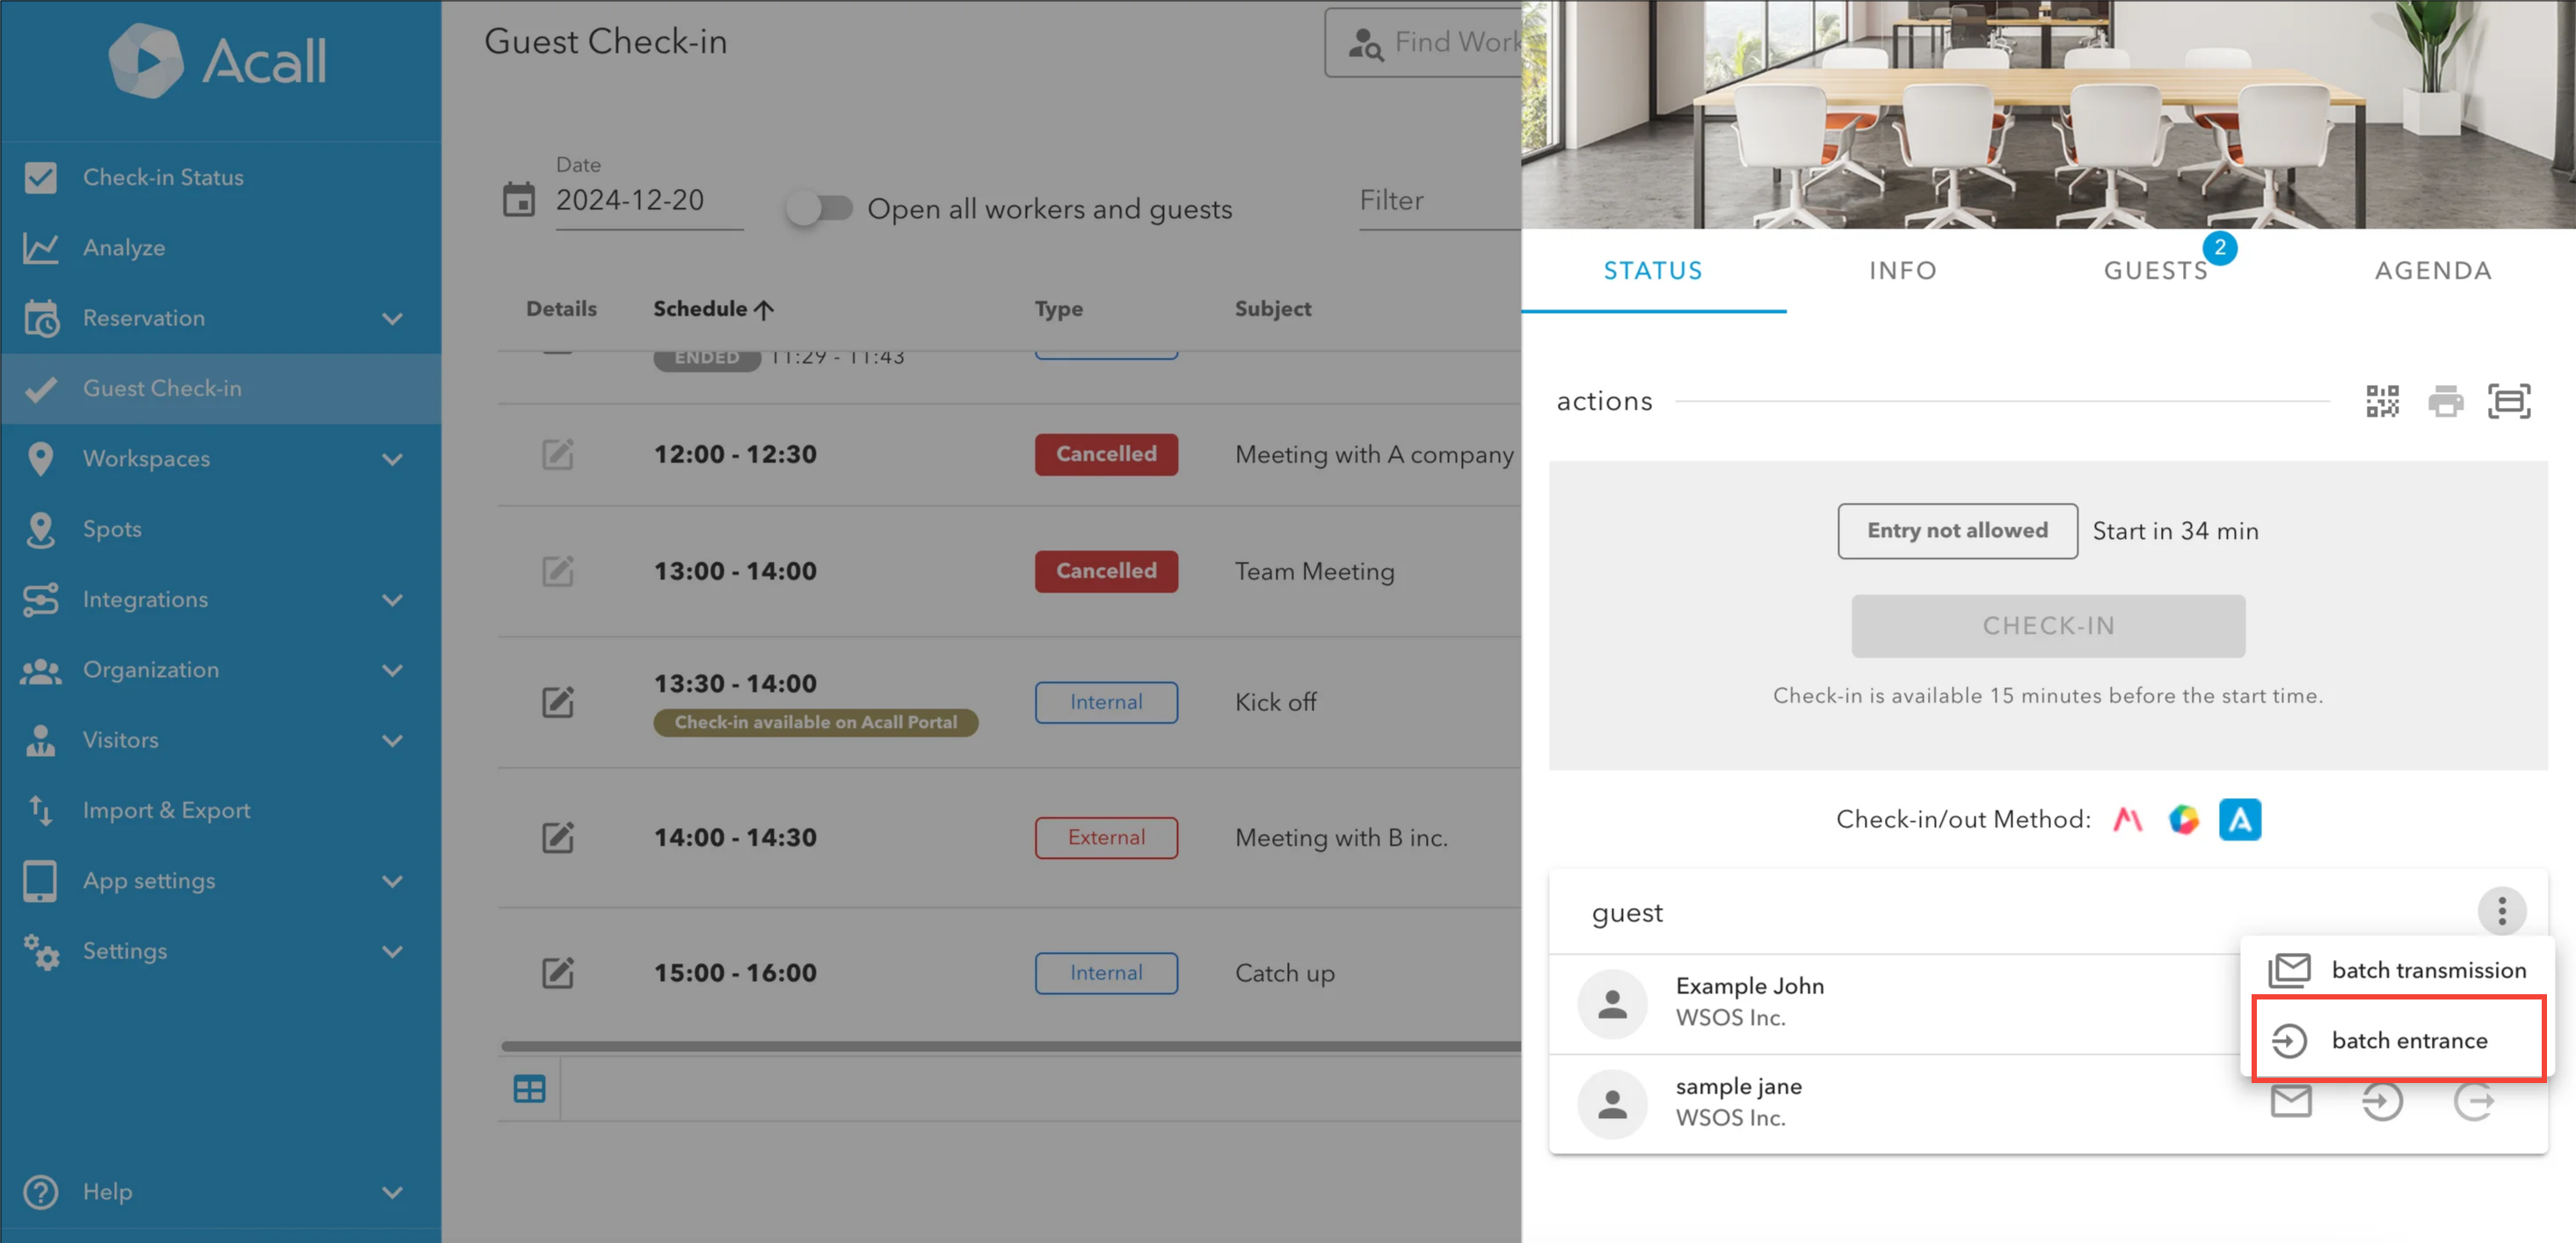
For exit of multiple guests, you can select "batch exiting".
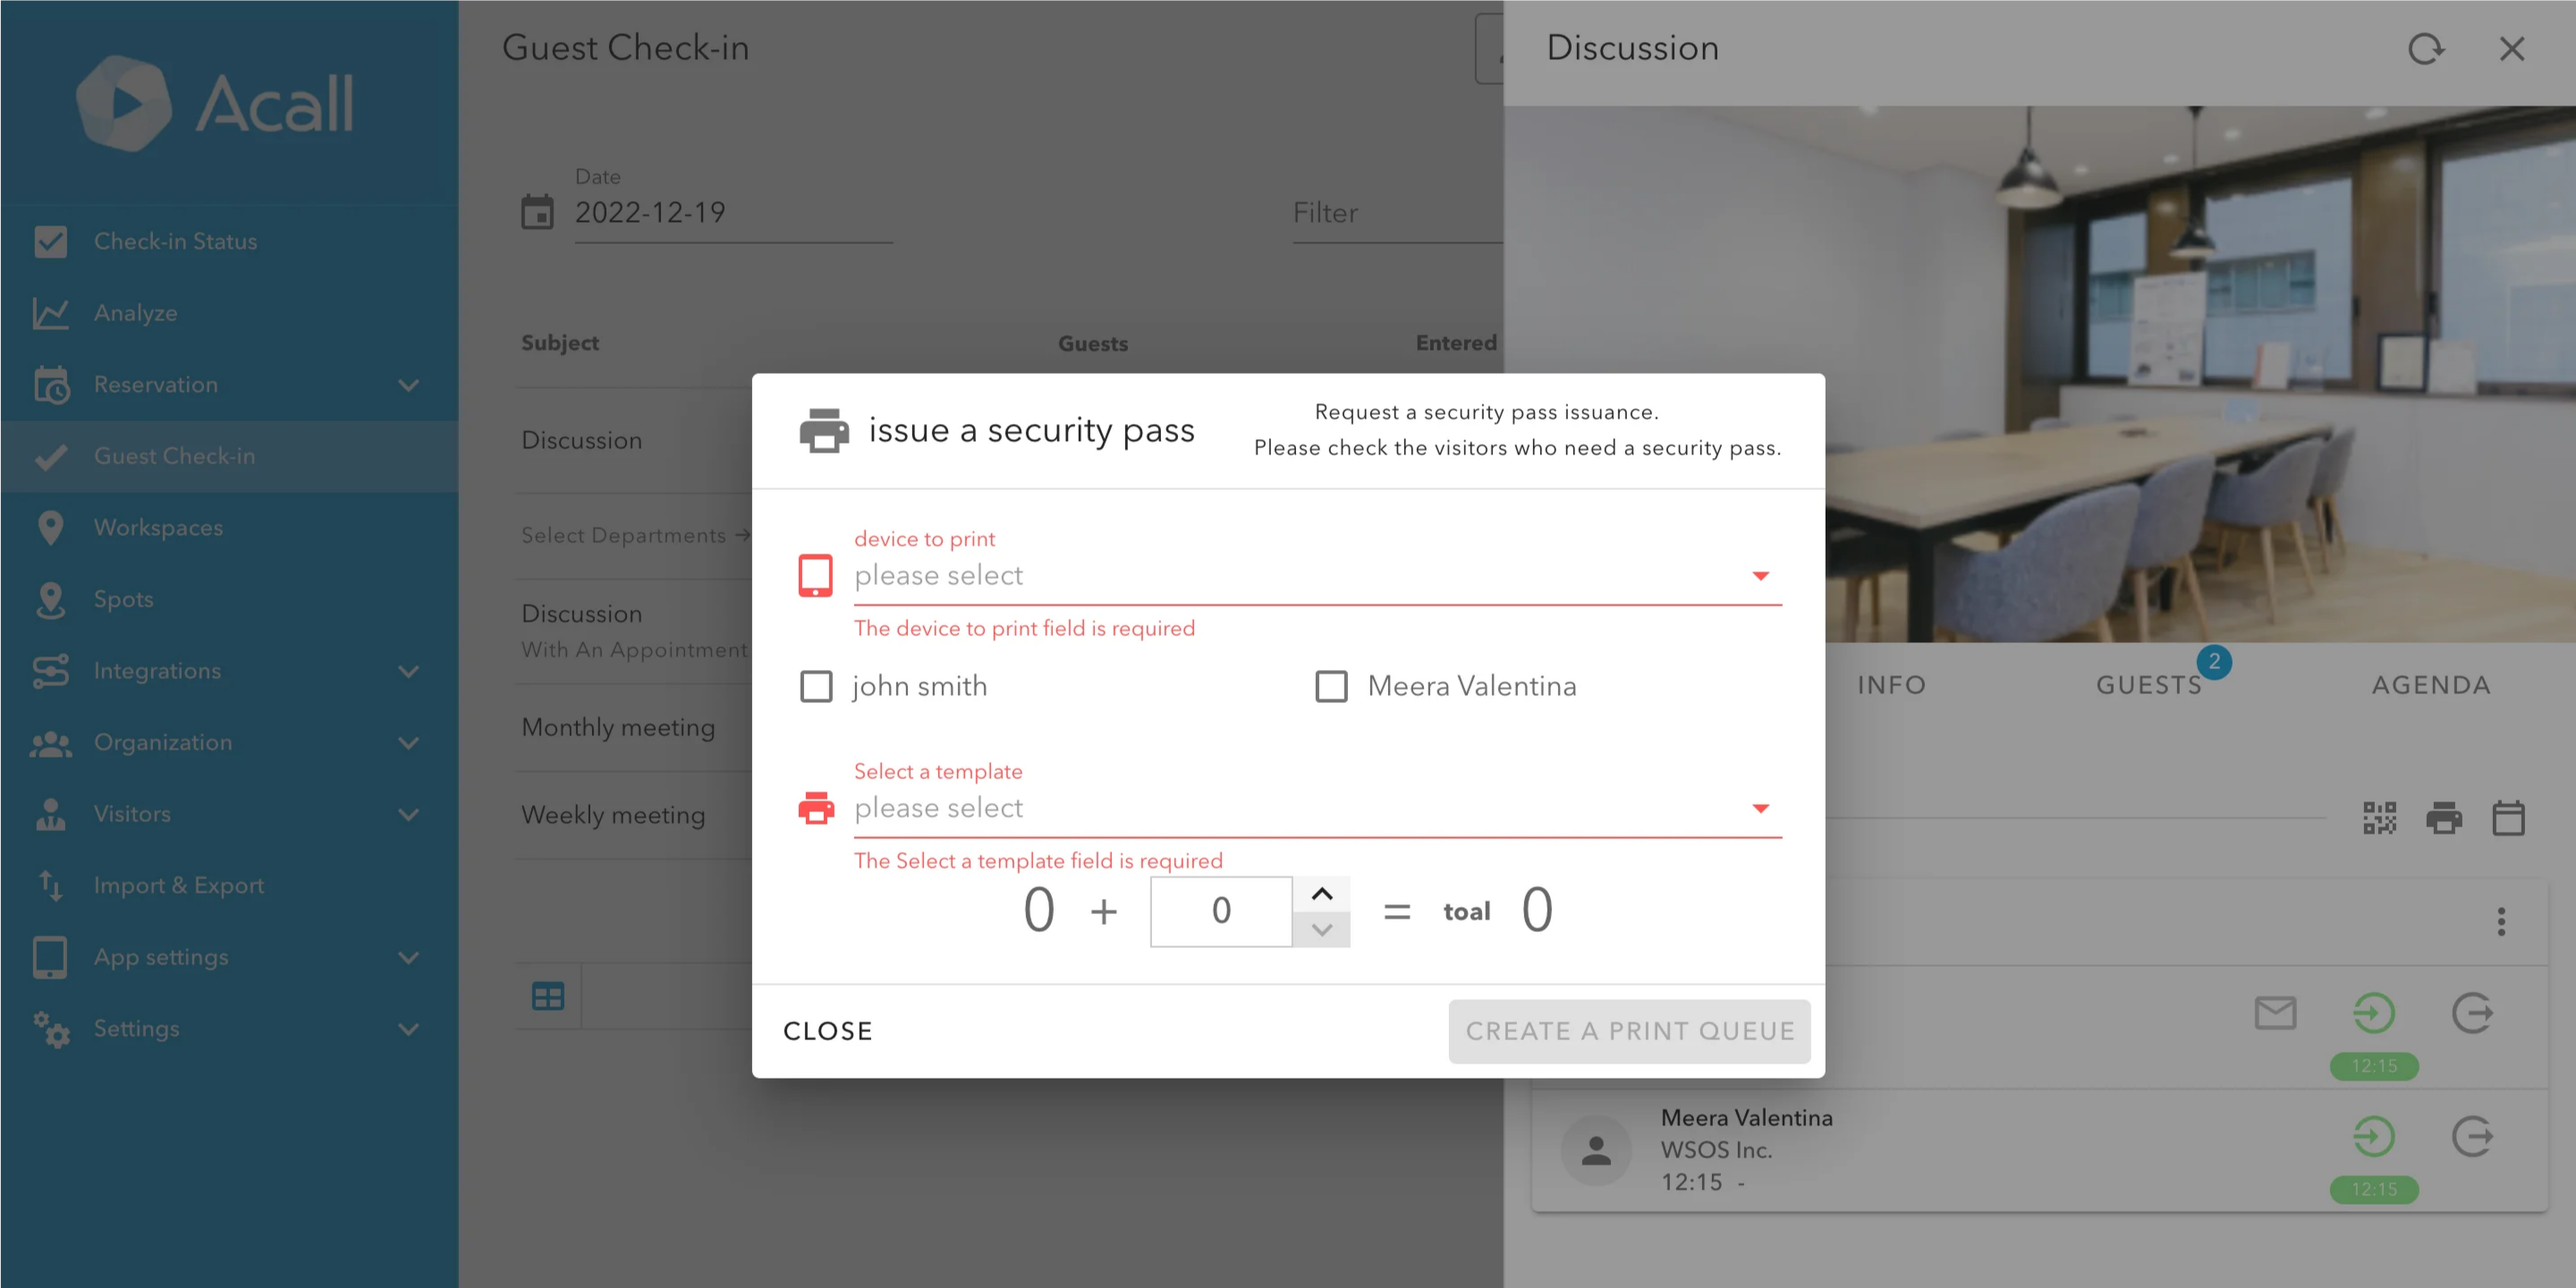
Print admission card
You can print admission card for the guests who have already been processed for entrance.
NOTE
・Admission card setting is required in advance.
Please refer to [Print Admission Card / Sheet].
Click printer icon.
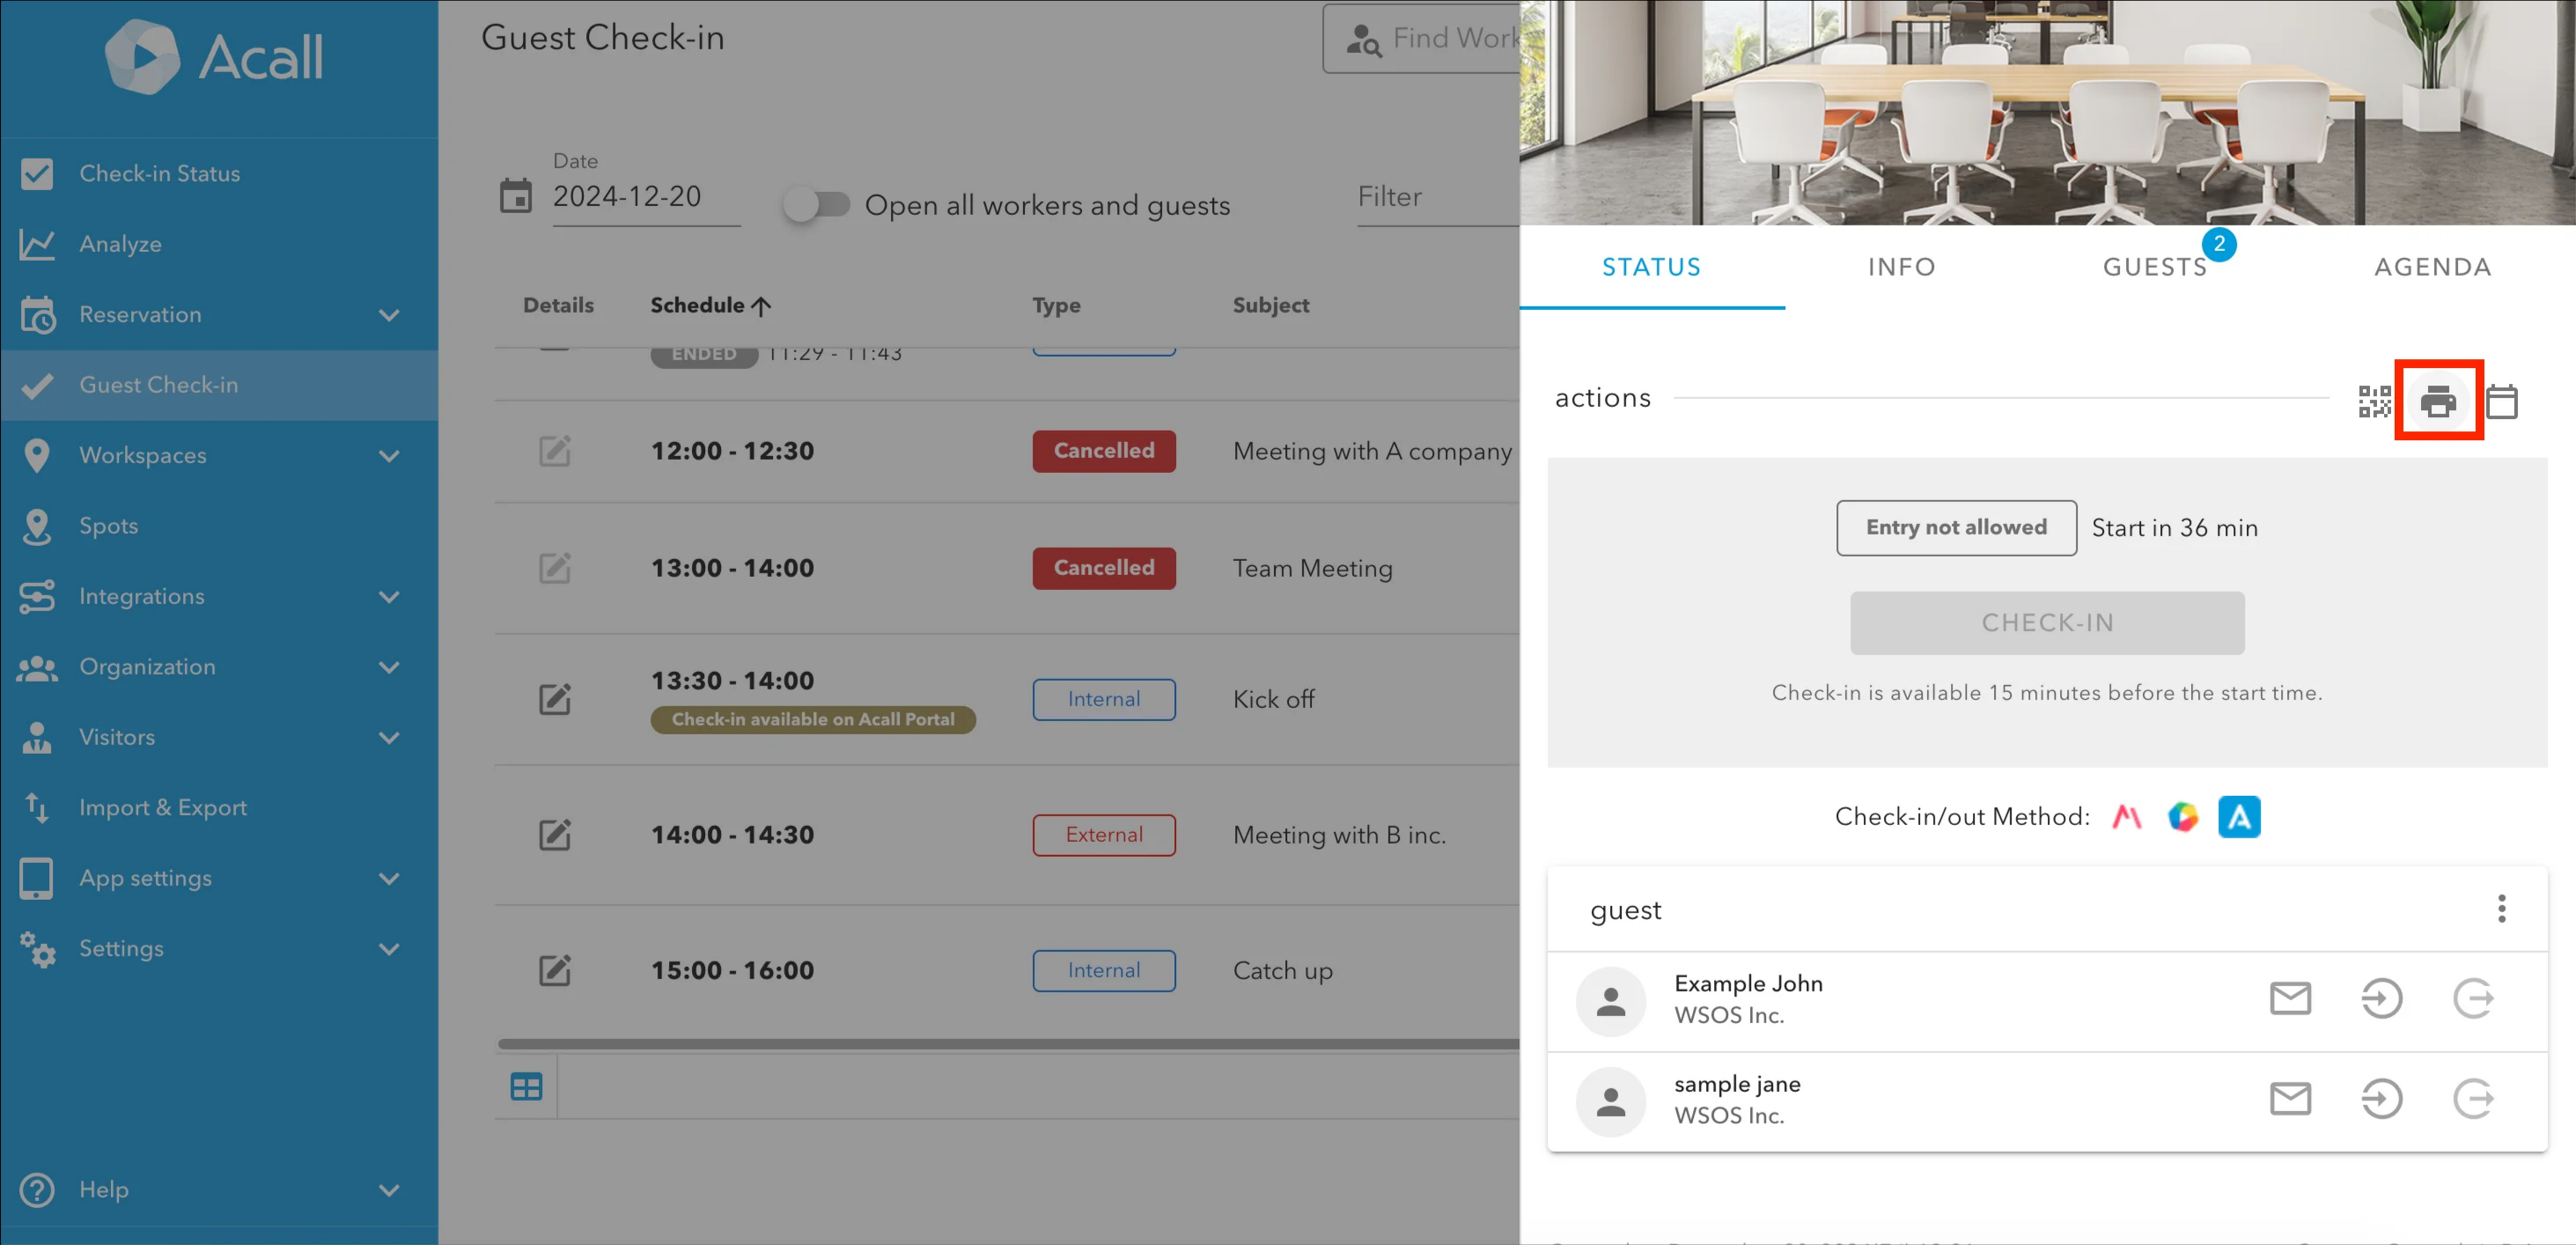
Select device, guests and template. Click "CREATE A PRINT QUEUE".
Register entrance card
NOTE
Please refer to [Use Borrowing Function for Admission Card] for more information about entrance card lending feature.
This feature needs to be set up on Acall side. In case you want to use this feature, please contact us.
Click the IC card icon to register.
Download and send iCalender(ics) file
NOTE
・External appointments and no appointment only.
・Administrators need to enable this feature in advance.
 Click [Settings] > [Company setting] in the side menu on Acall Portal
 and turn on [Generate iCalendar(ics)File] toggle.
Click the calendar icon and download iCalendar(ics) file.
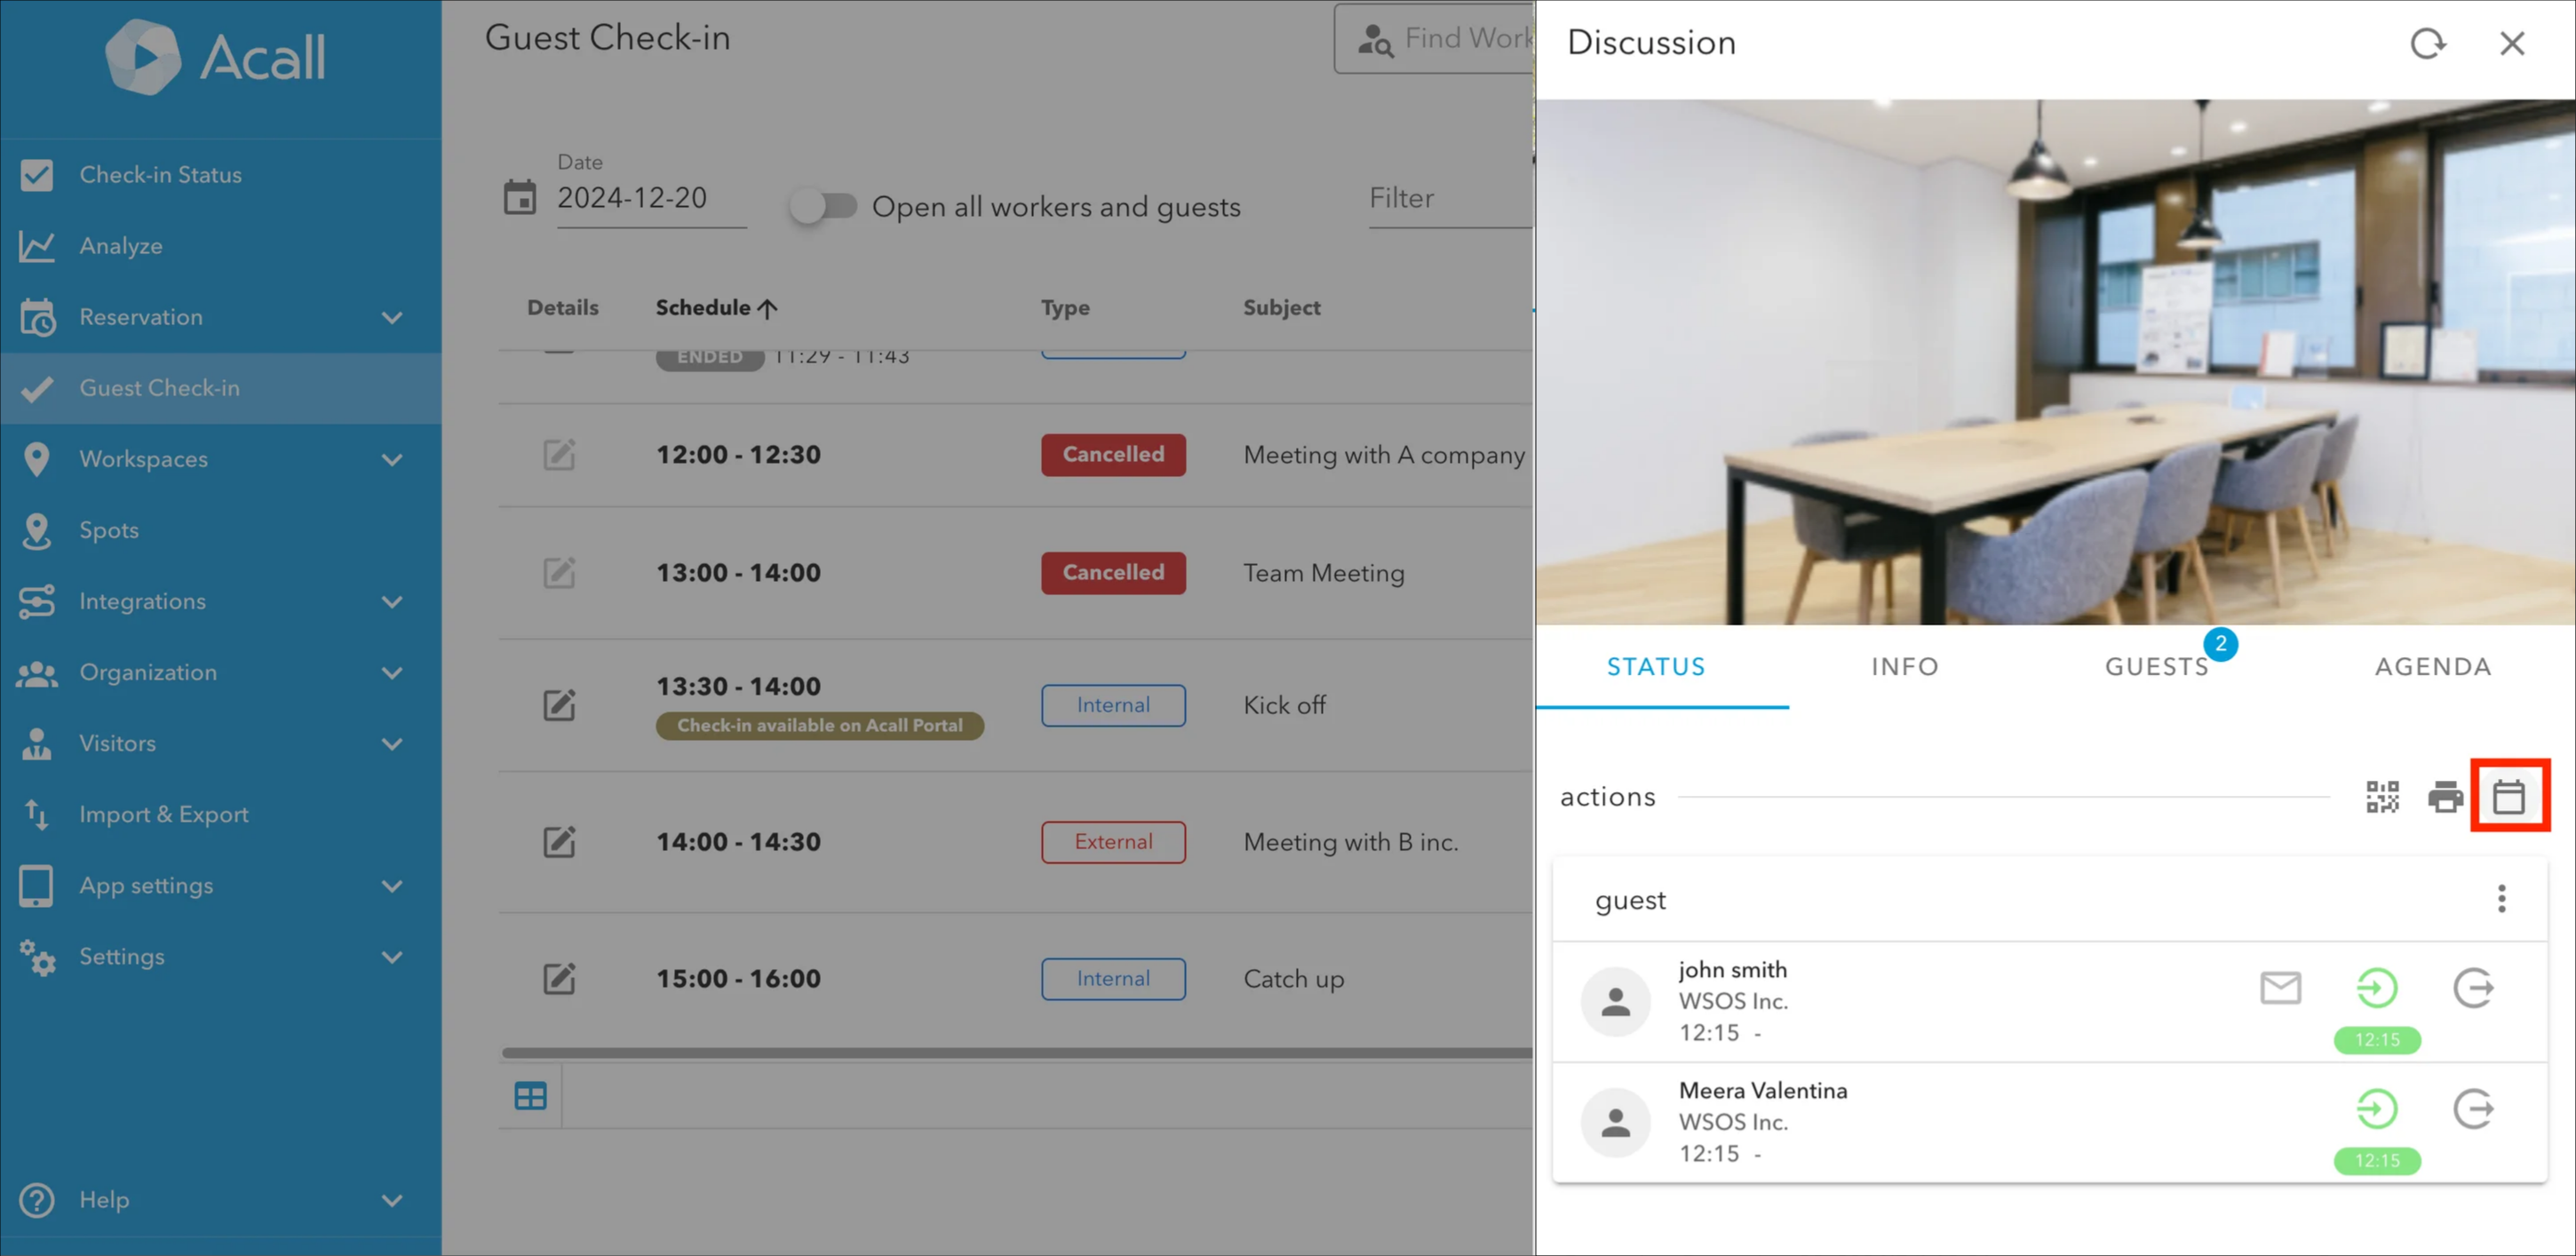
NOTE
When this feature is enabled,  iCalendar(ics) file will be automatically attached to the invitation email.
Comments
0 comments
Article is closed for comments.