Contents
This page describes how to set up to use the provisioning function.
💡 Note
Kindly note that the contents, screen captures and the order of steps on this manual may differ if Okta changes the specifications. You may cross-check the instructions from Okta.
Set up Provisioning
Contact Acall to Issue A Secret Token
Contact Acall via contact form to issue a secret token. Acall will come back to you within 5 working days.
Add SCIM App
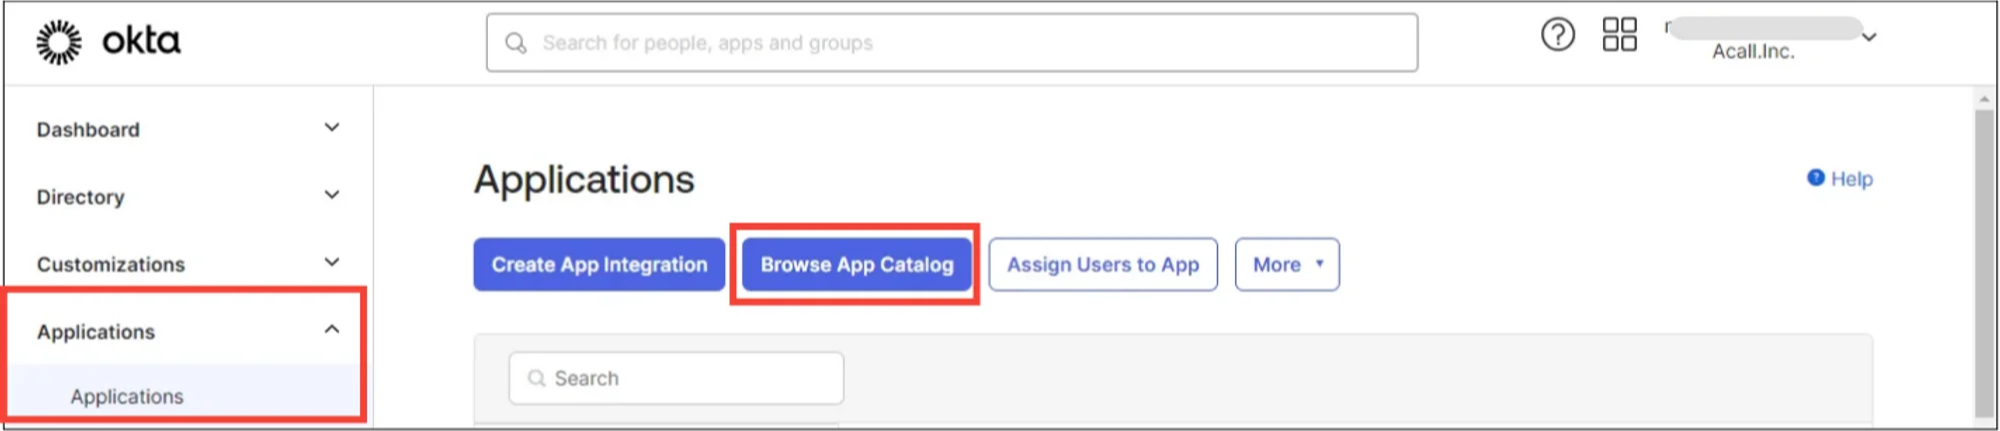
Click [Applications] > [Applications] in the menu bar and click [Browse App Catalog] on the Okta admin console.
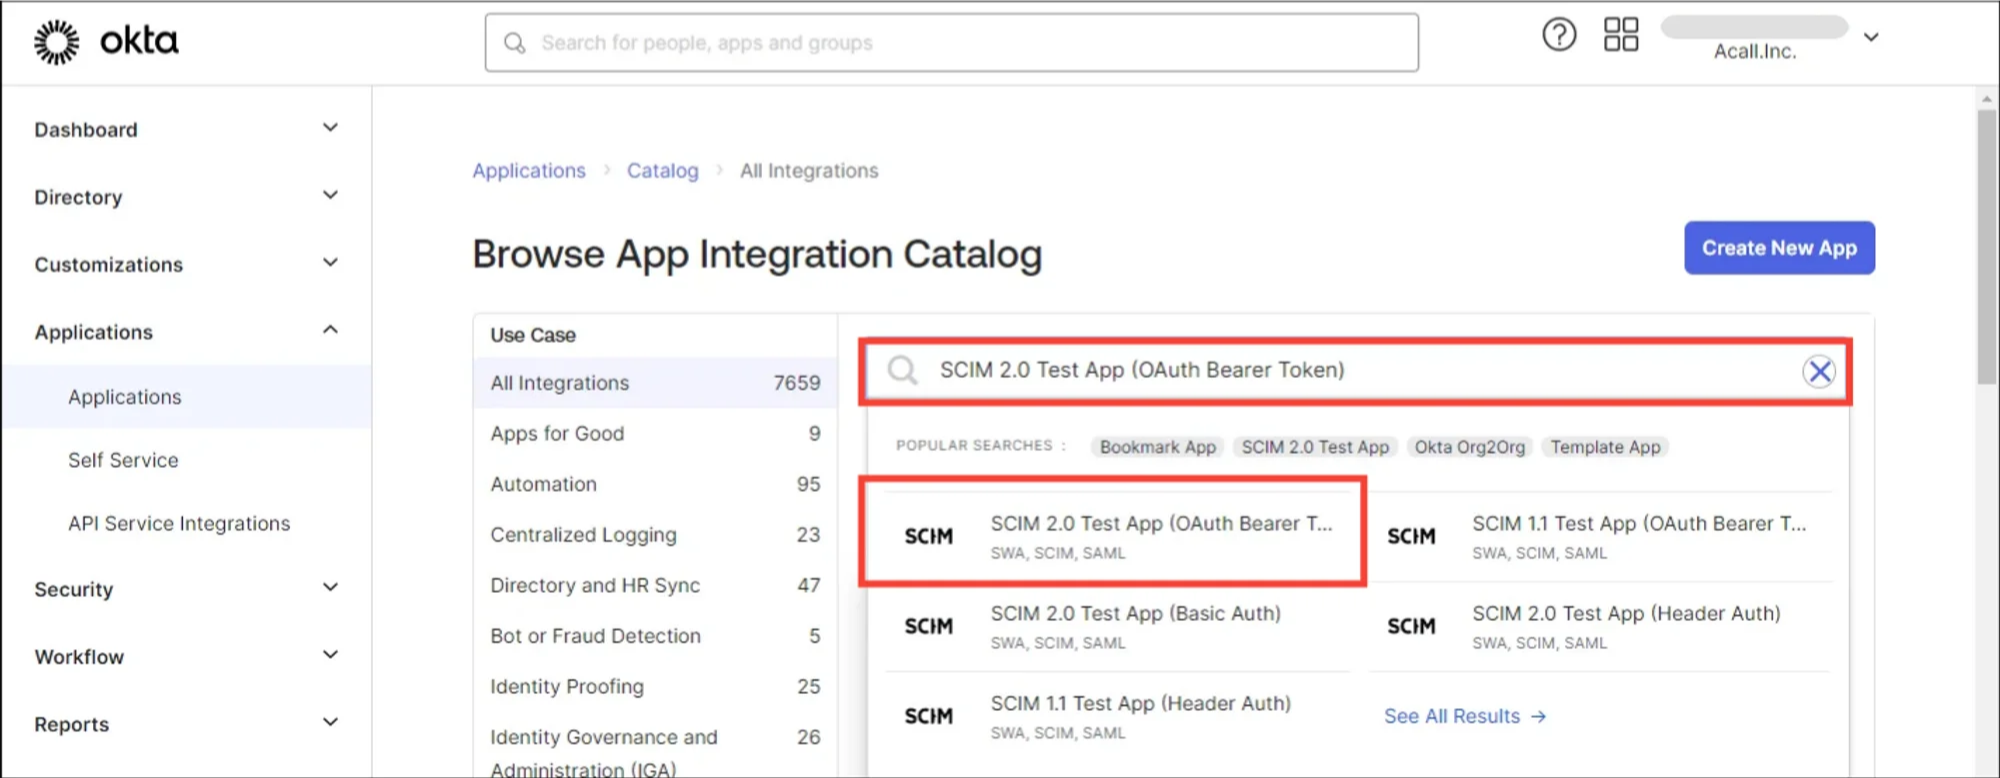
Search “SCIM 2.0 Test App (OAuth Bearer Token)” and select.
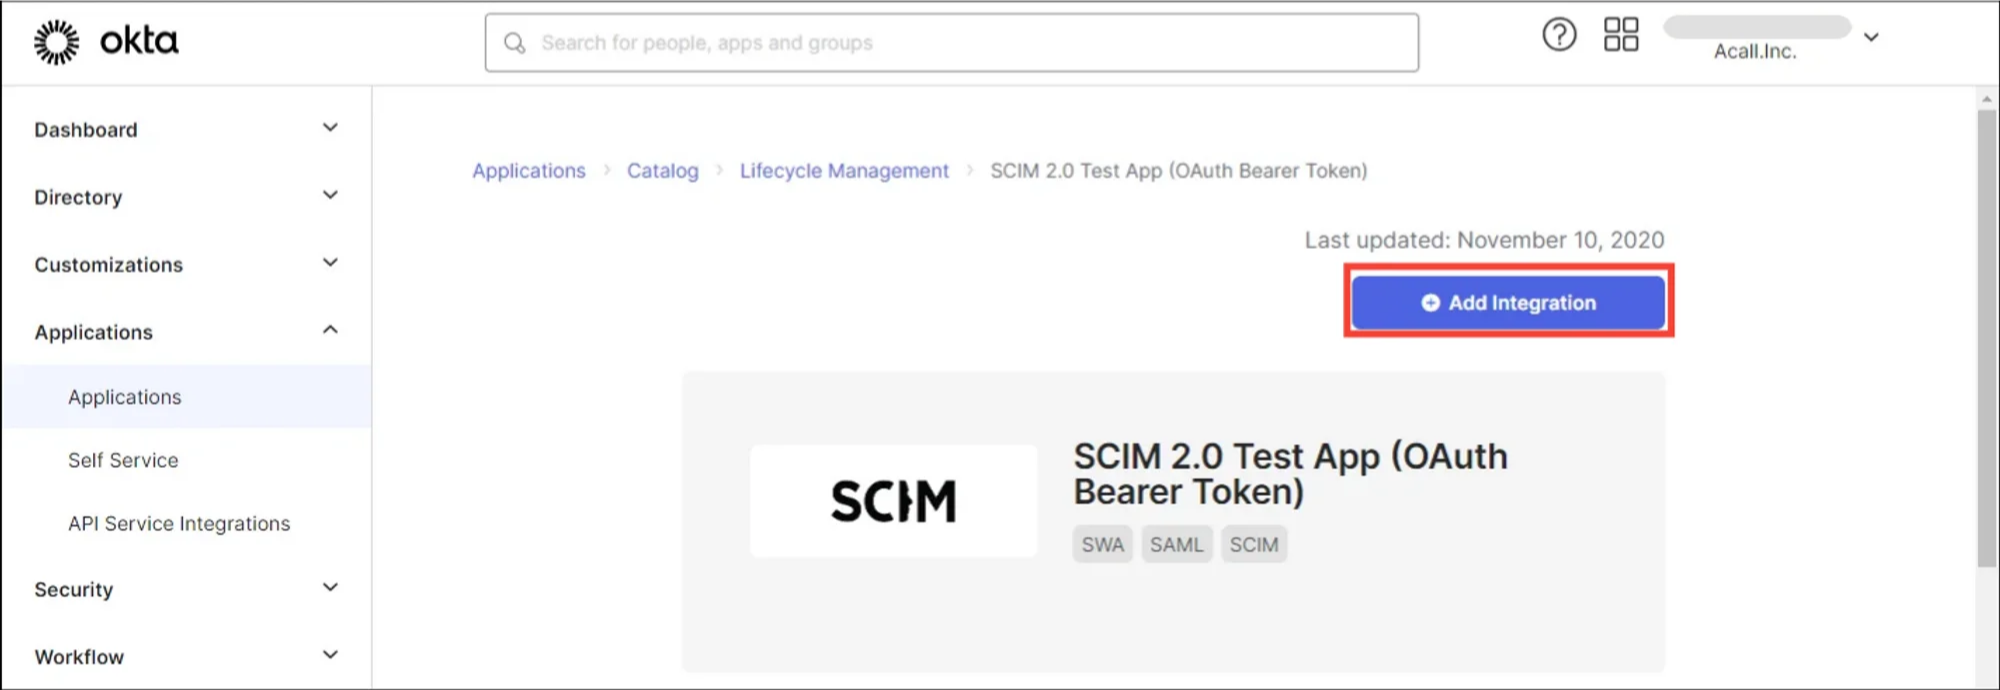
Click [Add Integration].
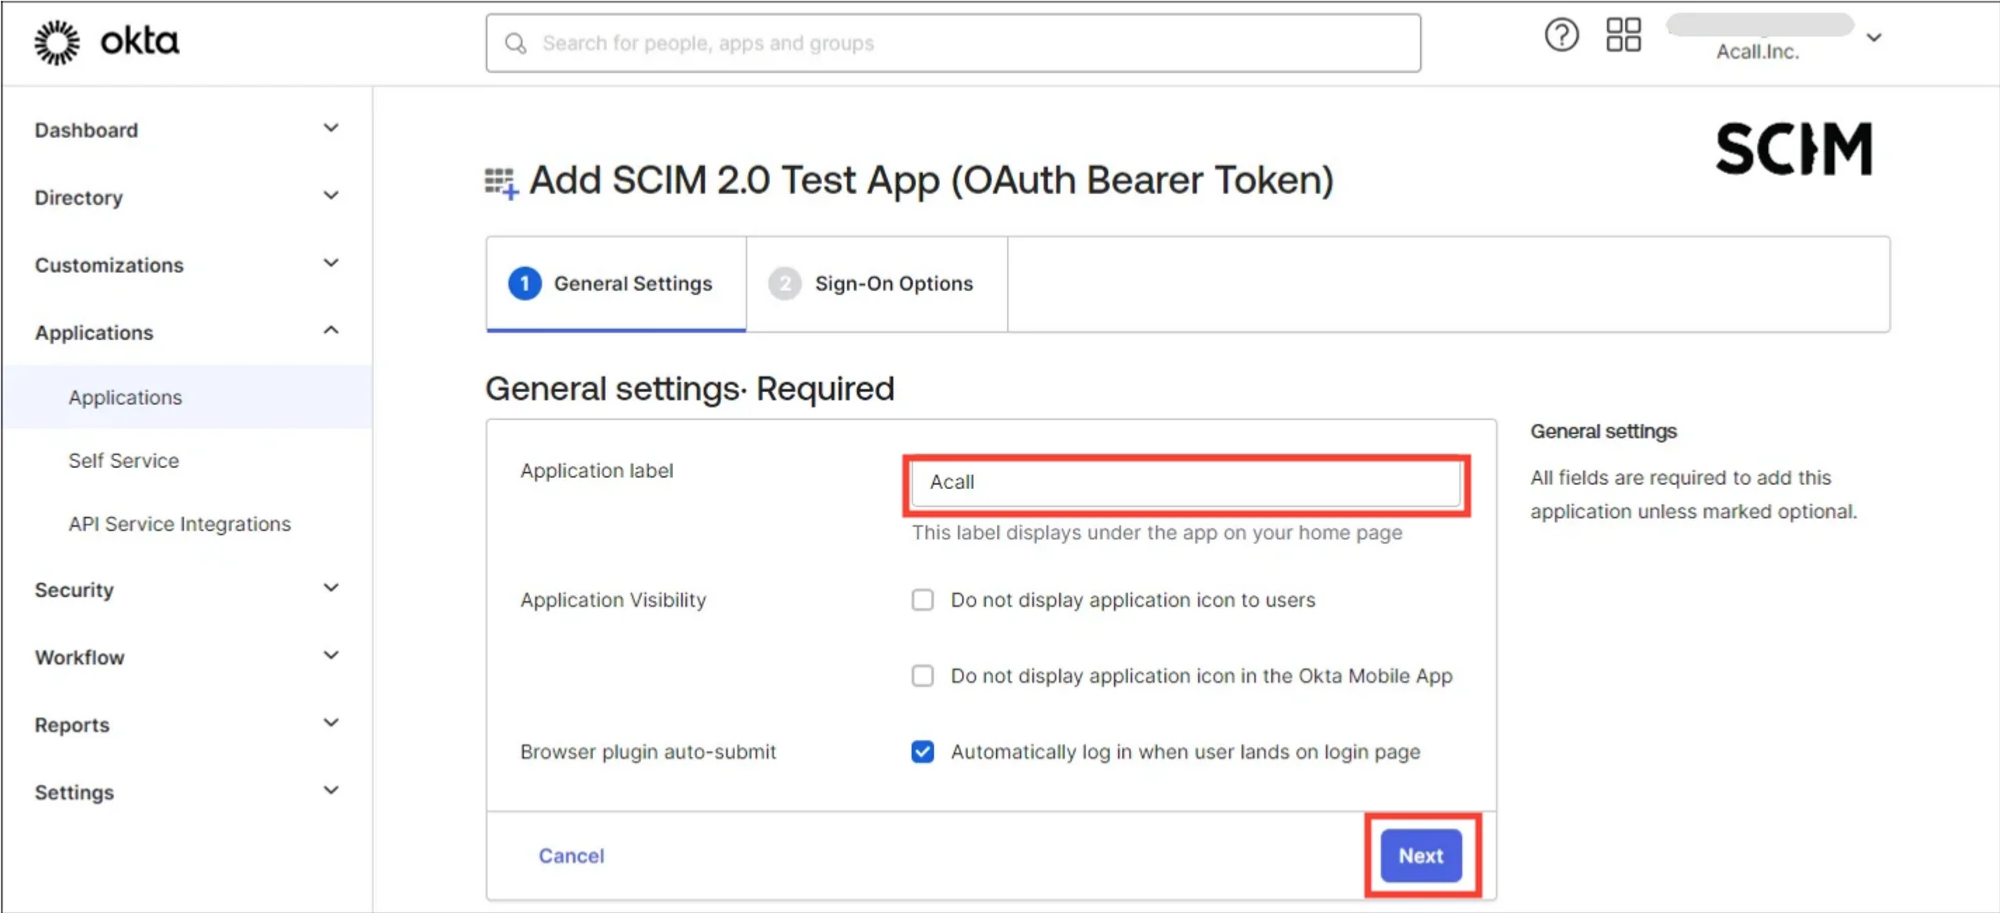
Enter any application name and click [Next], then click [Done] to complete.
Select Provisioning Option
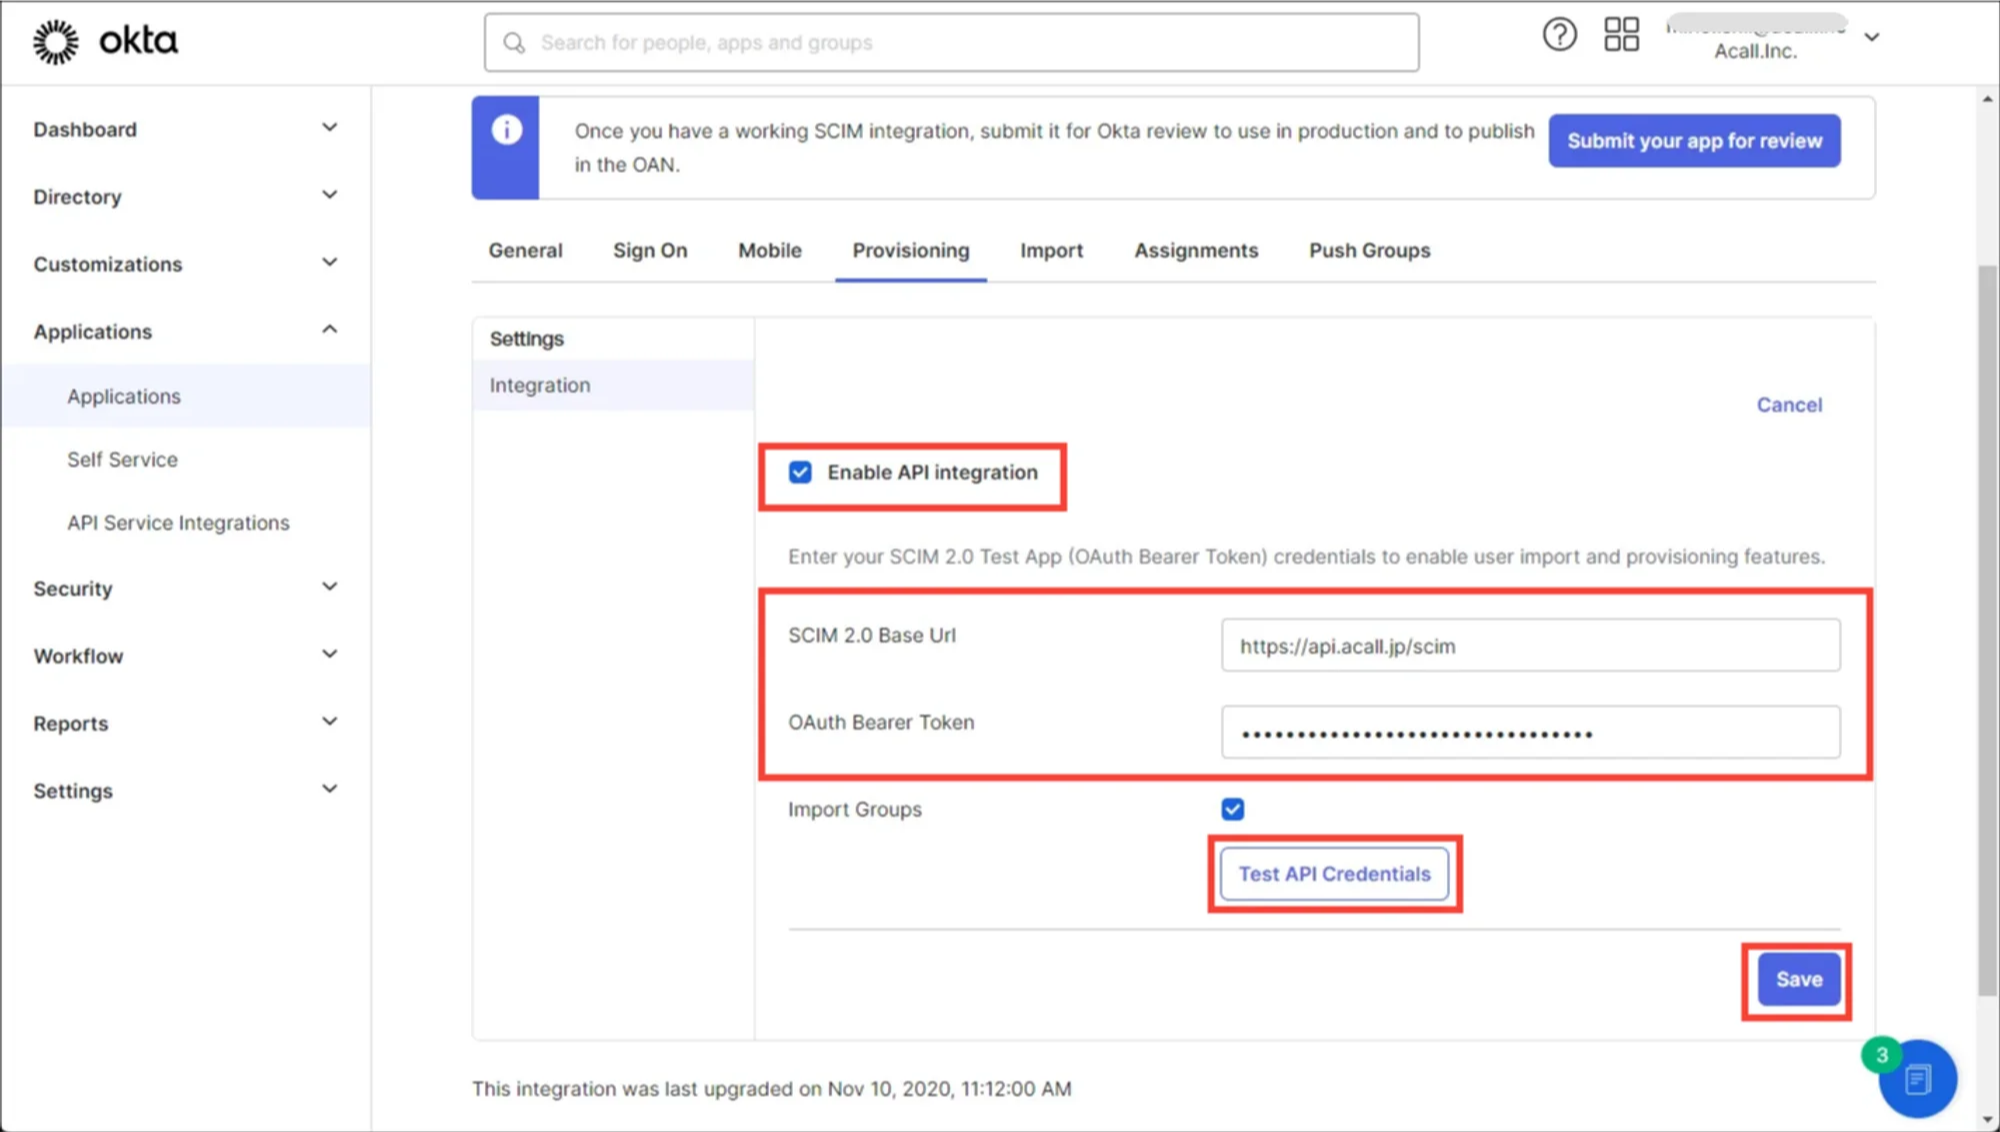
Open “Provisioning” tab for the created application and click [Configure API Integration]. Check the “Enable API Integration” box.
Enter the following information and click [Test API Credentials] to check the connection.
If there are no errors, click [Save].
| Items | Values |
|---|---|
| SCIM 2.0 Base Url |
*Do not put / at the end of the URL. |
| OAuth Bearer Token | Secret Token (Issued by Acall) |
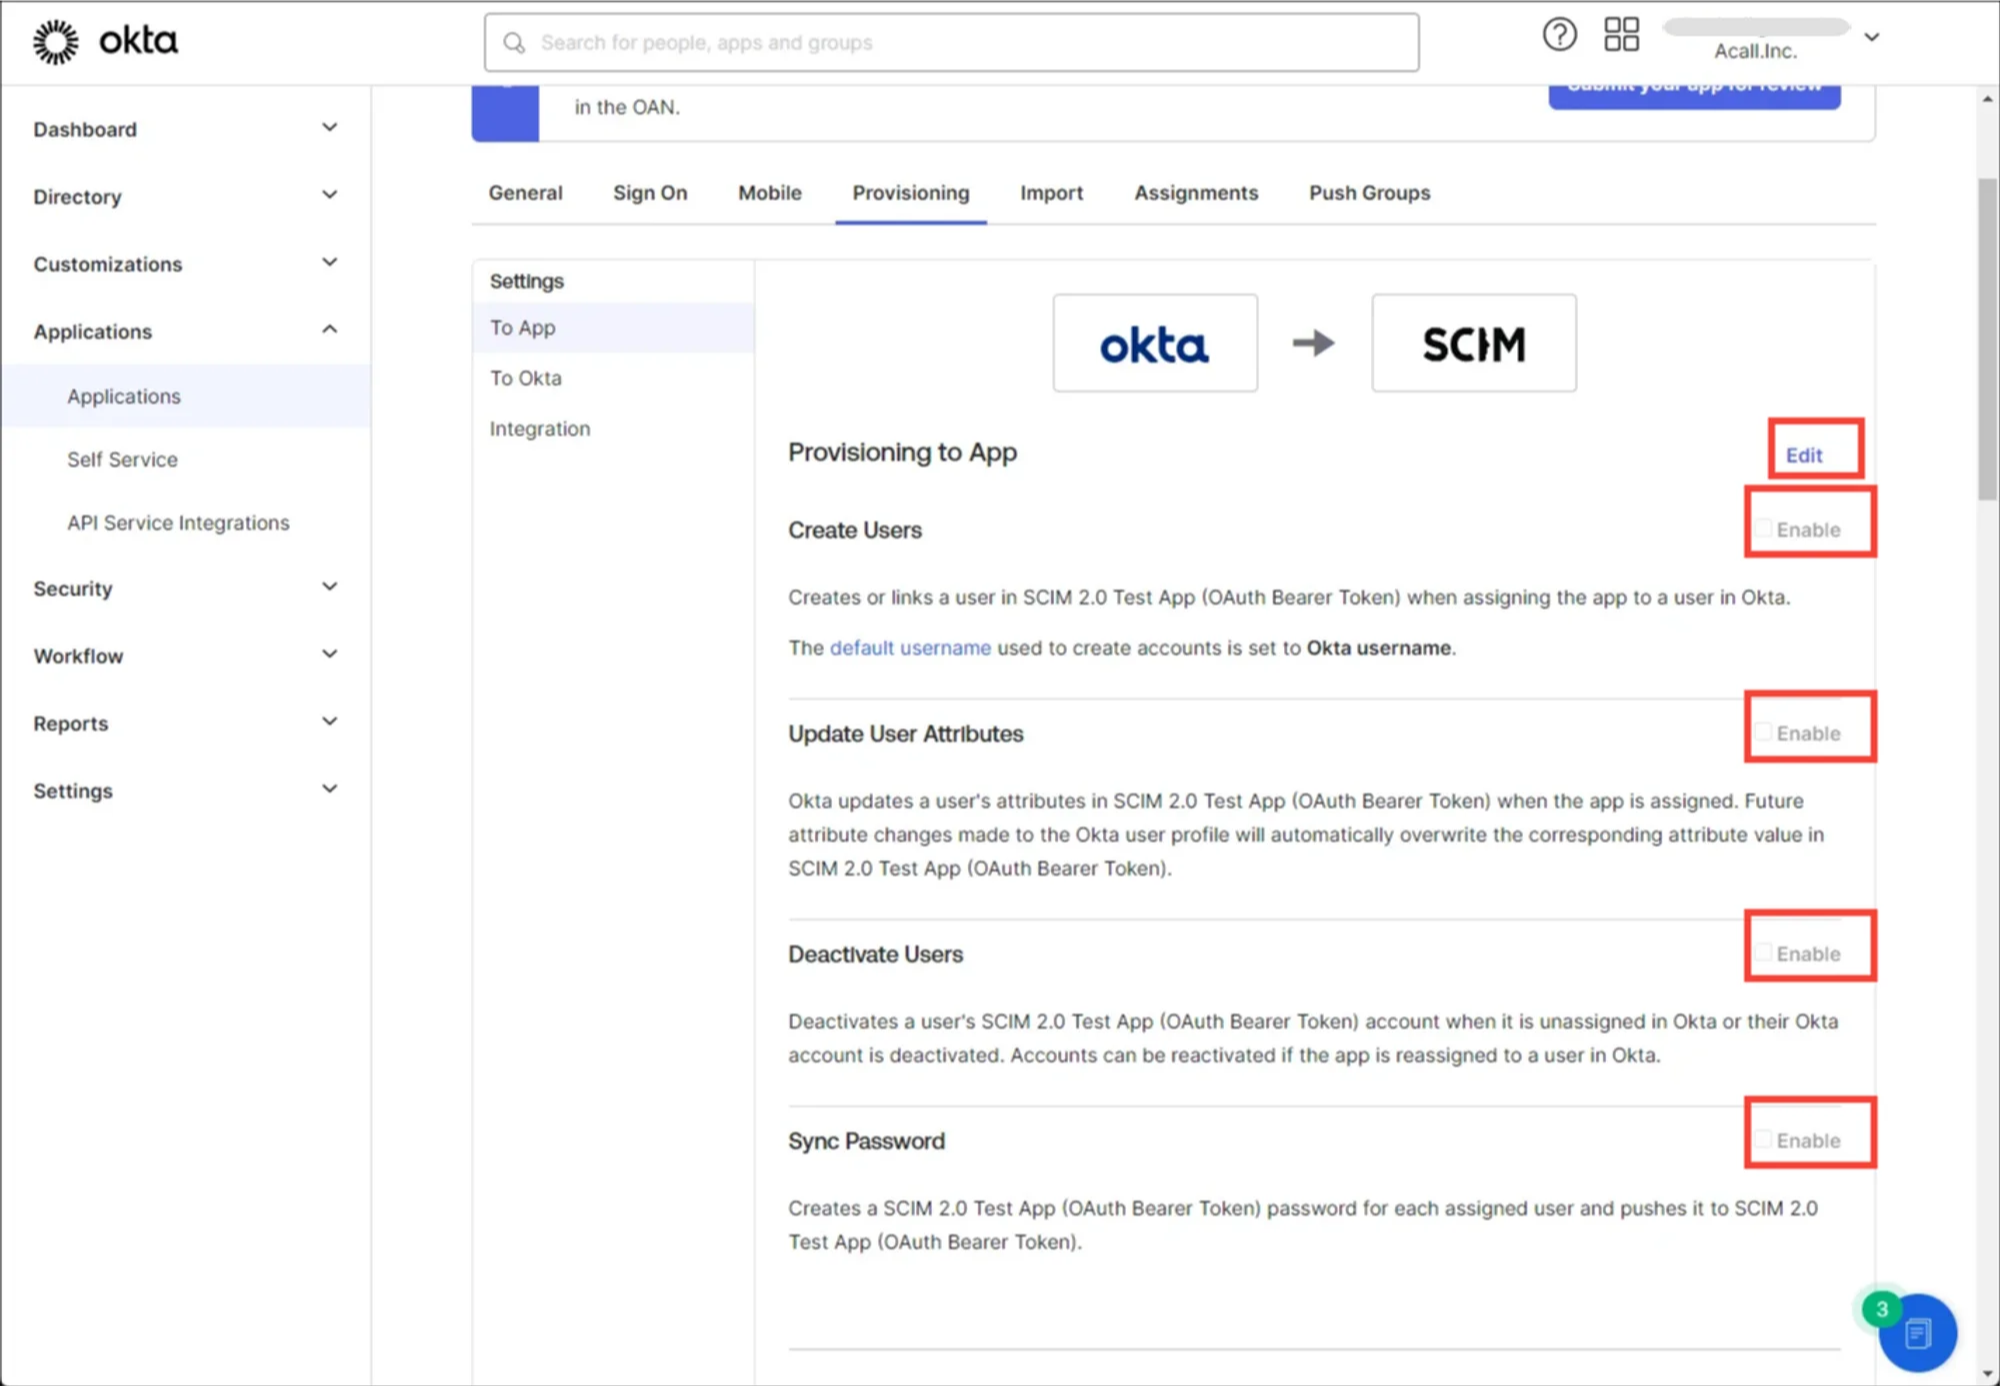
Click [Edit] and check all the boxes then save.
Add Attribute
Click [Directory] > [Profile Editor] in the menu bar and select the application for Acall provisioning.
Delete “roles” attribute by clicking [x] button in “Profile Editor” screen.
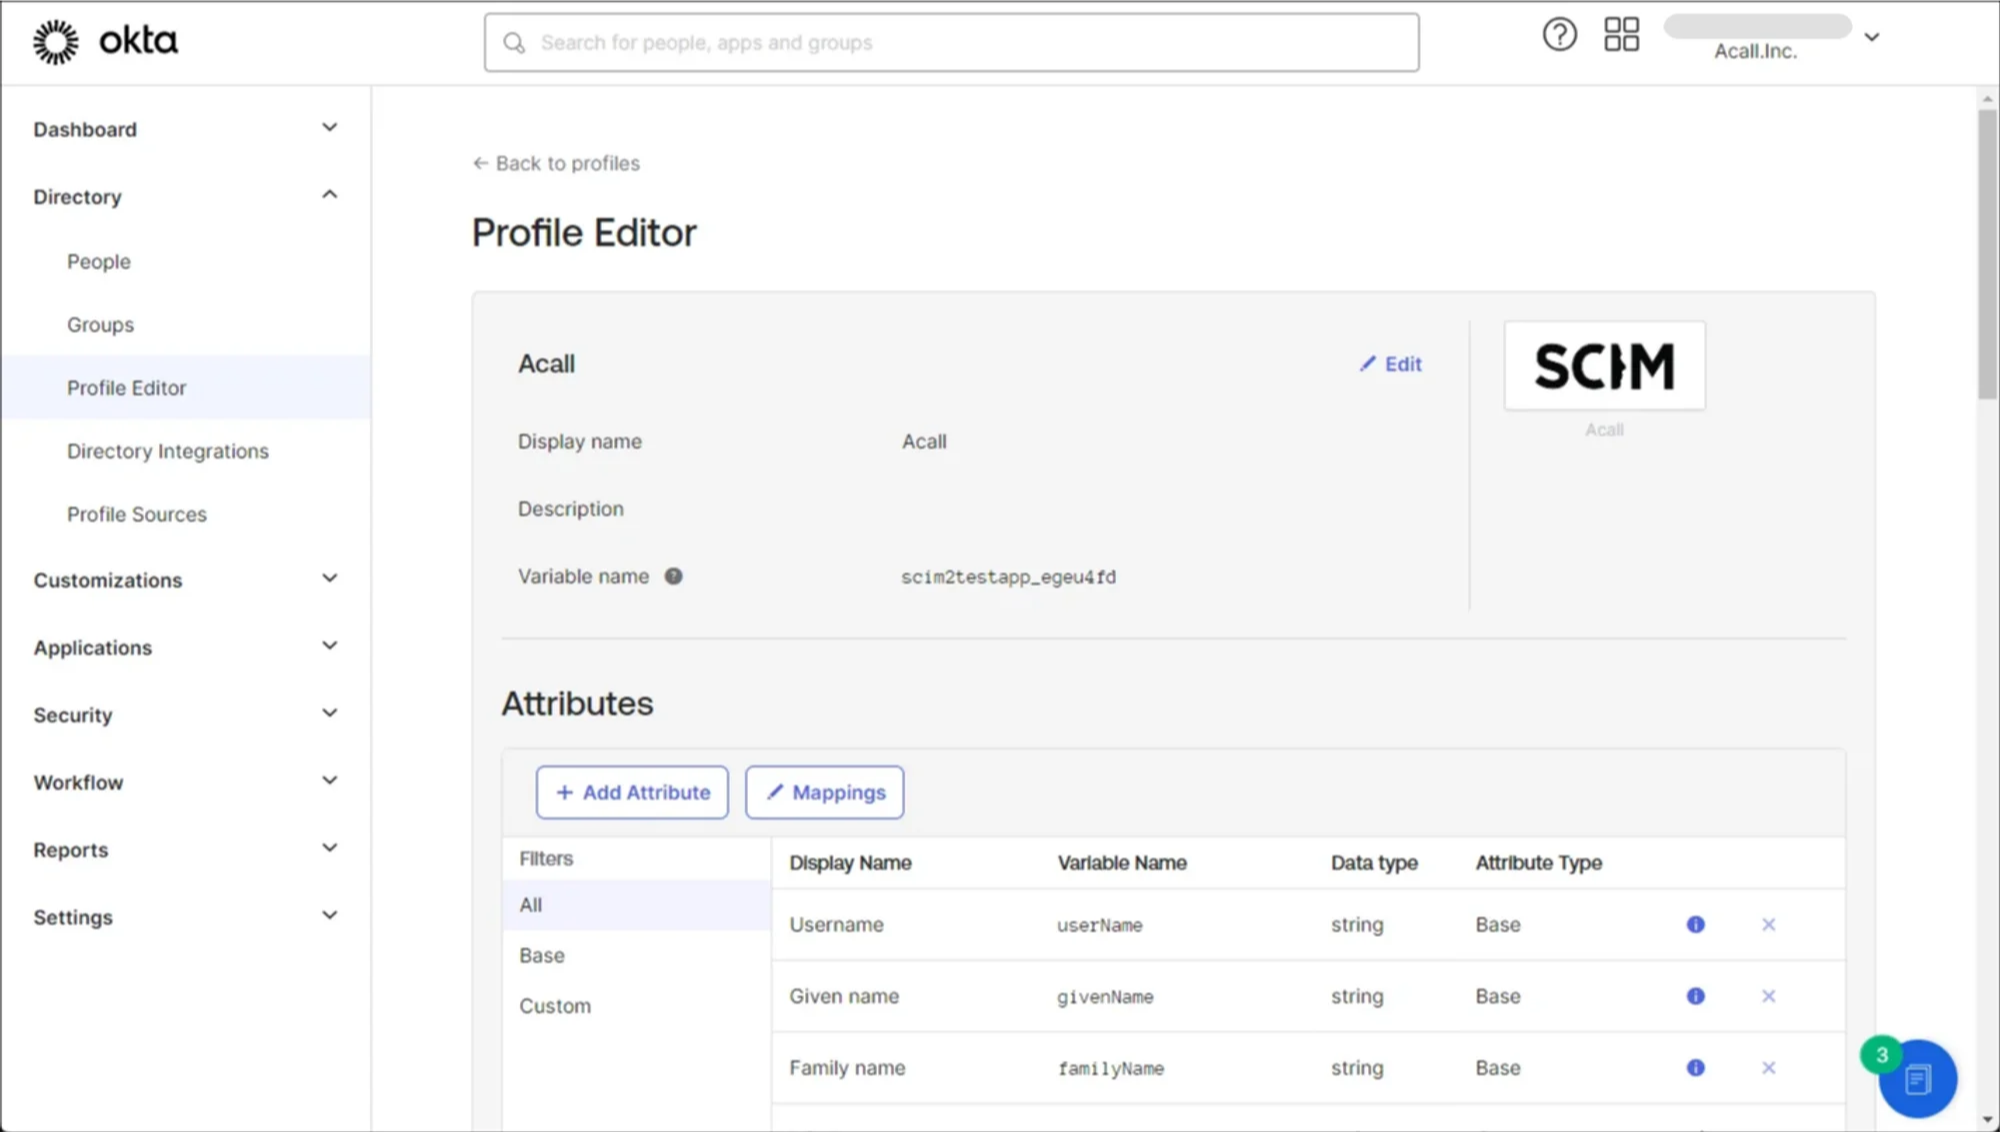

Click [+Add Attribute] and add each attribute as follows .
⚠️ Please [ Save ] and register one item at a time, as continued registration may fail.
💡
・ All”Data type” should be set to “string”.
・ Check “Personal” for all “Attribute Type”
・Remain other items as default values.
| Display name | Variable name | External name | External namespace |
|---|---|---|---|
| Primary role | primary_role | roles.^[primary=='true'].value | urn:ietf:params:scim:schemas:core:2.0:User |
| Tel to Call Number | tel_to_call_numbers | phoneNumbers.^[type=='sms'].value | urn:ietf:params:scim:schemas:core:2.0:User |
| Extension Number | extension_number | phoneNumbers.^[type=='work'].value | urn:ietf:params:scim:schemas:core:2.0:User |
| SMS Number | sms_number | phoneNumbers.^[type=='mobile'].value | urn:ietf:params:scim:schemas:core:2.0:User |
| Slack Account | slack_account | accounts.^[type=='slack'].value | urn:ietf:params:scim:schemas:core:2.0:User |
| Google Account | google_account | accounts.^[type=='google'].value | urn:ietf:params:scim:schemas:core:2.0:User |
| familyNamePhonetic | family_name_phonetic | name.familyNamePhonetic | urn:ietf:params:scim:schemas:extension:wsos:2.0:User |
| givenNamePhonetic | given_name_phonetic | name.givenNamePhonetic | urn:ietf:params:scim:schemas:extension:wsos:2.0:User |
| Additional information | additional_information | additionalInformation | urn:ietf:params:scim:schemas:extension:wsos:2.0:User |
Set up Mapping
Click [Applications] > [Applications] in the menu bar and select the application for Acall provisioning.
Open [Provisioning] tab and set up mapping as follows in “To App” screen.
Attributes that are not in the table need to be deleted by clicking the [×] button.
| Attribute | Attribute value1 | Attribute value2 | Apply on |
|---|---|---|---|
| Username | - | - | - |
| Given name | Map from Okta Profile | firstName | Create and update |
| Family name | Map from Okta Profile | lastName | Create and update |
| Display name | Expression | user.firstName + + user.lastName | Create and update |
| Primary role | Expression | String.stringSwitch(user.email, "general", "admin@ex.com", "admin") | Create and update |
| Tel to Call Number | Expression | user.mobilePhone == null ? null : user.mobilePhone | Create and update |
| Extension Number | Expression | user.primaryPhone == null ? null : user.primaryPhone | Create and update |
| SMS Number | Expression | user.mobilePhone == null ? null : user.mobilePhone | Create and update |
| Slack Account | Expression | user.email | Create and update |
| Google Account | Expression | user.email | Create and update |
| Additional information | Map from Okta Profile | user.userType | Create and update |
※You can set up from [Mapping] in Profile Editor.
Reference: Map Okta attributes to app attributes in the Profile Editor
Open [To Okta] screen.
Delete all attribute mapping except "Username” by clicking [x] button.
Assign App to Users
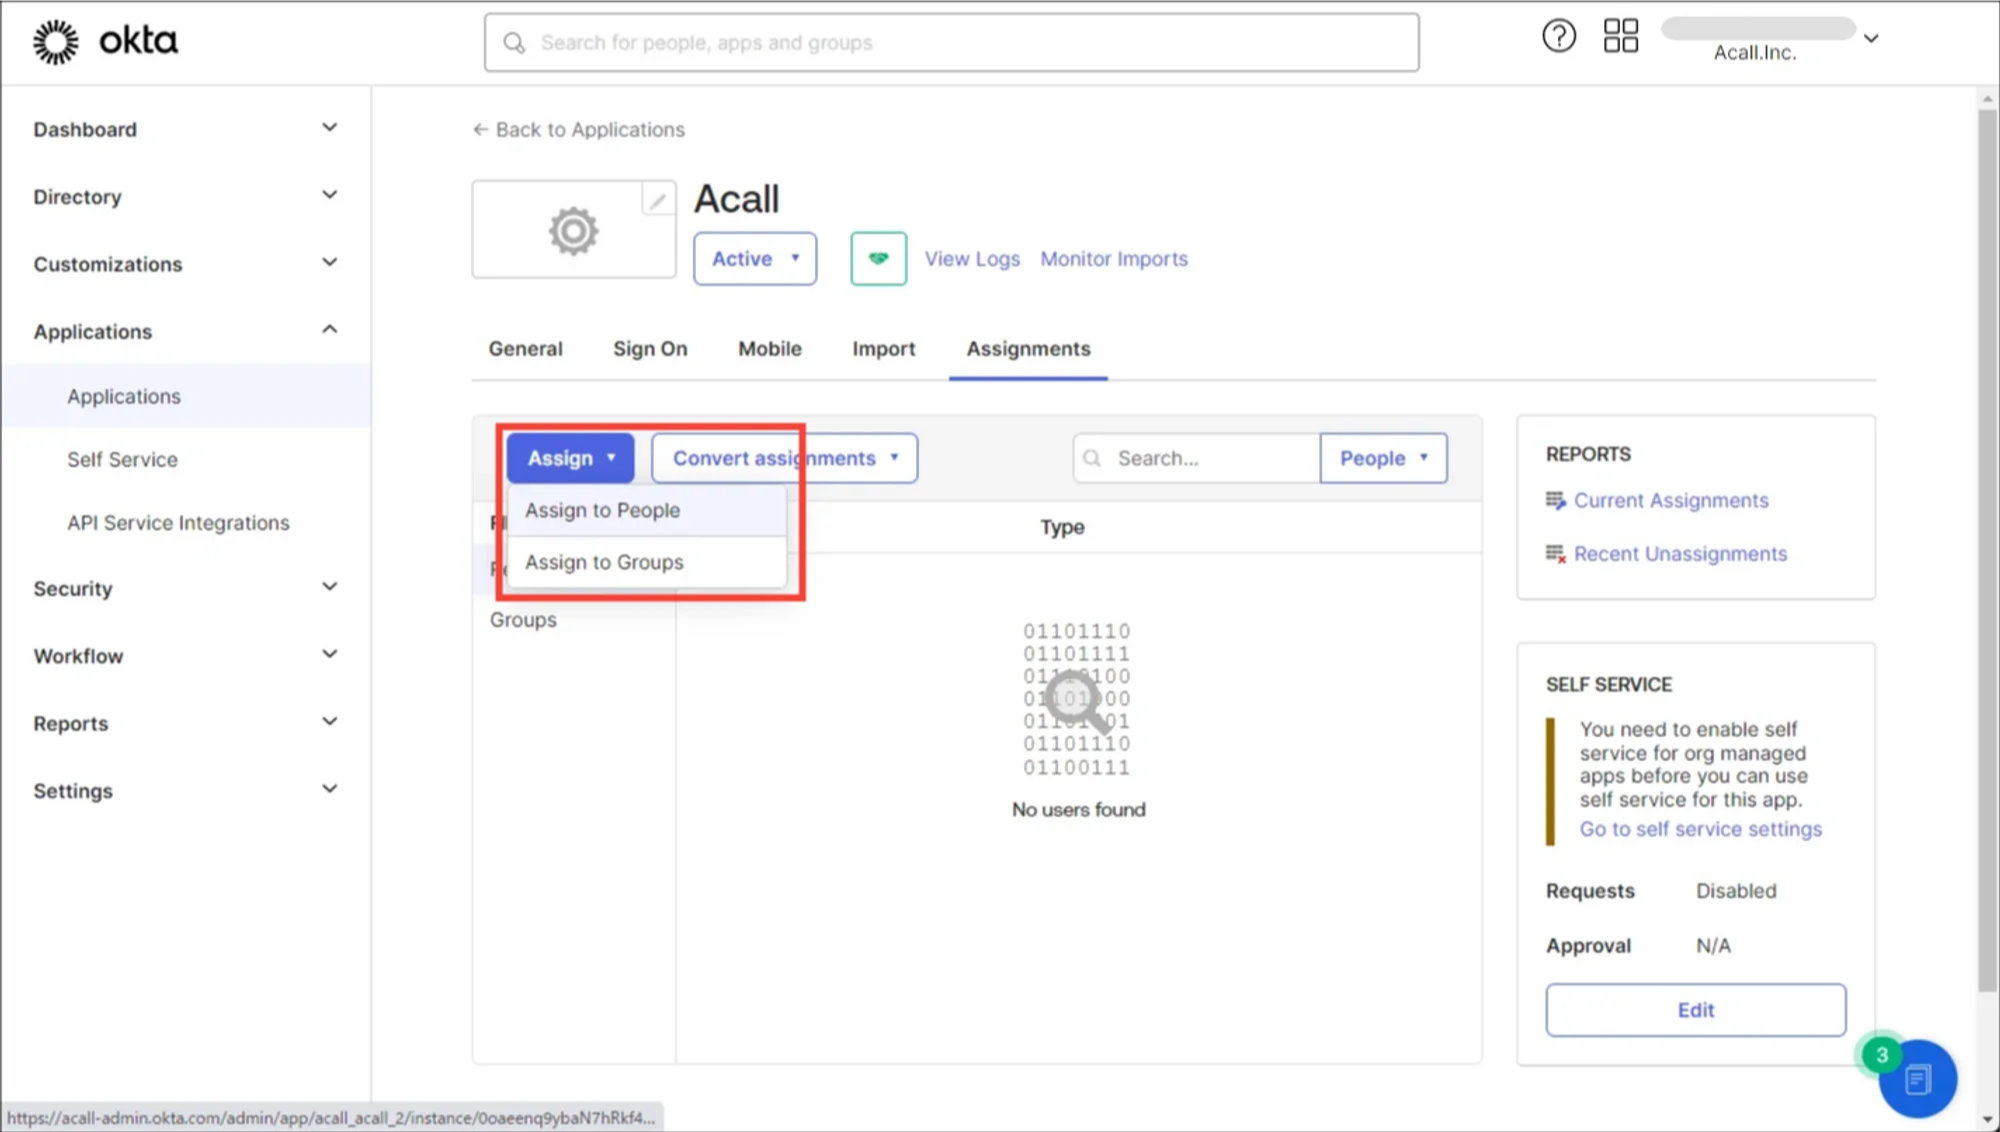
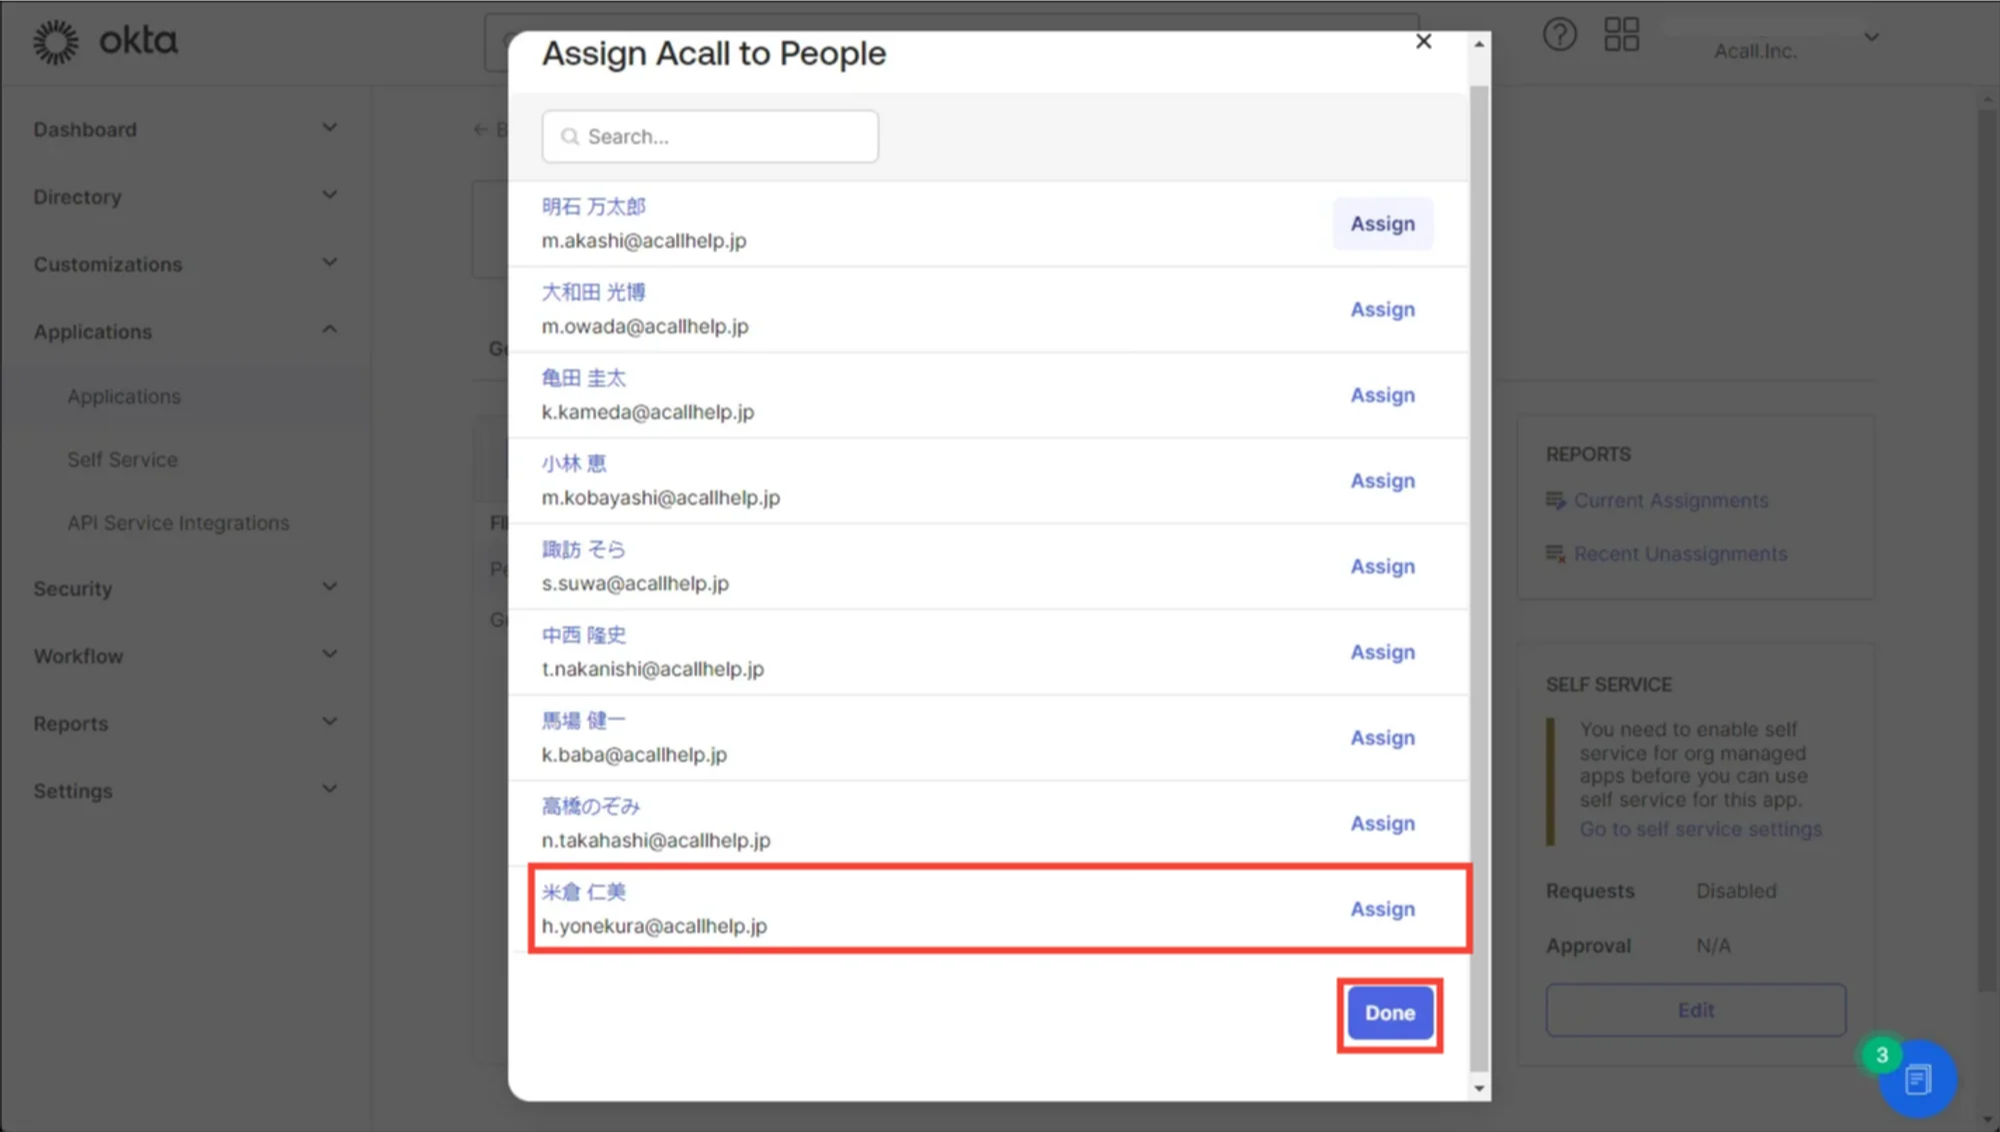
Open “Assignments” tab for the created application and click [Assign]. Select “Assign to People” or “Assign to Groups” from [Assign] pull-down.
Click [Assign] for the user or group you want to add to the application and click [Save and Go Back].
Once you confirm the added member is “Assigned”, click [Done].
After assigning, provisioning process is automatically executed.
If the user's "External Id" has a value, provisioning is completed.
※If there is no "External Id", delete the assignment and reassign it.
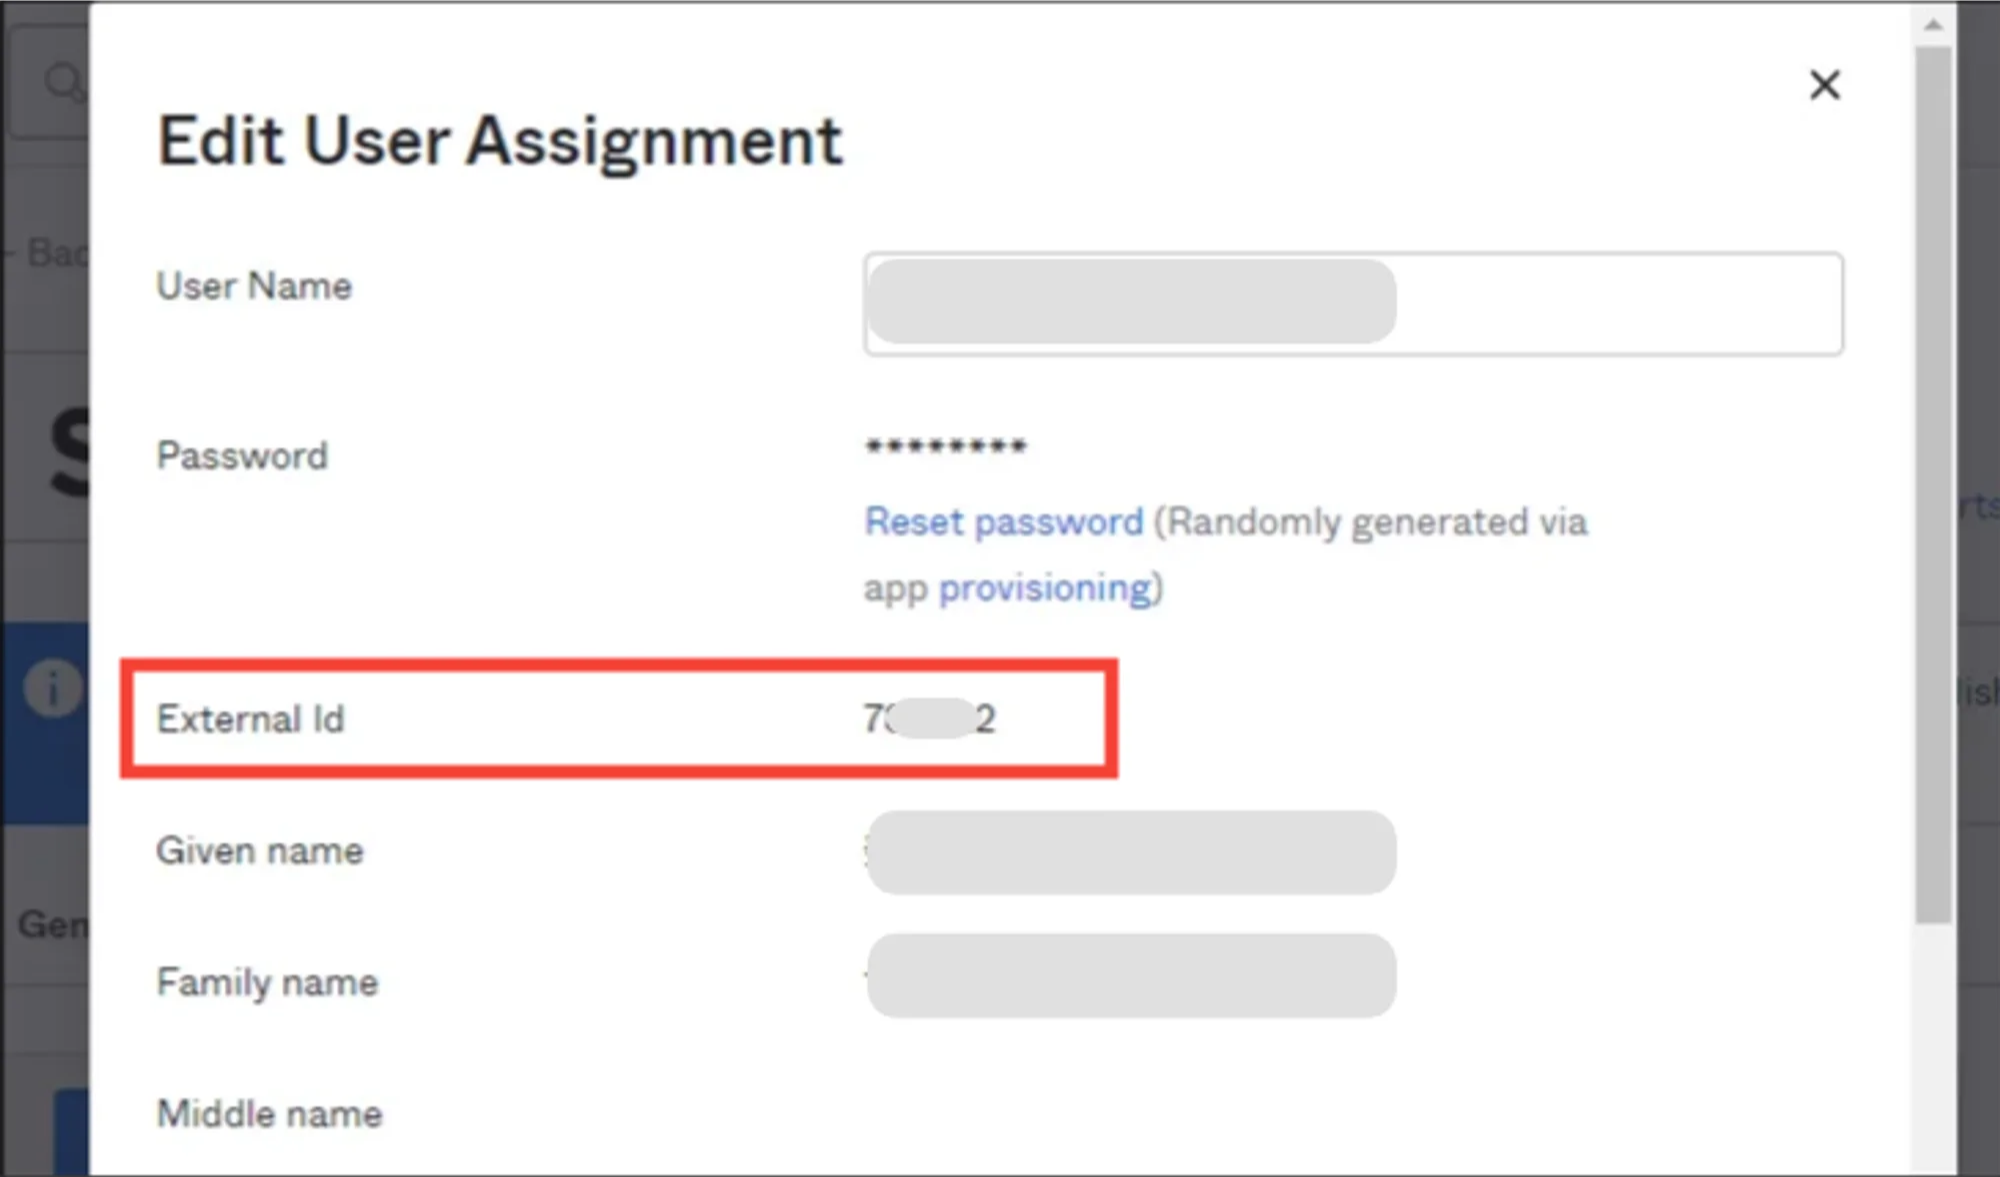
💡 Note
If there is no External Id, delete the assignment and reassign it.
Comments
0 comments
Article is closed for comments.