Contents
This page describes the steps to set up SSO on your Okta admin console.
SSO Setup workflow
Customer first prepares for the setup on Okta admin console and provides Acall with the required information for SSO configuration.
Acall will then proceed internal process, and provide customer necessary information to complete SSO setup, and the customer will complete the setup on their Okta admin console.
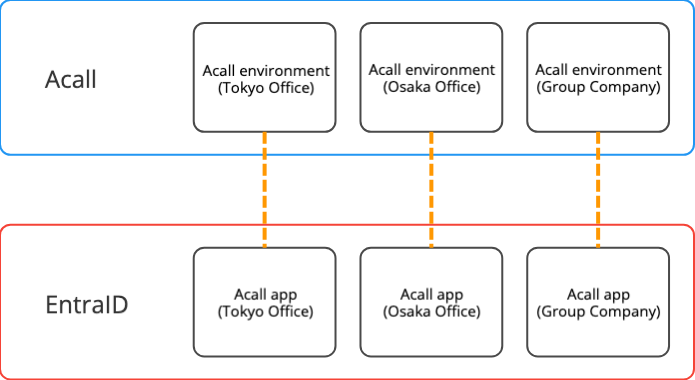
Customers using multiple Acall environments
Even when using multiple Acall environments, you can utilize the SSO feature by creating one Acall app per Acall environment on Okta.
For example, if you are using three Acall environments, such as "Tokyo Office," "Osaka Office," and "Group Company," you would create three corresponding Acall apps on Okta.
Set up SSO
⚠️ Administrator permission is needed to operate Okta admin console.
Create Acall Application
In this section, create an application on the Okta admin console.
Click [Applications] > [Applications] in the menu bar and click [Create App Integration] on the Okta admin console.

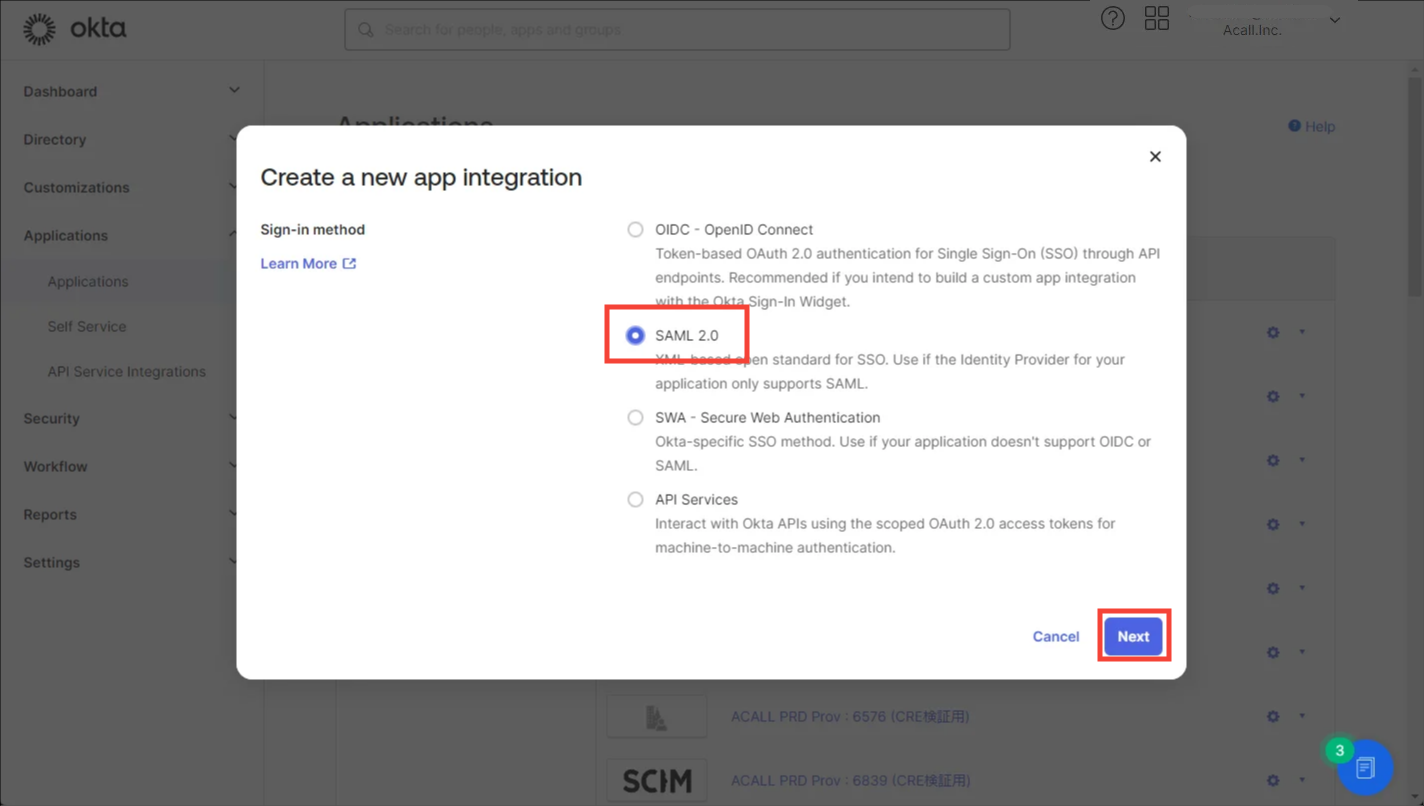
In the [Sign-in method] screen, select [SAML 2.0] and click [Next].
Click [①General Settings] tab in “Create SAML Integration” screen, enter following information and click [Next].
| Items | Required / Optional | Contents |
|---|---|---|
| App name | Required | ex) Acall |
| App logo | Optional | File format:PNG、JPG or GIF Minimum size:420x120 px |
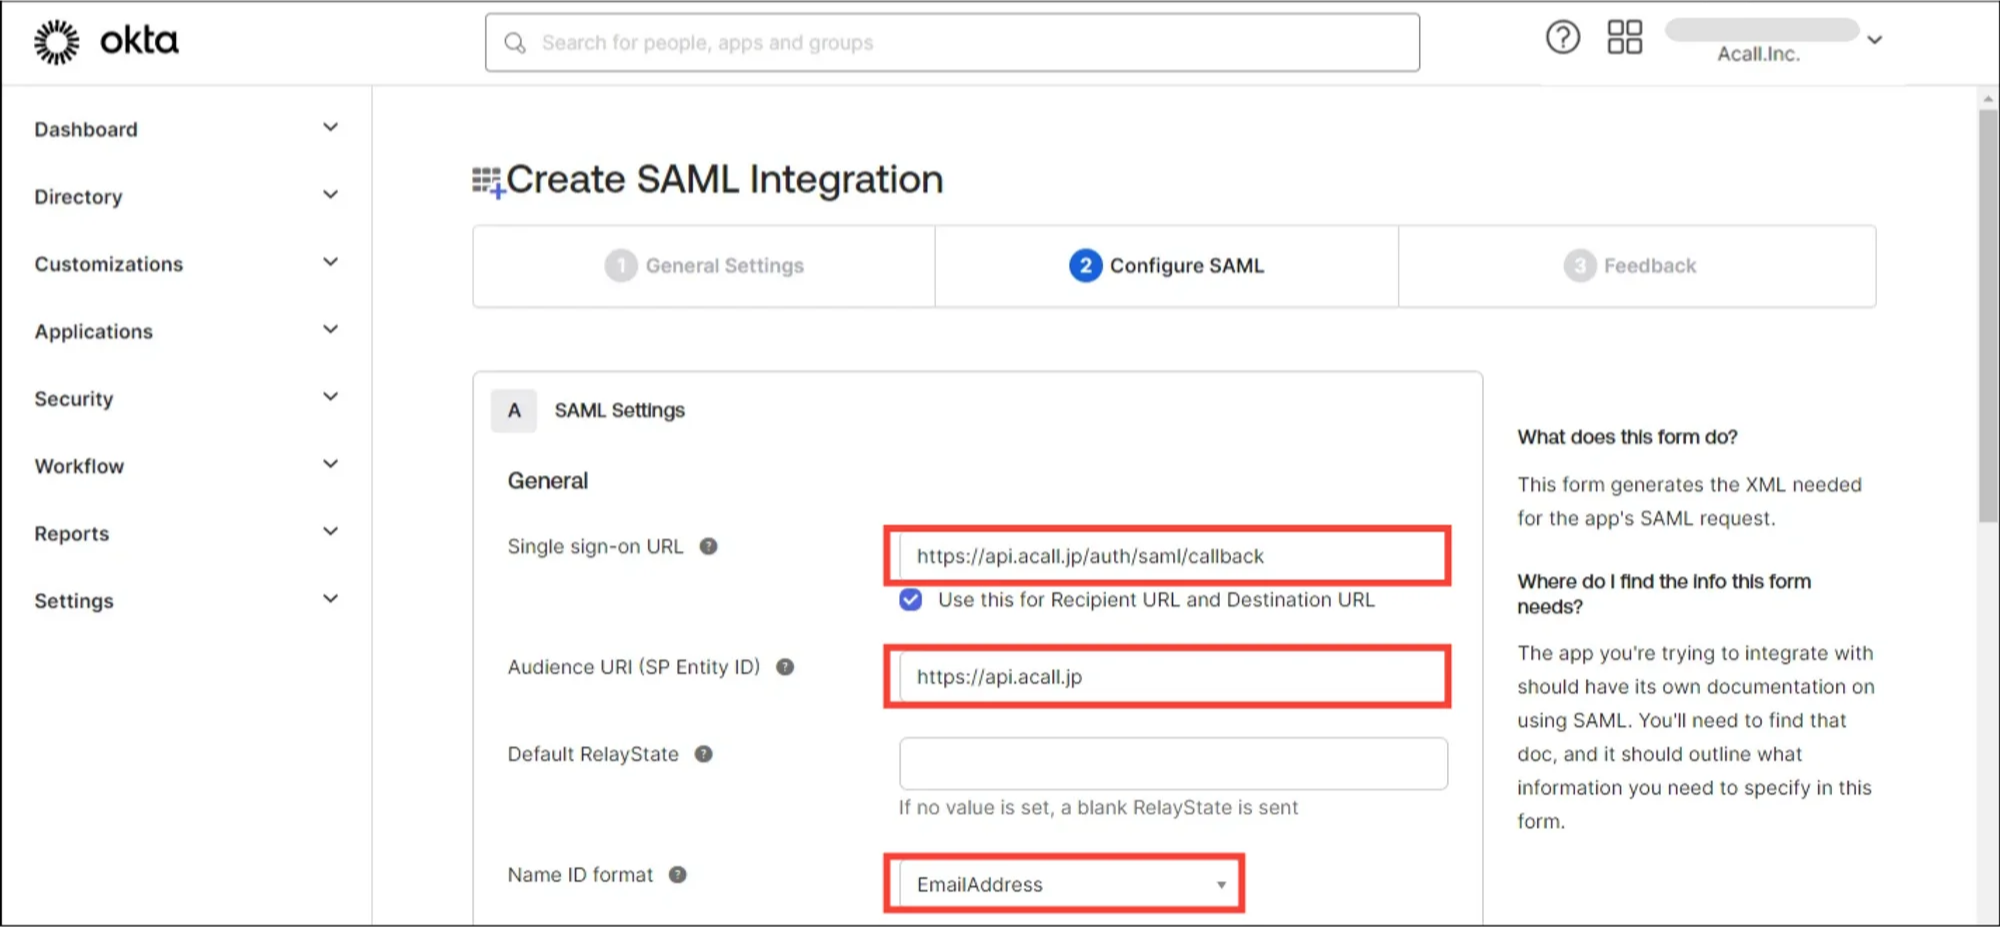
Click [②Configure SAML] tab in “Create SAML Integration” screen, enter following information and click [Next].
| Items | Value |
|---|---|
| Single sign on URL * |
https://api.acall.jp/auth/saml/callback *Do not put / at the end of the URL. *This will be replaced with the value in subsequent steps. Enter the above value temporarily. |
| Audience URI (SP Entity ID) |
https://api.acall.jp *Do not put / at the end of the URL |
| Name ID format | EmailAddress |
💡 Note:
Customers using multiple Acall environments, please append a suitable string to the Audience URI (SP Entity ID) when setting it.
Example:https://api.acall.jp/2
In the later steps, the URL will be replaced to the one specified by Acall.
Click [③Feedback] tab in “Create SAML Integration” screen, select [I'm an Okta customer adding an internal app] and click [Finish].
Assign Apps to Users / Groups
In this section, add users or groups who want to use Okta for SSO in Acall to application that is created in the previous step.
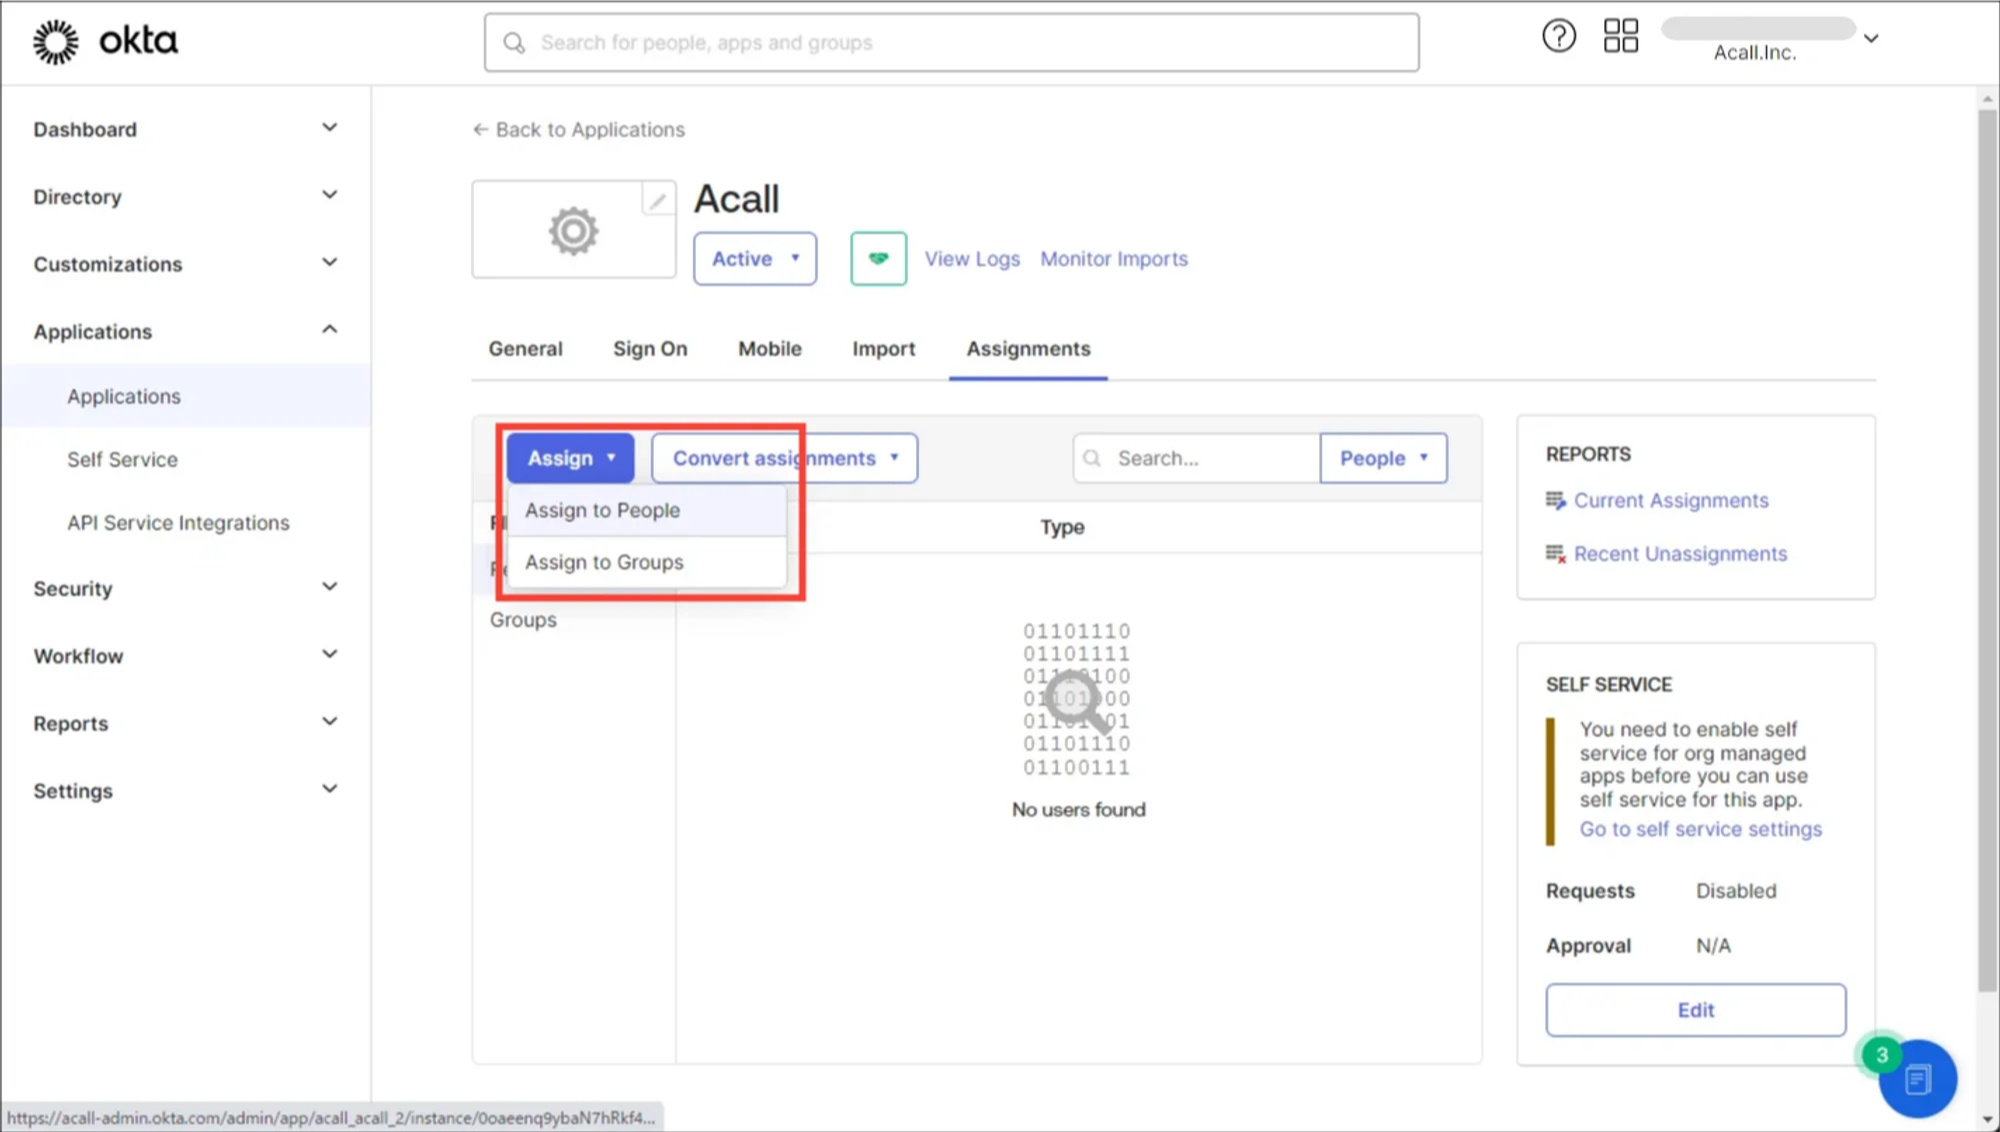
Open [Assignments] tab in the application.
Select [Assign to People] or [Assign to Groups] from [Assign] pull down.
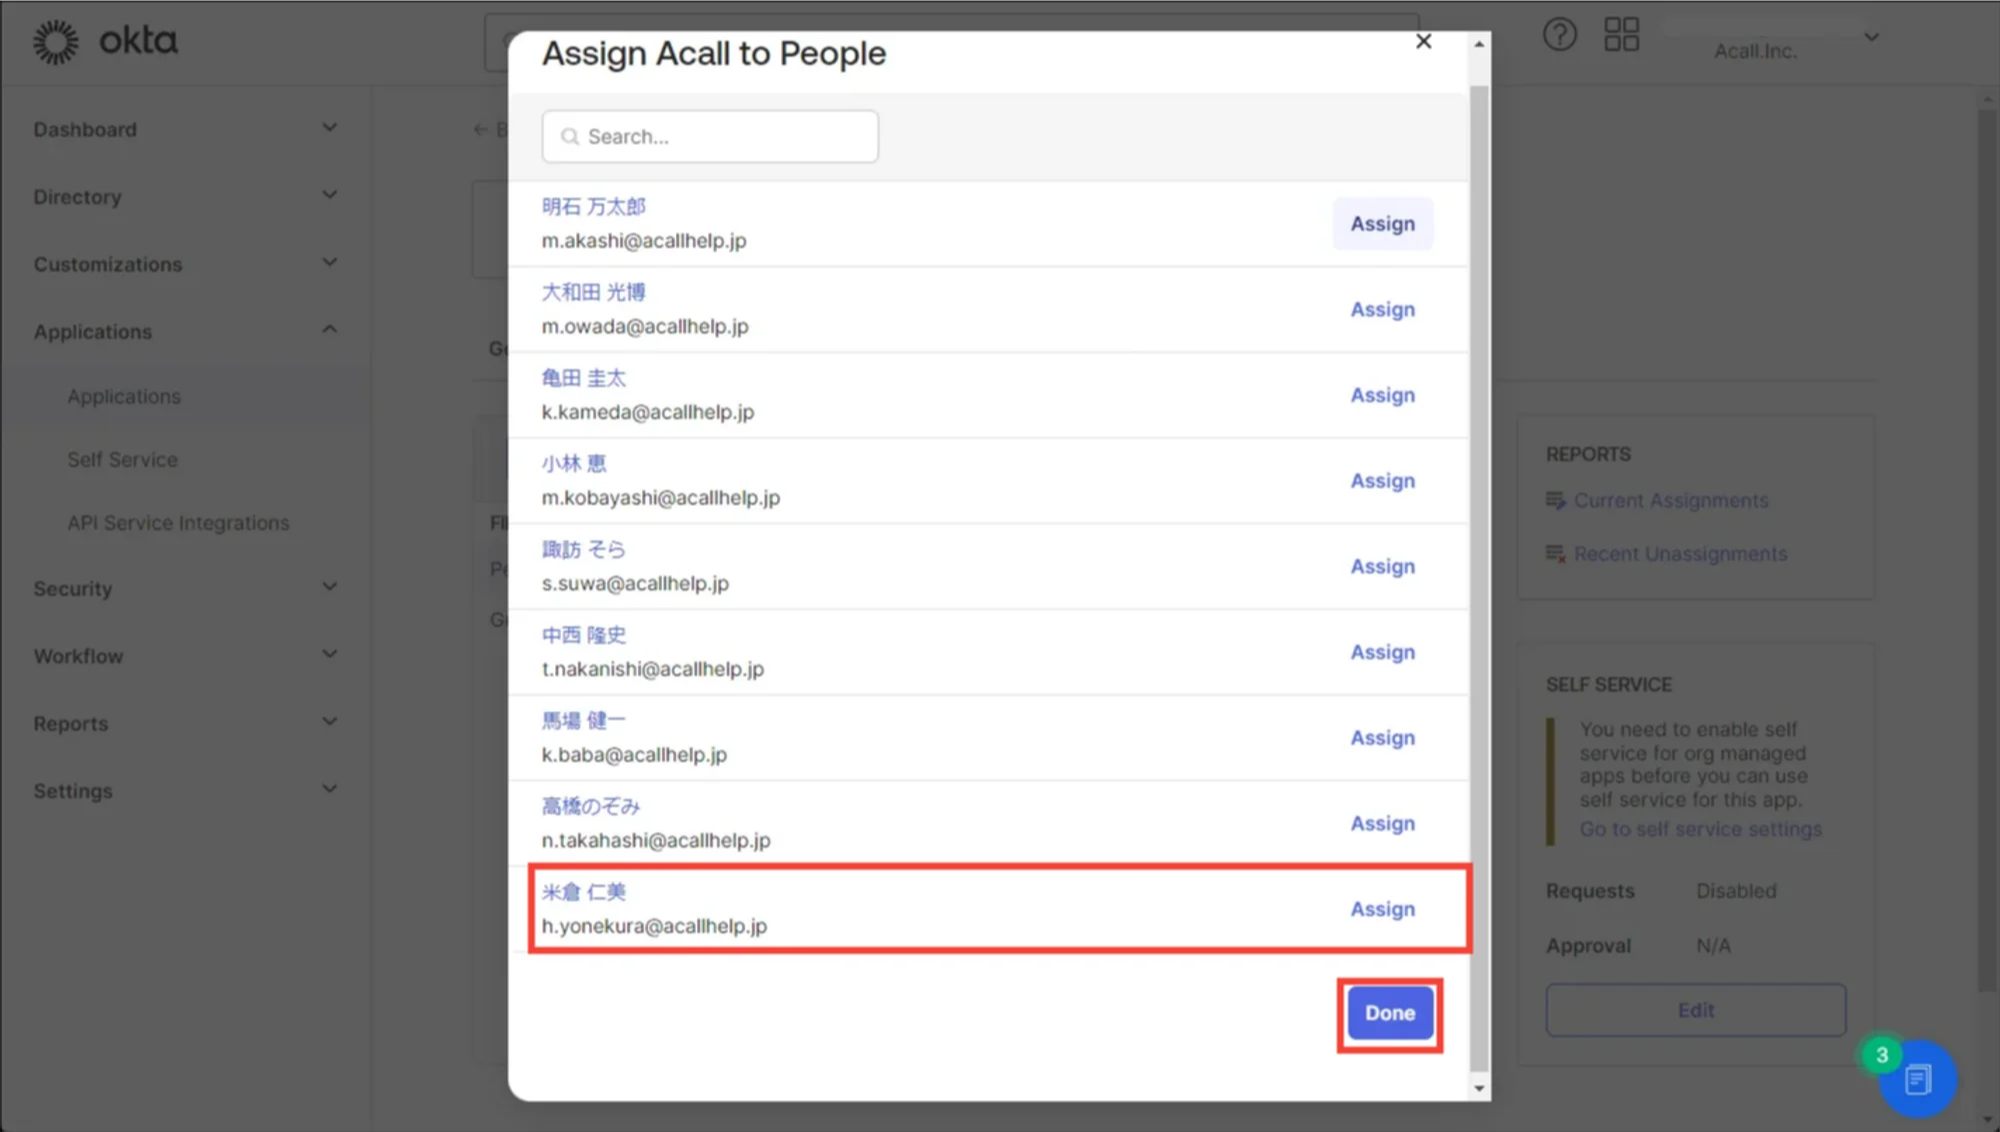
Click [Assign] for the user or group you want to add to the application, then click [Save and Go Back].
Once you confirm the added member is “Assigned”, click [Done].
Contact Acall For SSO Setting
To use SSO, Acall needs to proceed internal settings and provide necessary information to the customers. Customers can use SSO after “Replace Single Sign On URL” is completed.
Please contact Acall via contact form with your desired setup time/date (weekdays (excluding our holidays) 10:00 ~ 16:00 JST) and the following information.
Please allow 3 business days from the date of request for setup.
- Identity Provider Single Sign-On URL
- X.509 Certificate
Please follow the following steps to find the application information on your Okta admin console.
Open [Sign On] tab in the application and click [View SAML setup Instructions].
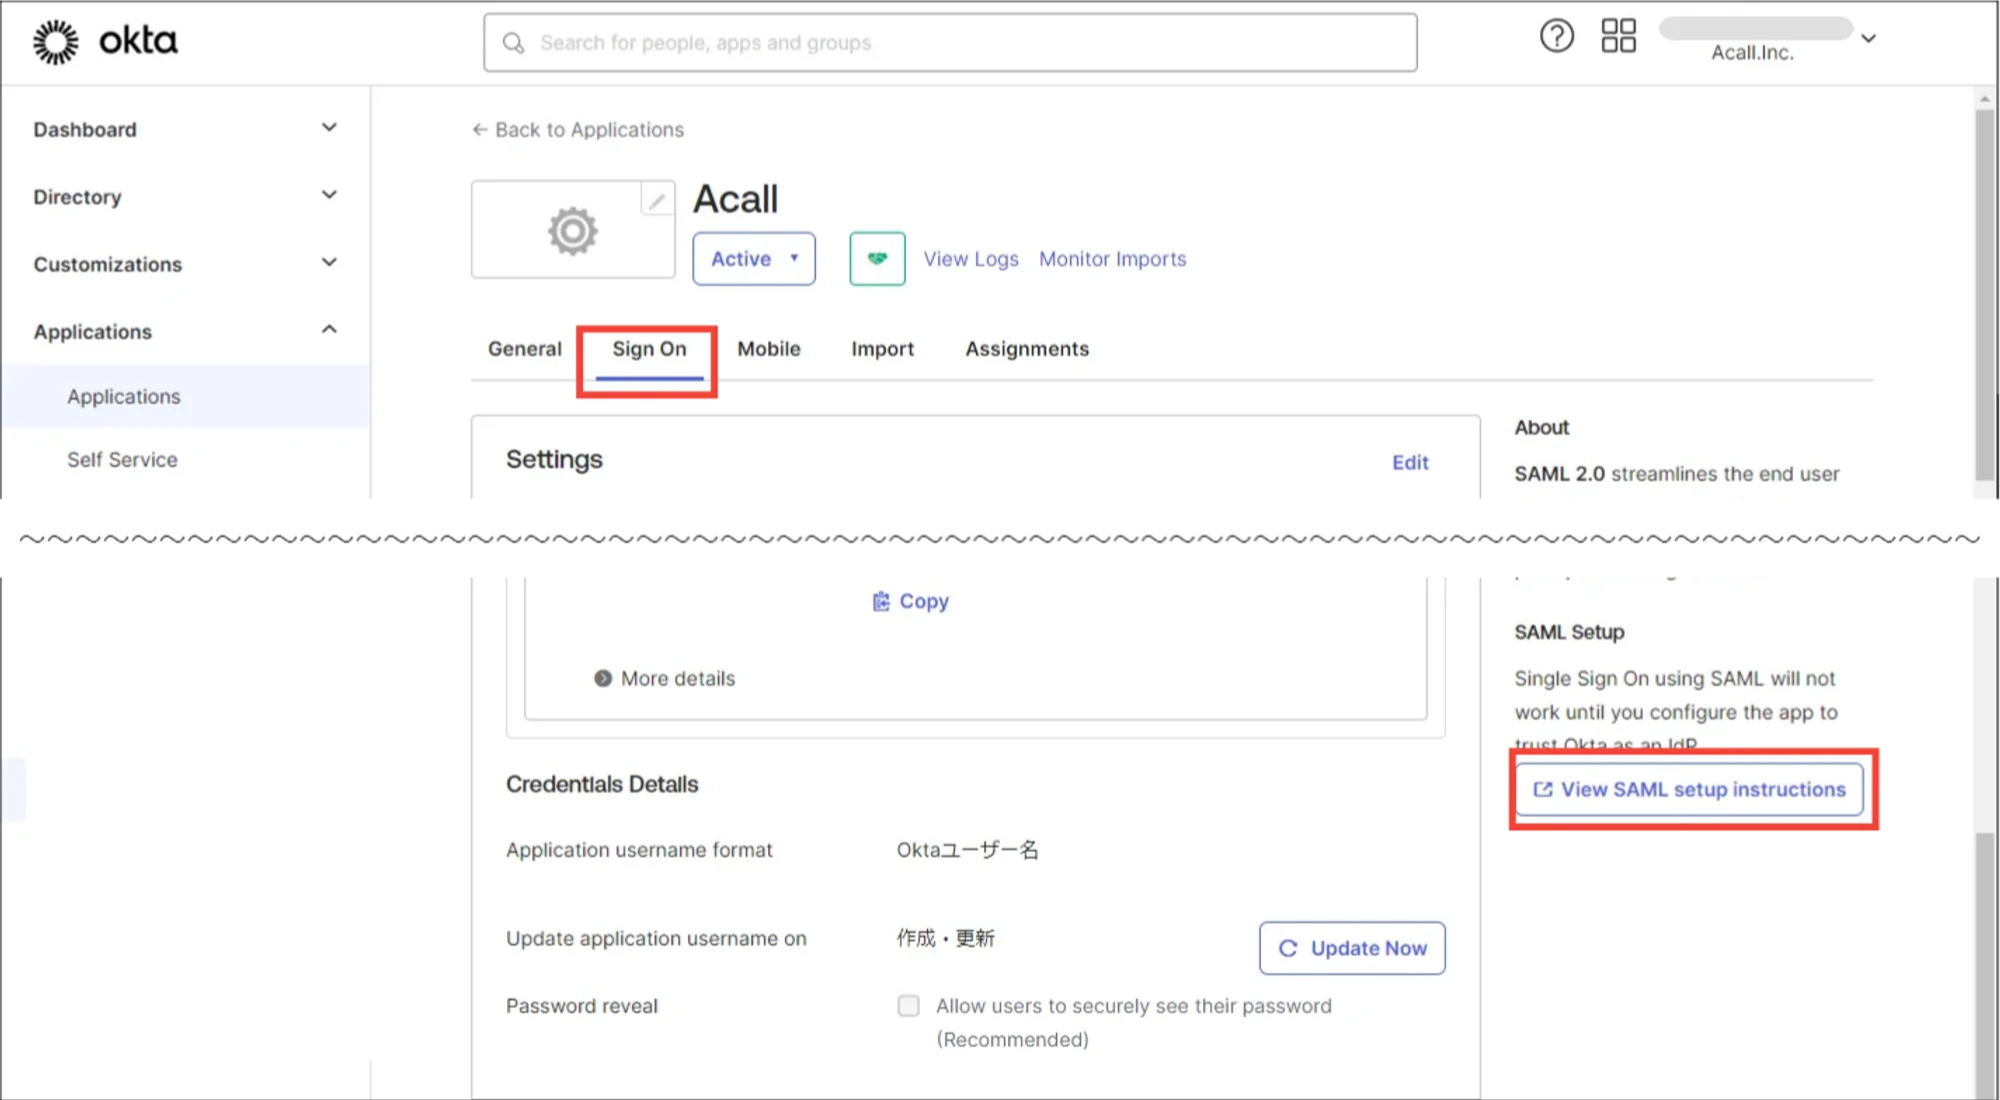
Provide Acall the following information that you can find in the “How to Configure SAML 2.0 for xxx (created application name) Application” screen.
- Identity Provider Single Sign-On URL
- X.509 Certificate
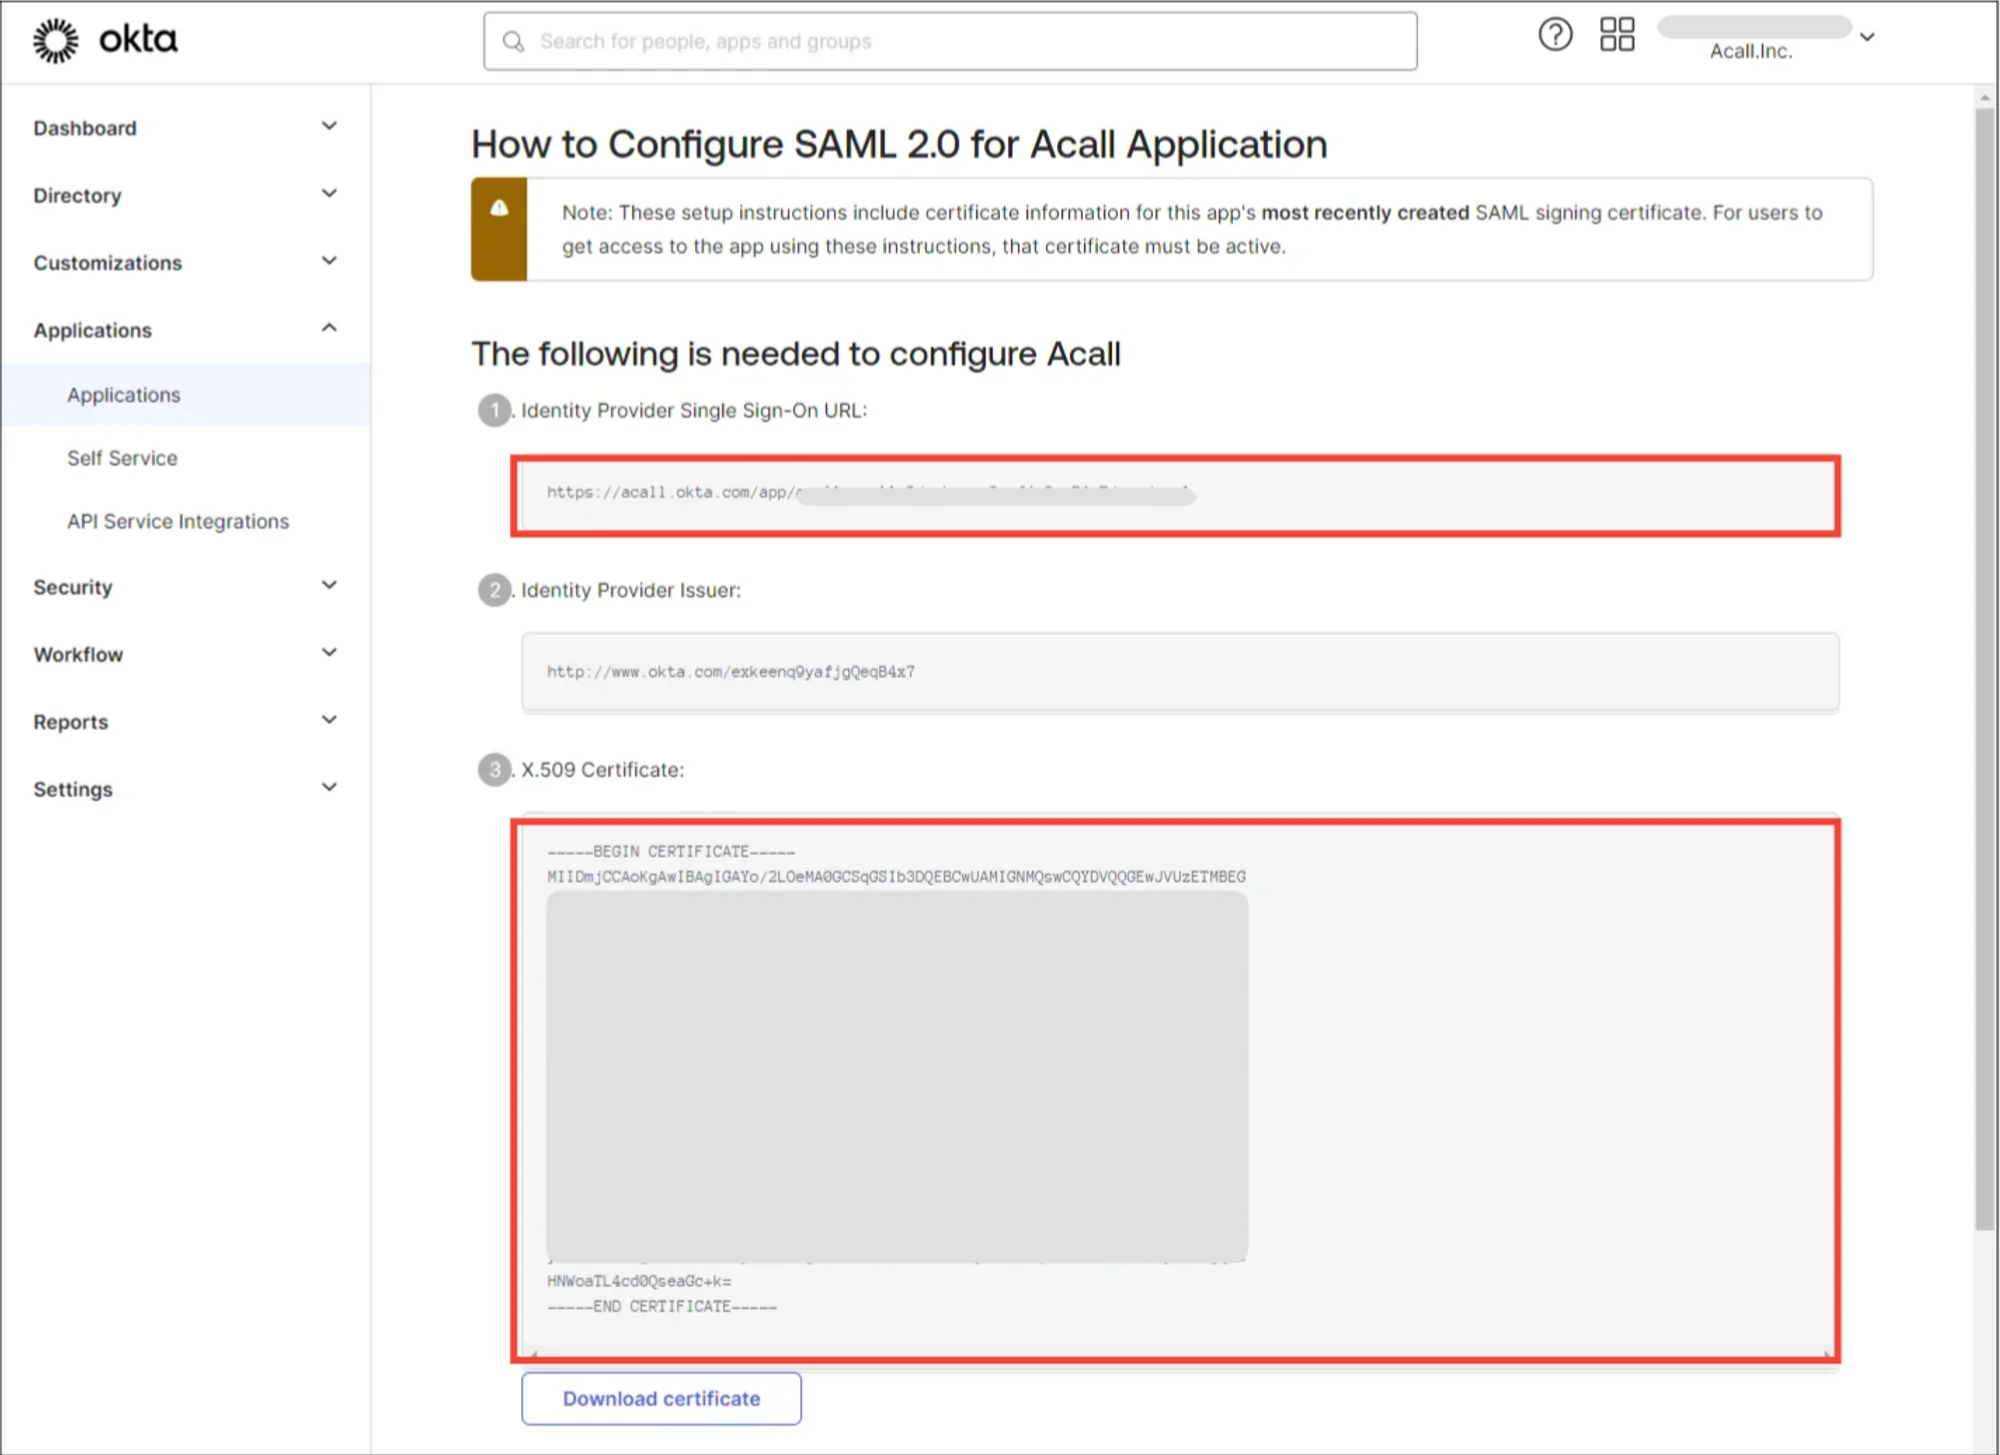
Note:
Customers using multiple Acall environments, please provide the information for all the apps you have created.
Replace Single Sign On URL
Note:
For customers using multiple Acall environments, we will provide information for each app you have created.
In addition to the "Single sign on URL," we will also provide the value for the "Audience URI (SP Entity ID)." Please make sure to configure both accordingly.
In this section, complete SSO setting on Okta admin console.
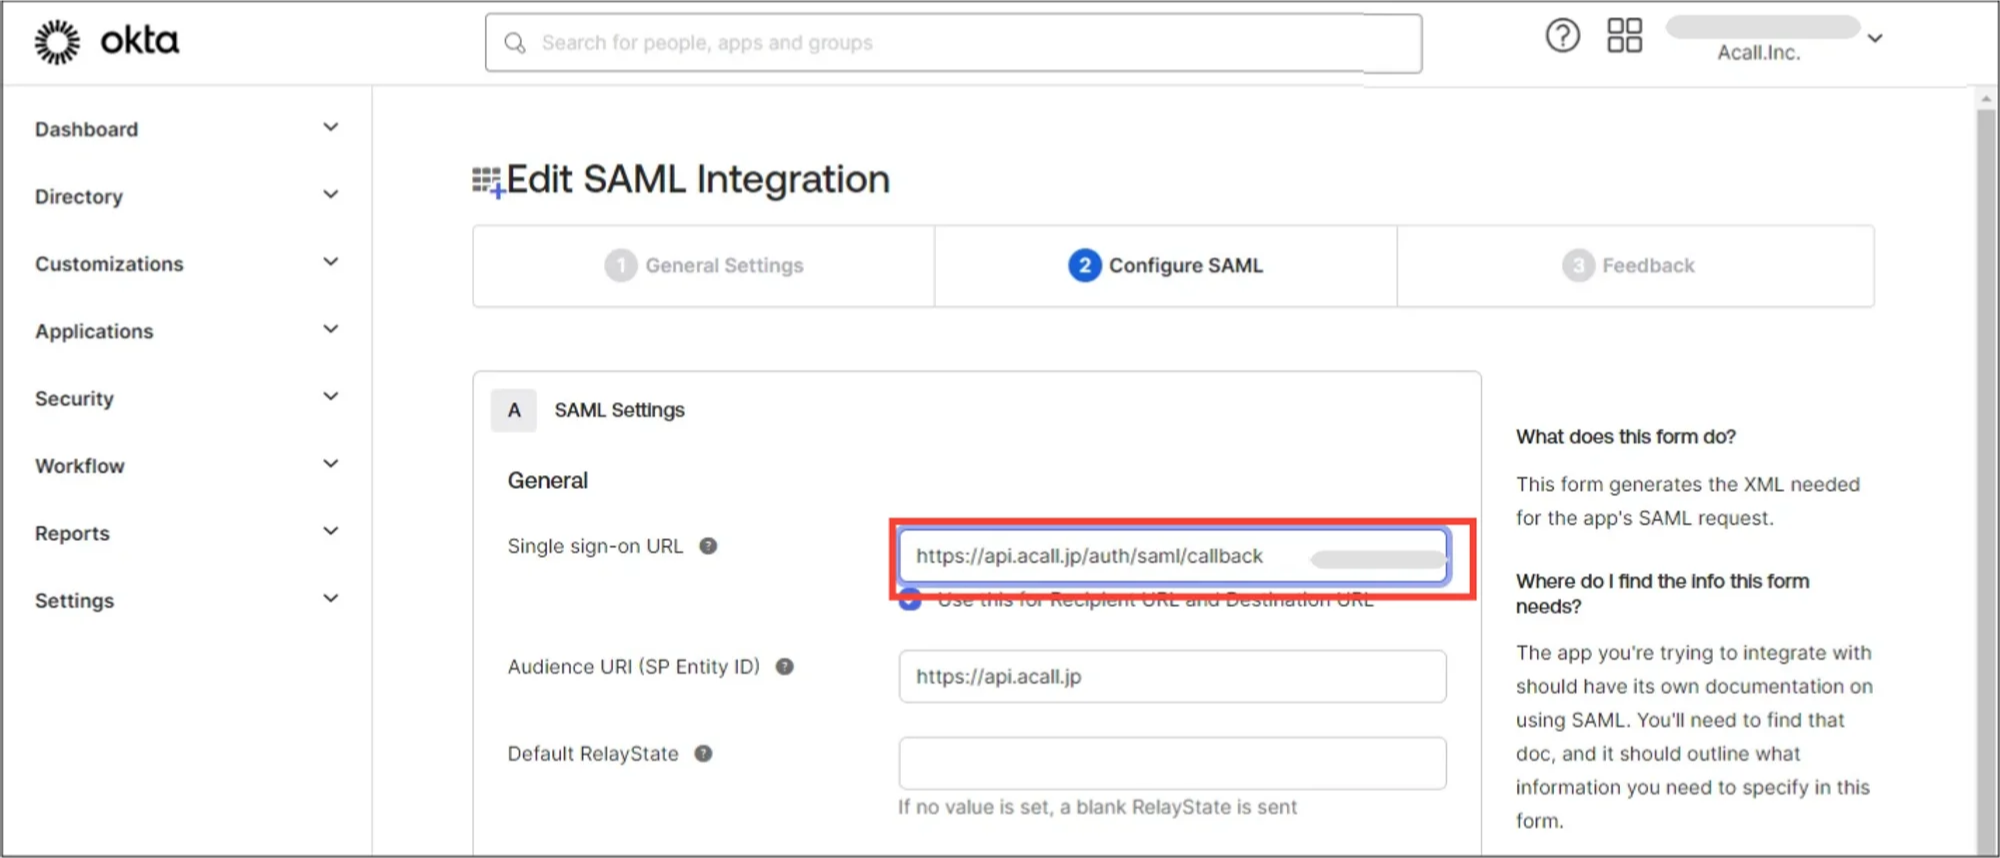
Enter [Single sign on URL] which is provided by Acall.
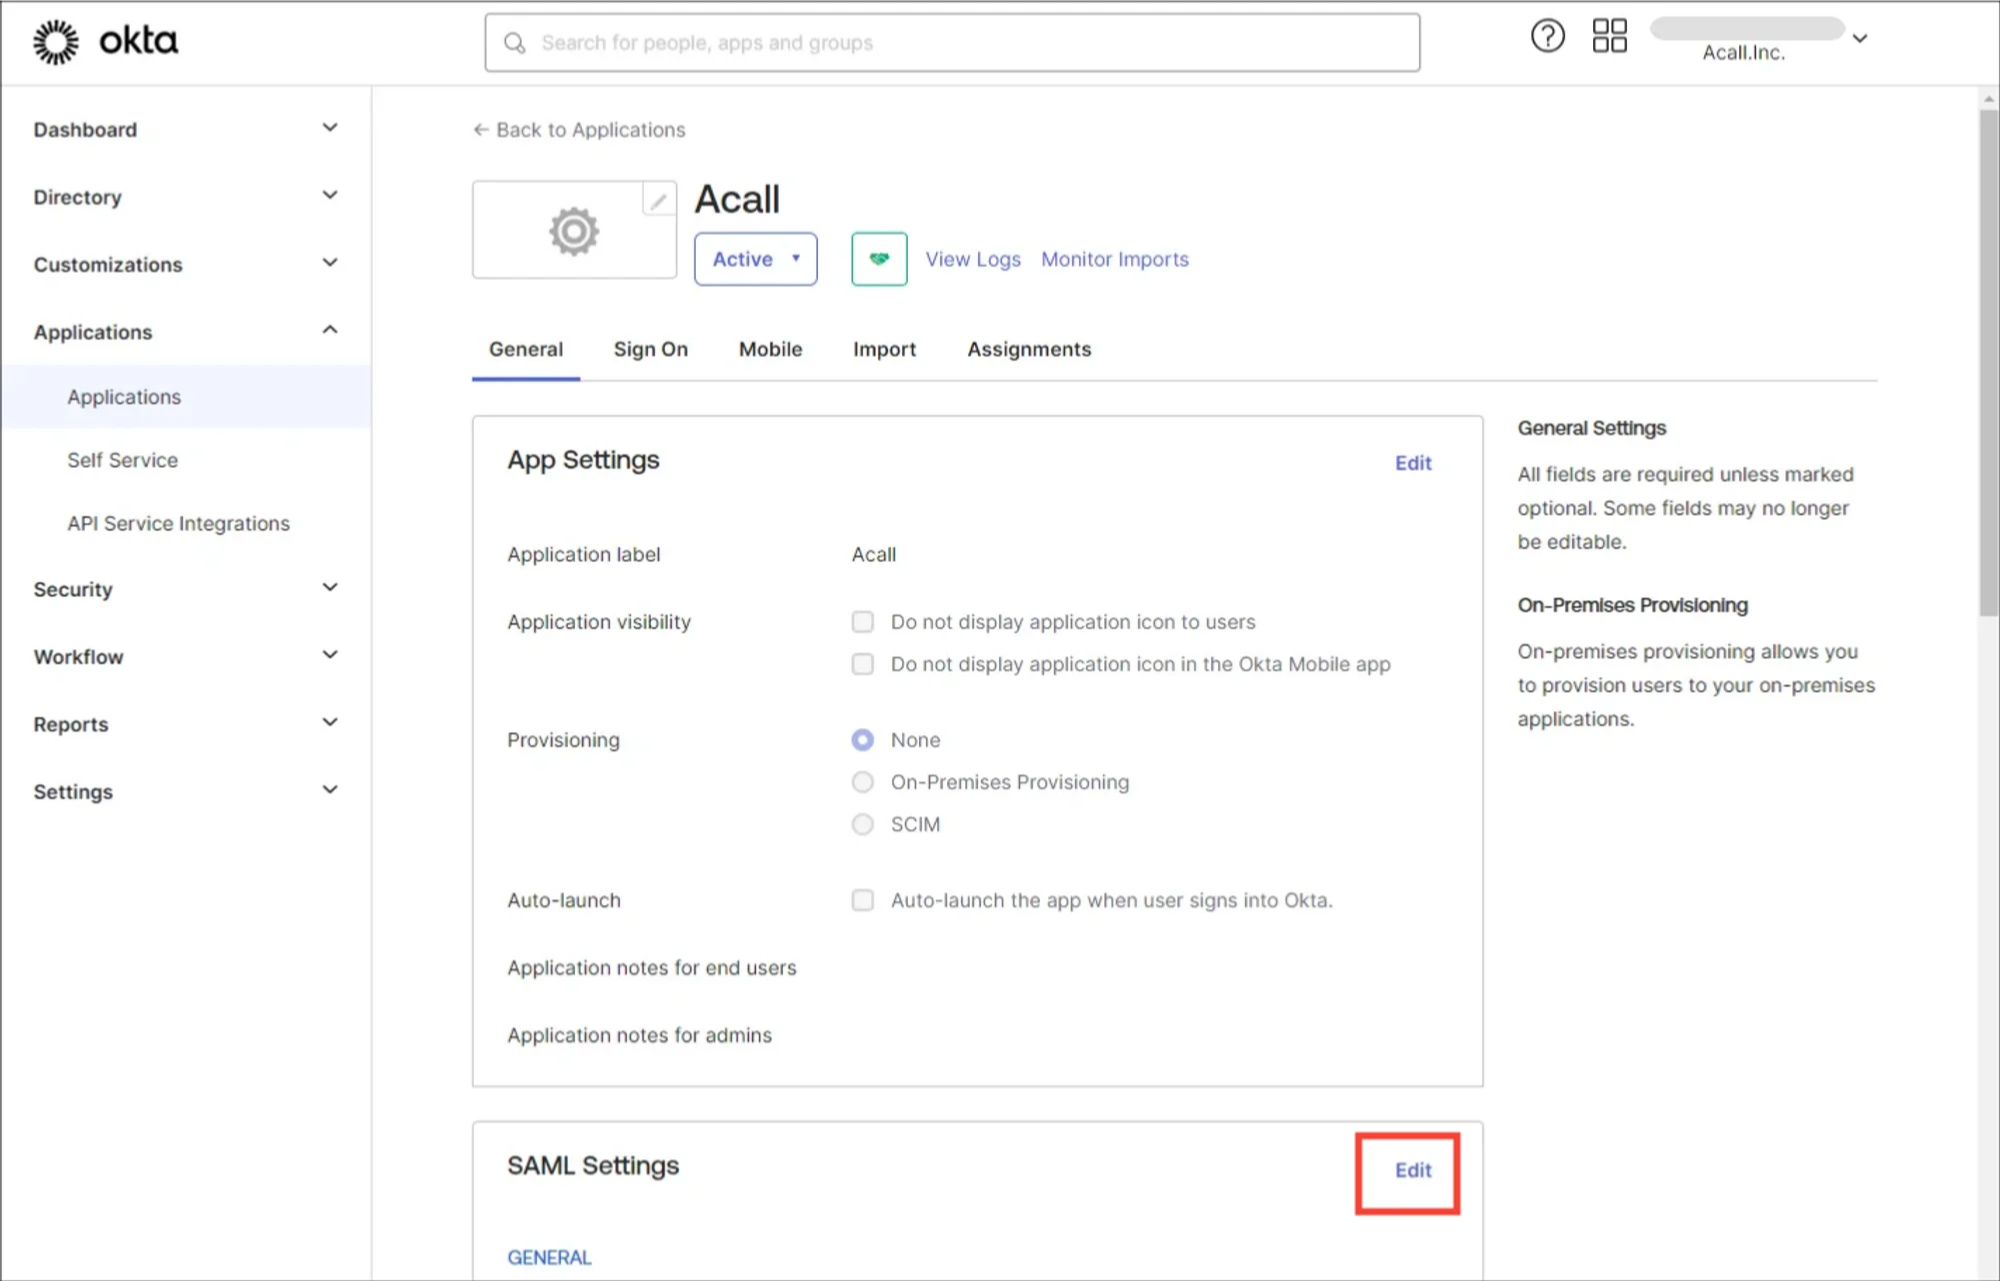
Open [General] tab in the application and click [Edit] in “SAML Setting” section.
Skip [①General Settings] tab and click [Next].
Enter provided ACS URL in the [Single sign on URL] field in “②Configure SAML” tab and click [Next].
Skip [③Feedback] tab, click [Next].
SSO setting is completed.
Test SSO
Test SSO login to Acall Portal or Acall Mobile. If you are not able to log in or face any problems, please reach out to Acall with the following information.
- Screenshot of the error
- Date/Time of your test
- Steps you took
- Email address of the account
Comments
0 comments
Article is closed for comments.