Contents
SSO Settings
If you want to use the SSO function, please follow the steps on this page.
This process is to complete SSO setting; below is the overview of the workflow.

Set Up SAML Configuration
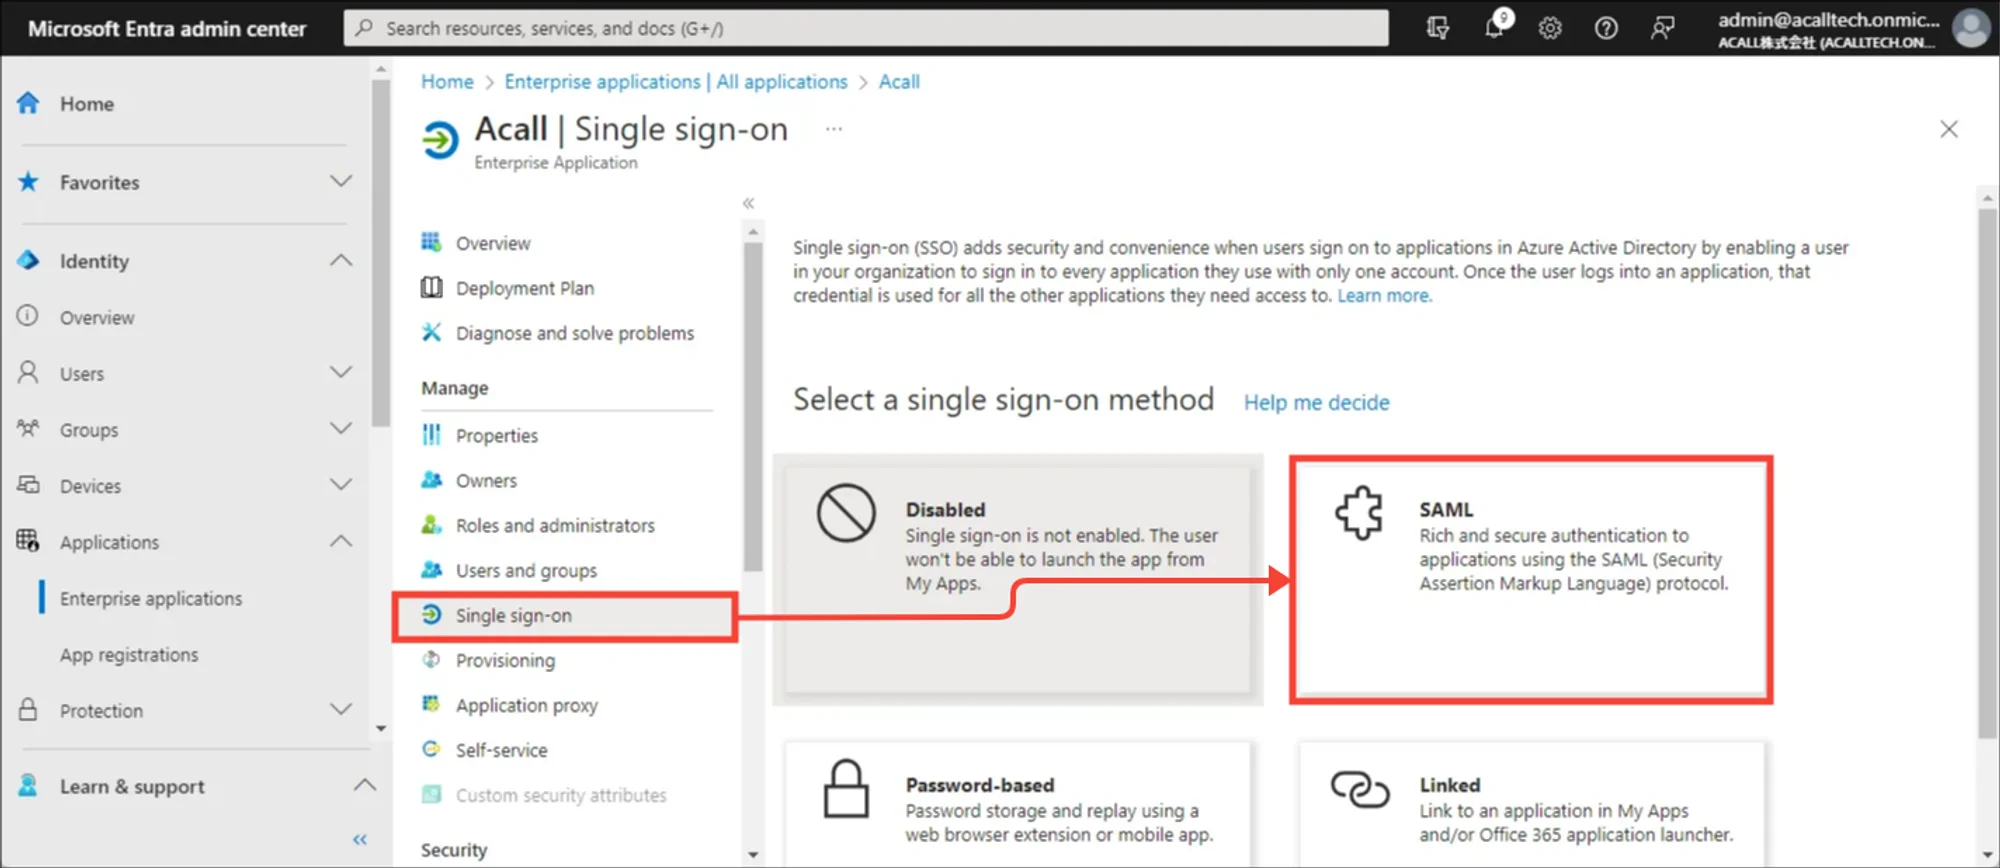
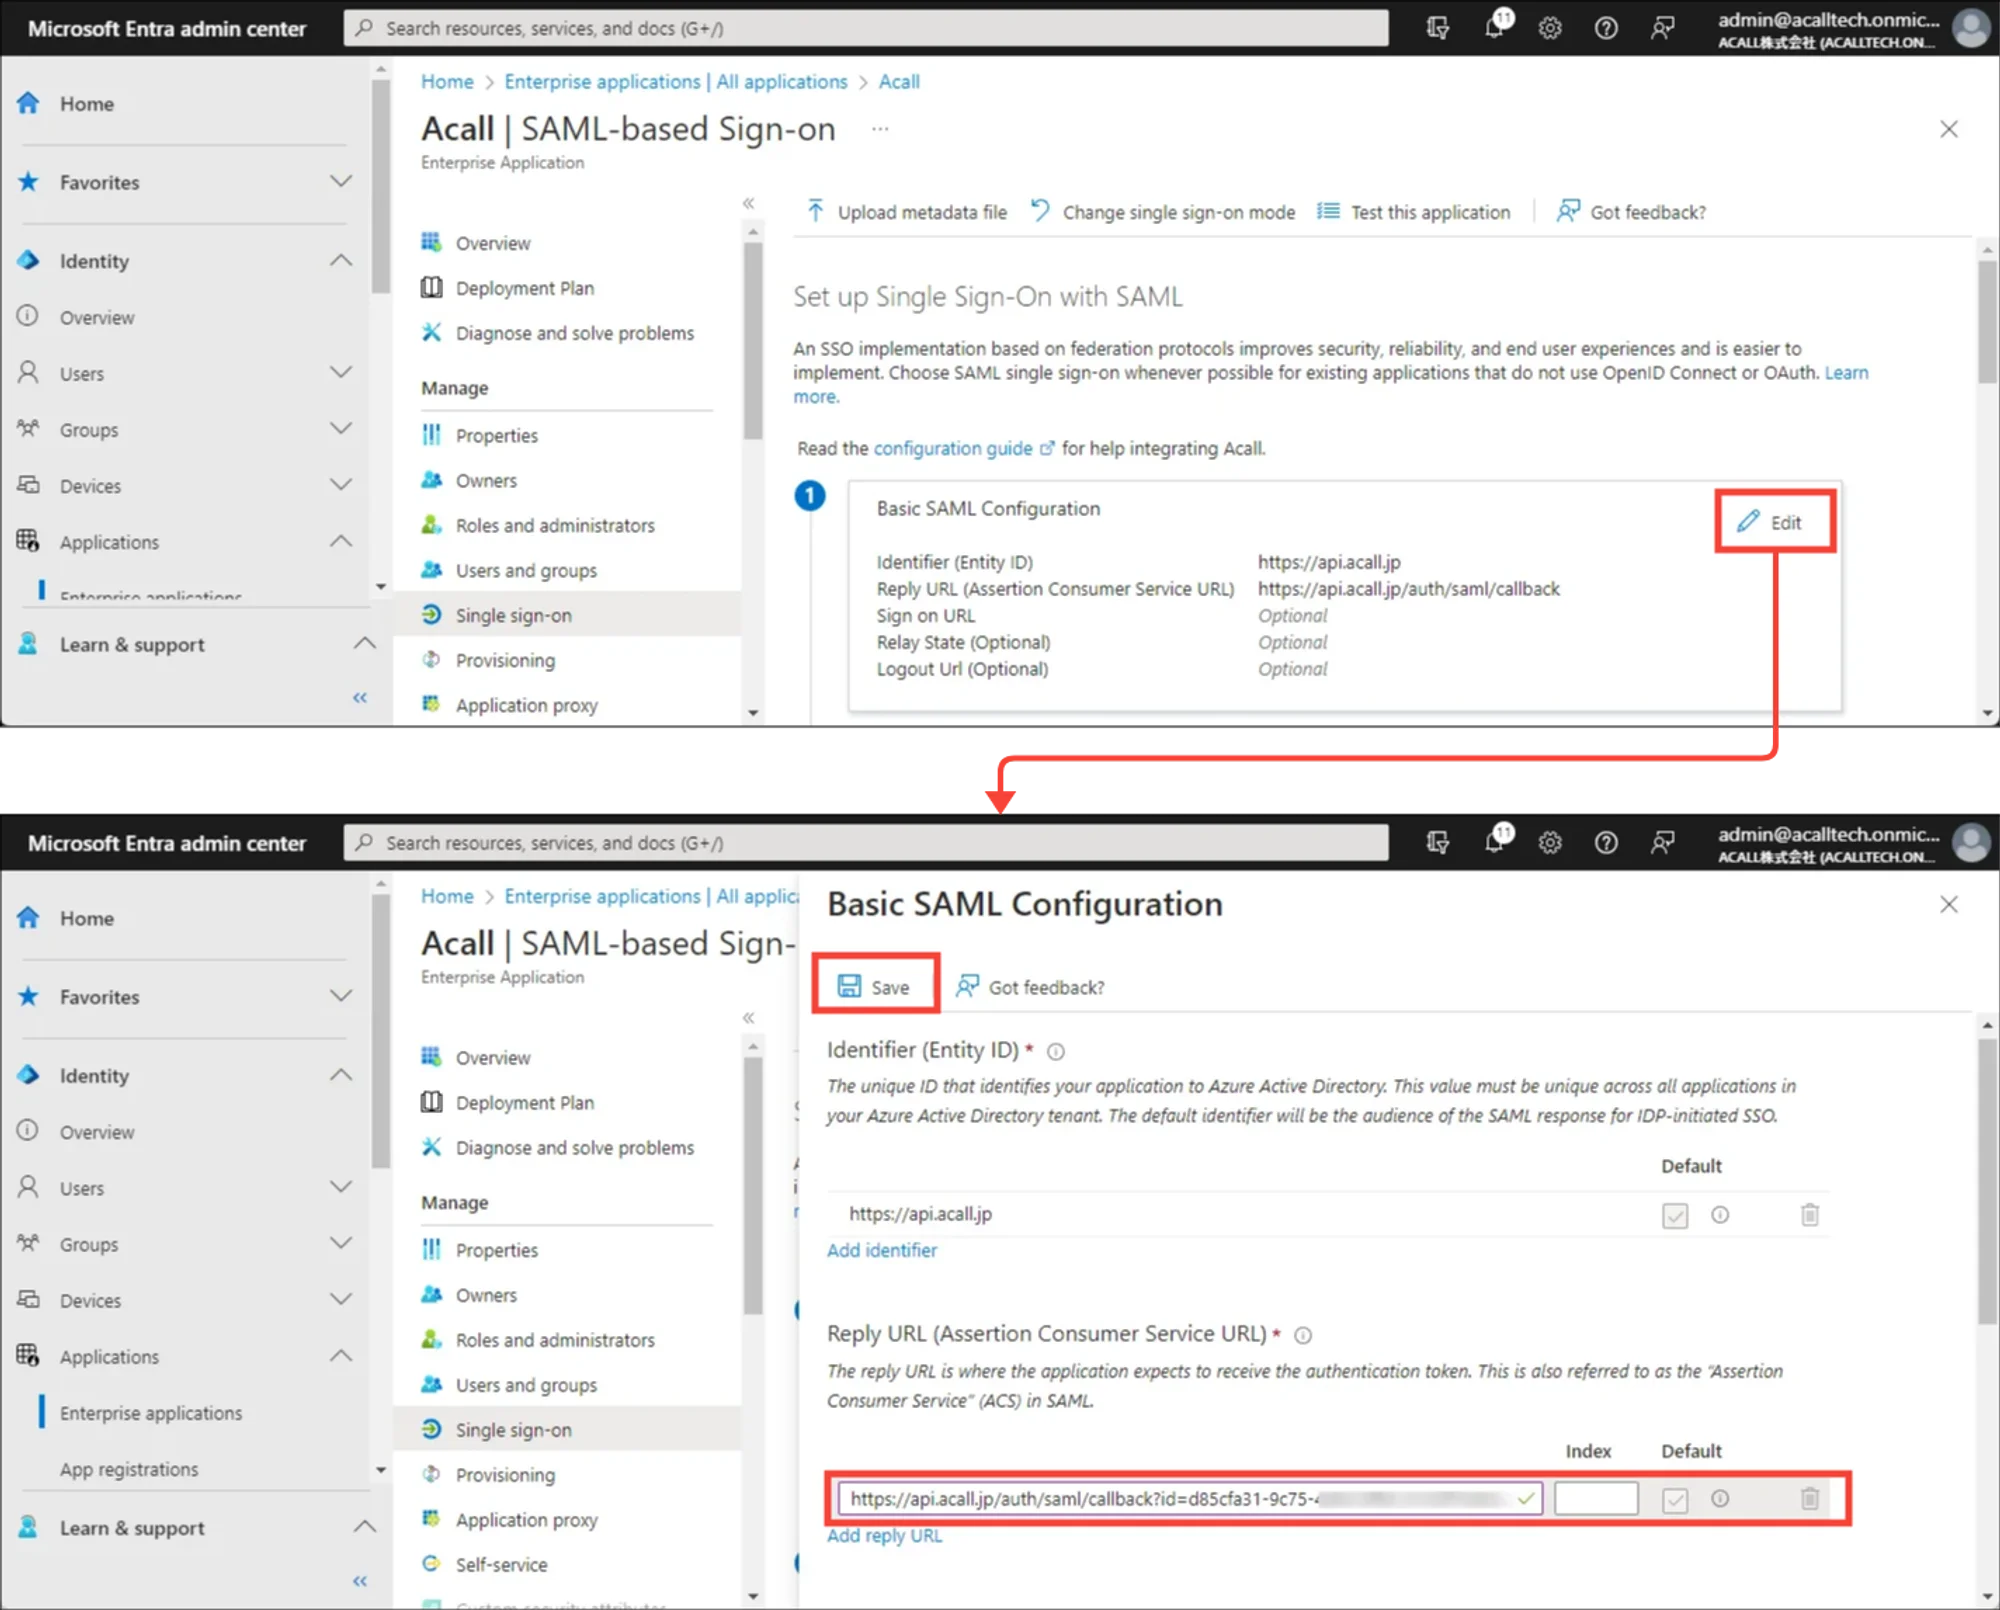
Open Microsoft Entra admin center.
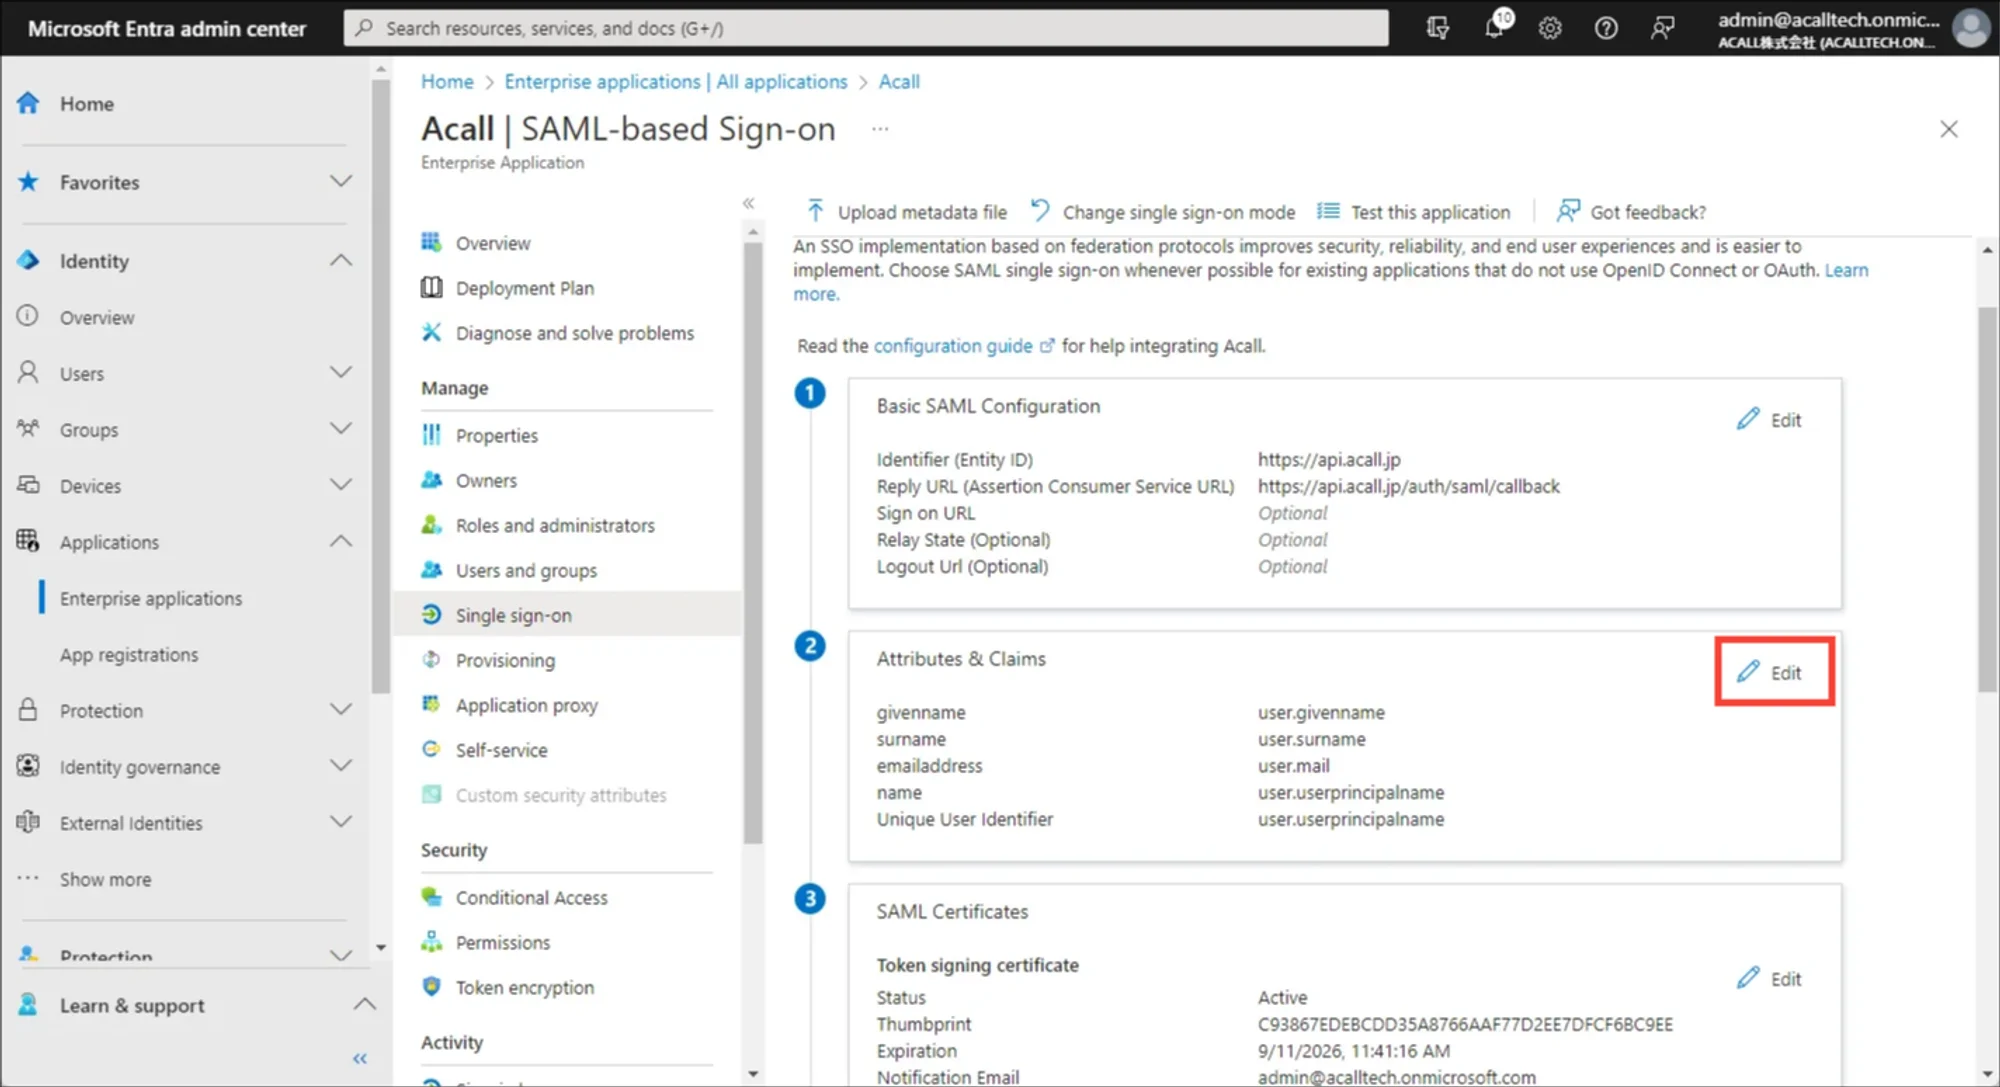
Click [SAML] in [Single Sign-on] menu for Acall application.
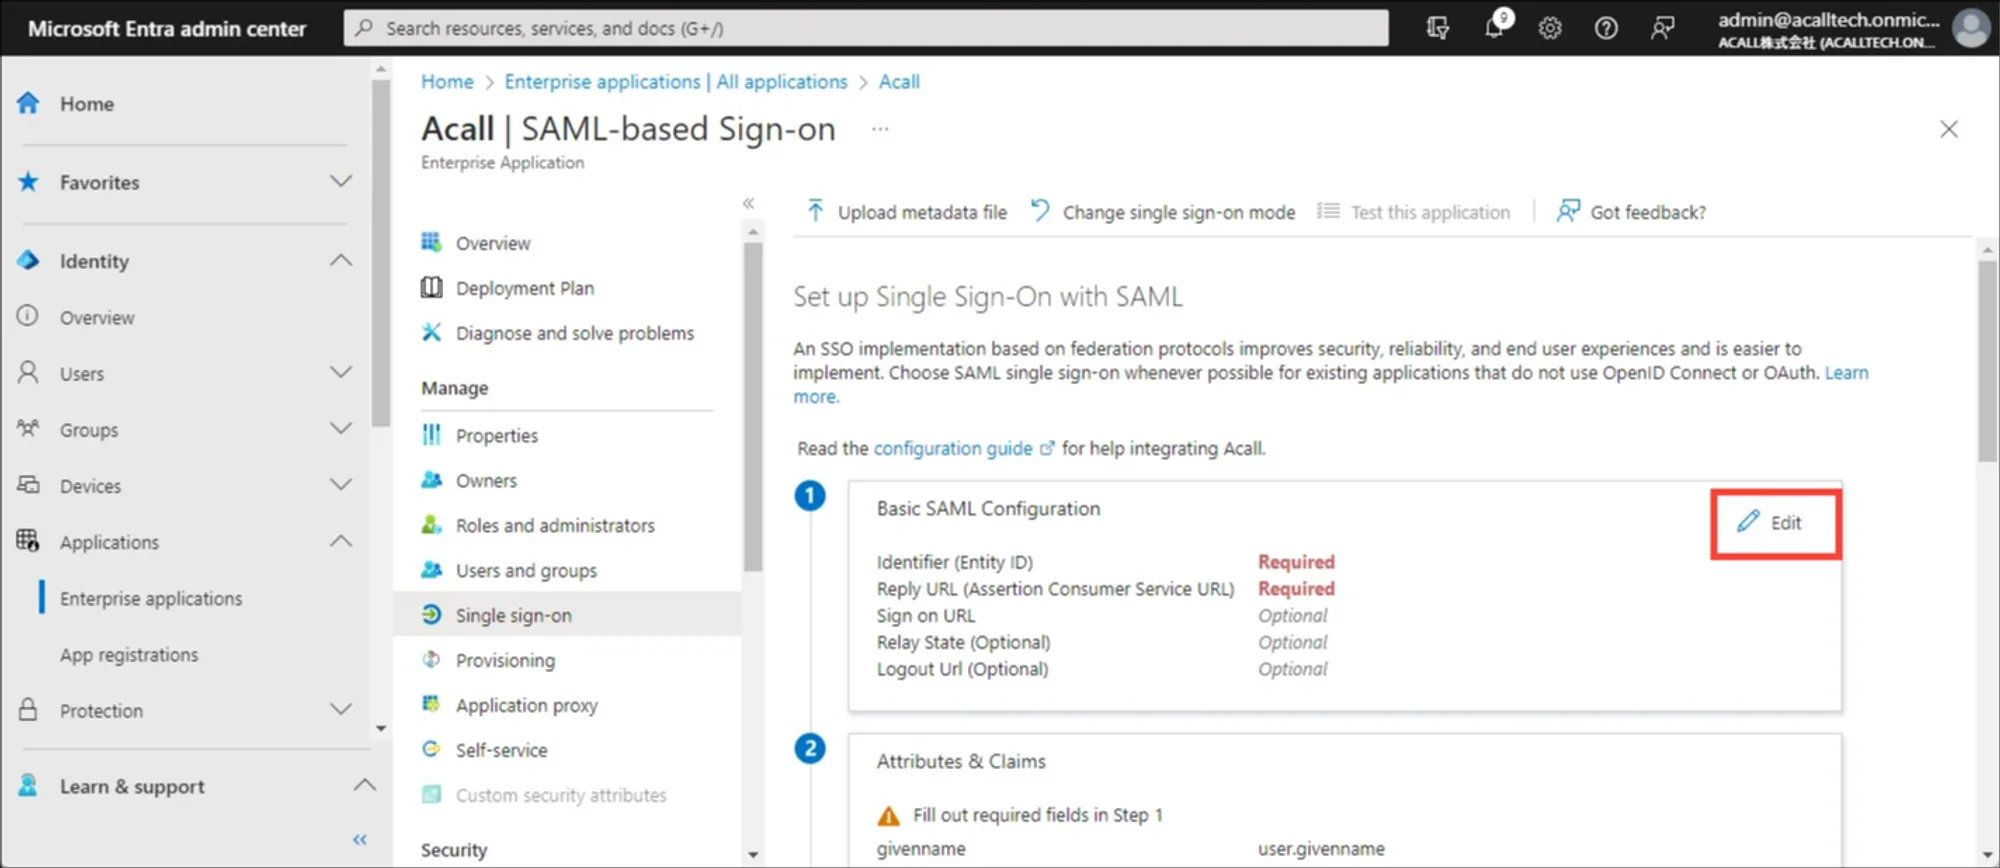
Click [Edit] in the [Basic SAML Configuration] section.
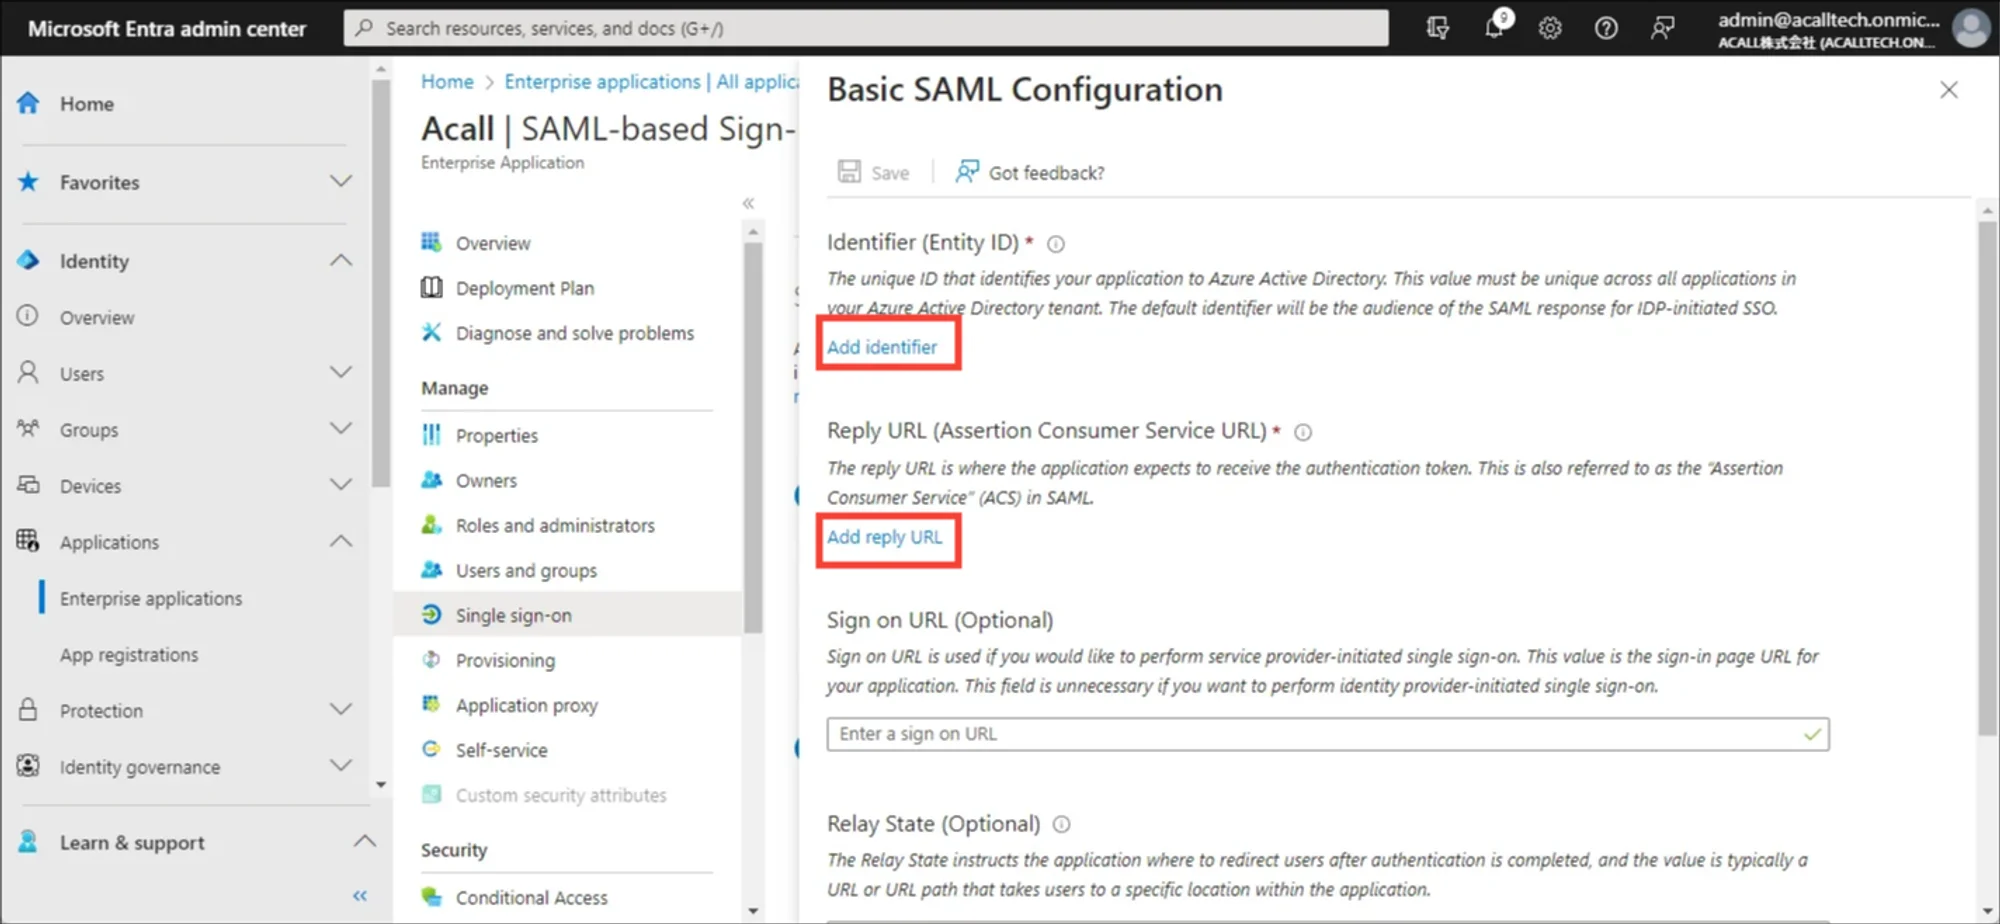
Click [Add Identifier] and [Add Reply URL].
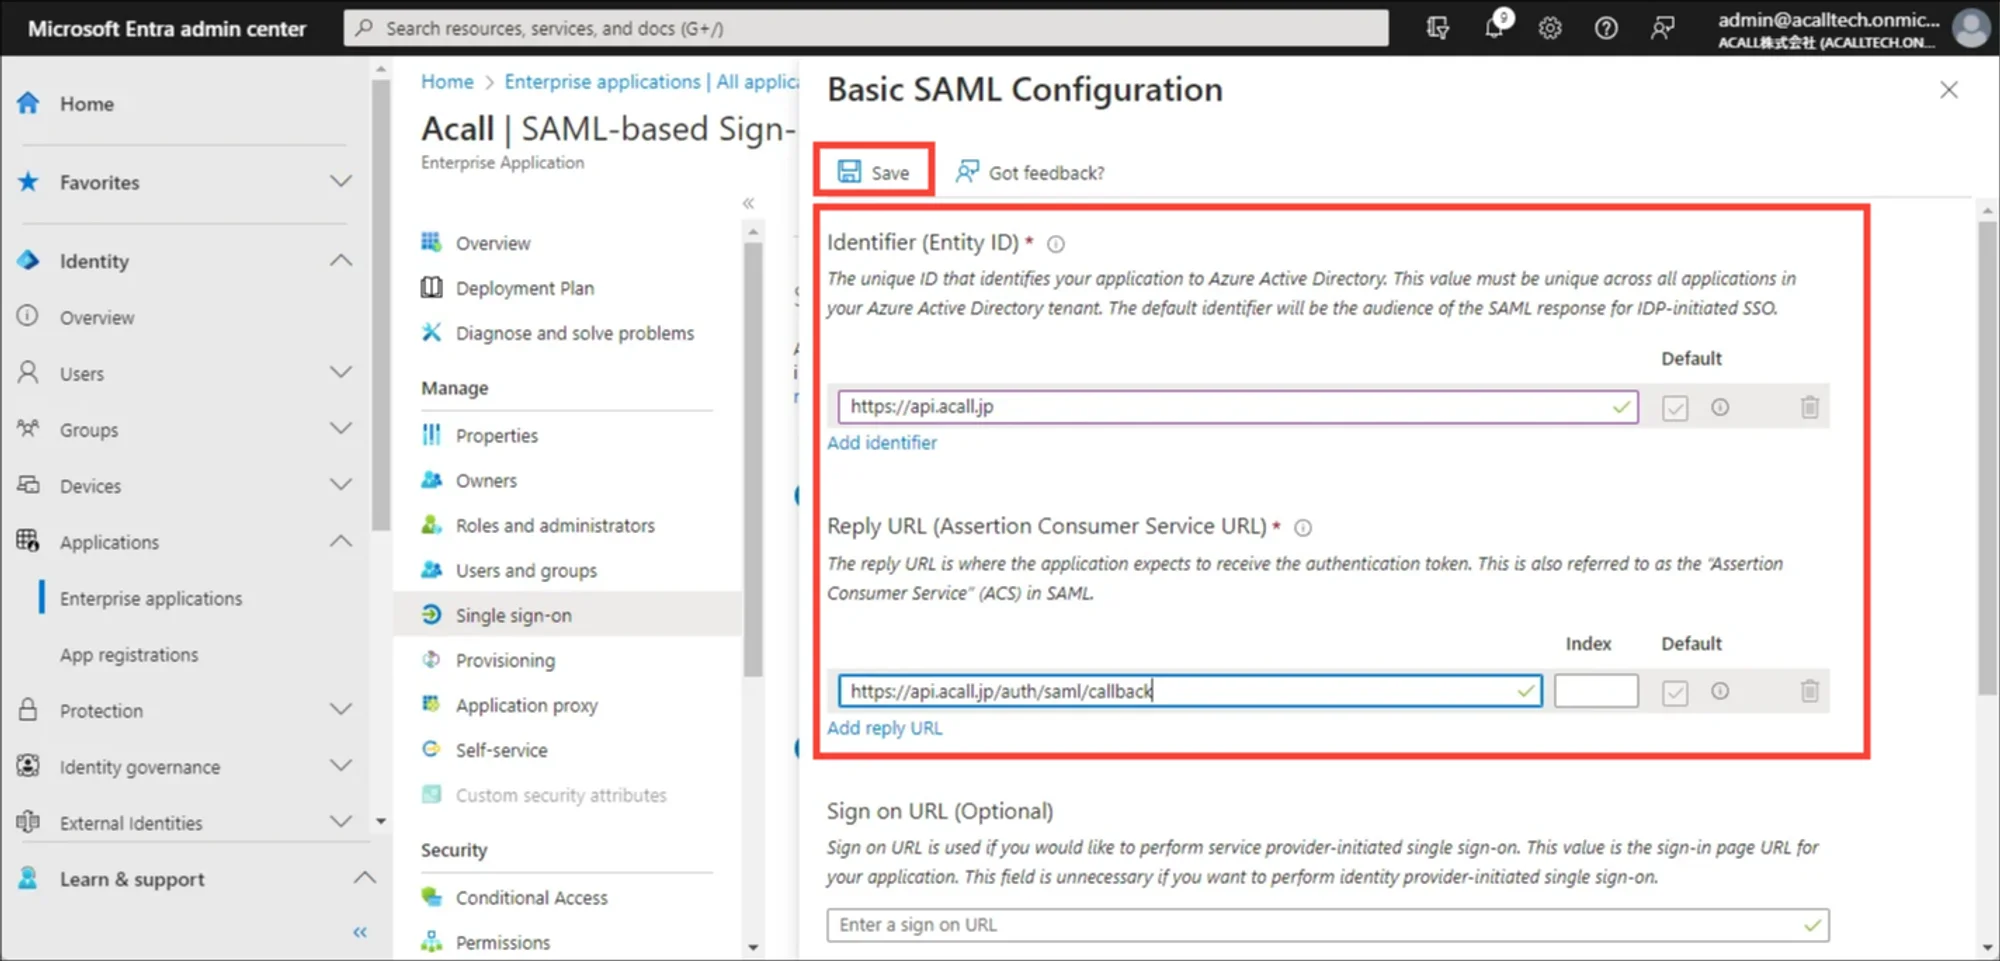
Enter the values below and save.
| Items | Value |
|---|---|
| Identifier (Entity ID) |
*Check ‘Default’ box *Do do not enter “/” at the end of the URL |
| Reply URL (Assertion Consumer Service URL) |
https://api.acall.jp/auth/saml/callback *Do do not enter “/” at the end of the URL *This ACS URL will be replaced in a later step |
💡 Note:
Customers using multiple Acall environments cannot enter duplicate values for the "Identifier (Entity ID)". Please append a suitable string to the URL when setting it.
Example:https://api.acall.jp/2
In the later steps, the URL will be replaced to the one specified by Acall.
Set Attributes To Uniquely Identify Users
When you SSO login, Acall workers and Microsoft Entra ID users must be uniquely matched with some attributes.
Acall uses the worker's "email address" for matching. If you registered Microsoft Entra ID "mail" attribute value in the "email address" in Acall, please follow the steps below to change the setting so that the "email" attribute is used for matching in Microsoft Entra ID.
⚠️
If any of the following is applicable, skip this step and go to the next step [Contact Acall For SSO Setting].
- Microsoft Entra ID user’s “userPrincipalName” attribute value and “mail” attribute value are the same.
- Microsoft Entra ID user’s "userPrincipalName" attribute value is registered in Acall worker’s "email address"
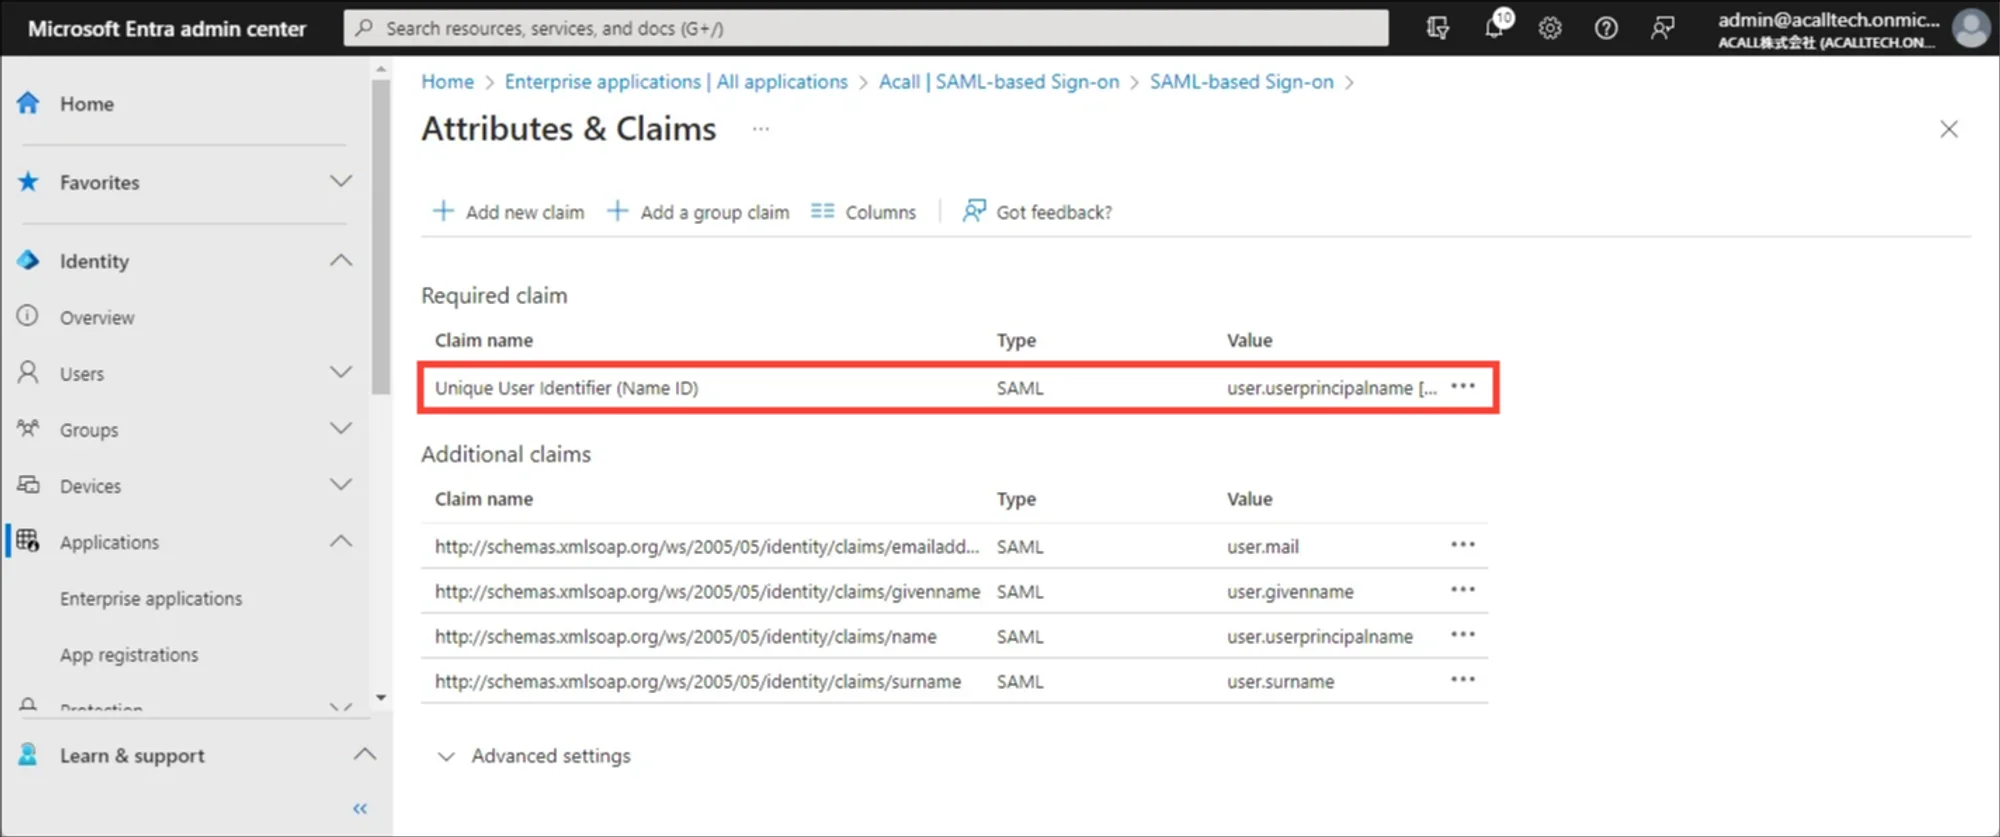
Click [Edit] in [Attributes & Claims] section in [Single Sign-on] menu for Acall application.
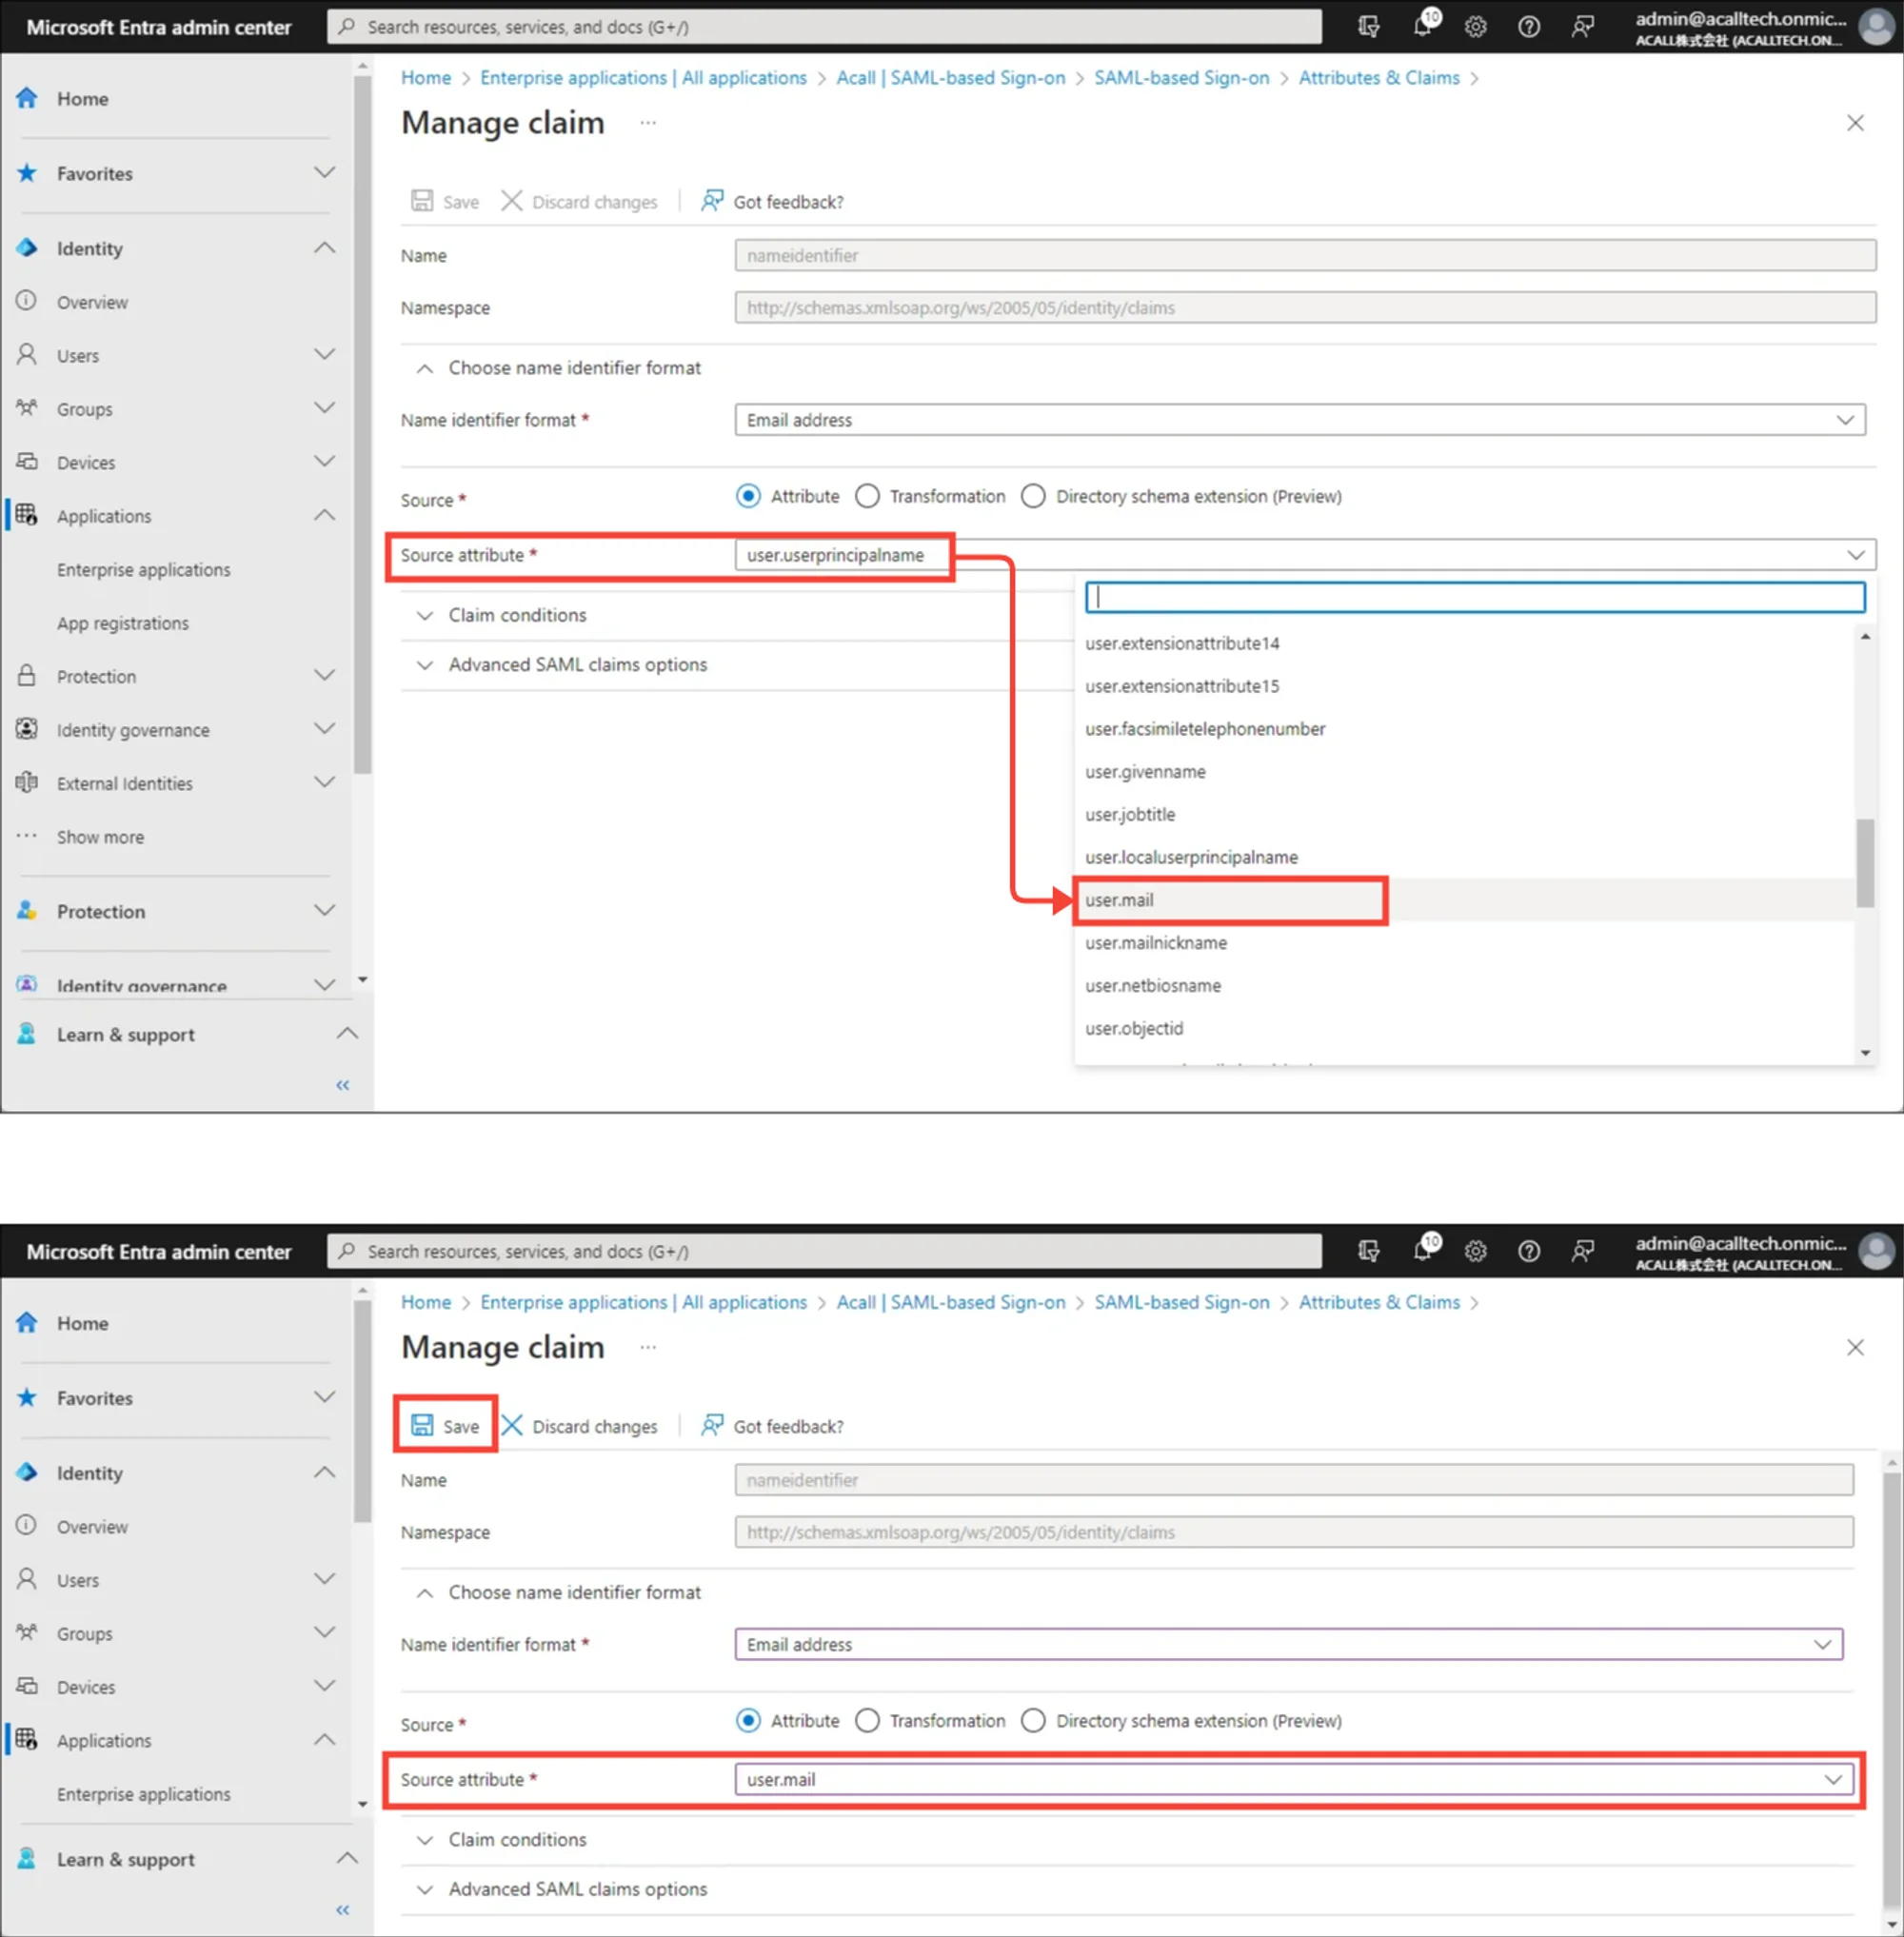
Click [Unique User Identifier (Name ID)].
Change “Source attribute” from ‘user.userPrincipalName’ to ‘user.mail’ and save.
Contact Acall For SSO Setting
Please contact Acall via contact form with your desired setup time/date (weekdays (excluding our holidays) 10:00 ~ 16:00 JST) and the following information.
Please allow 3 business days from the date of request for setup.
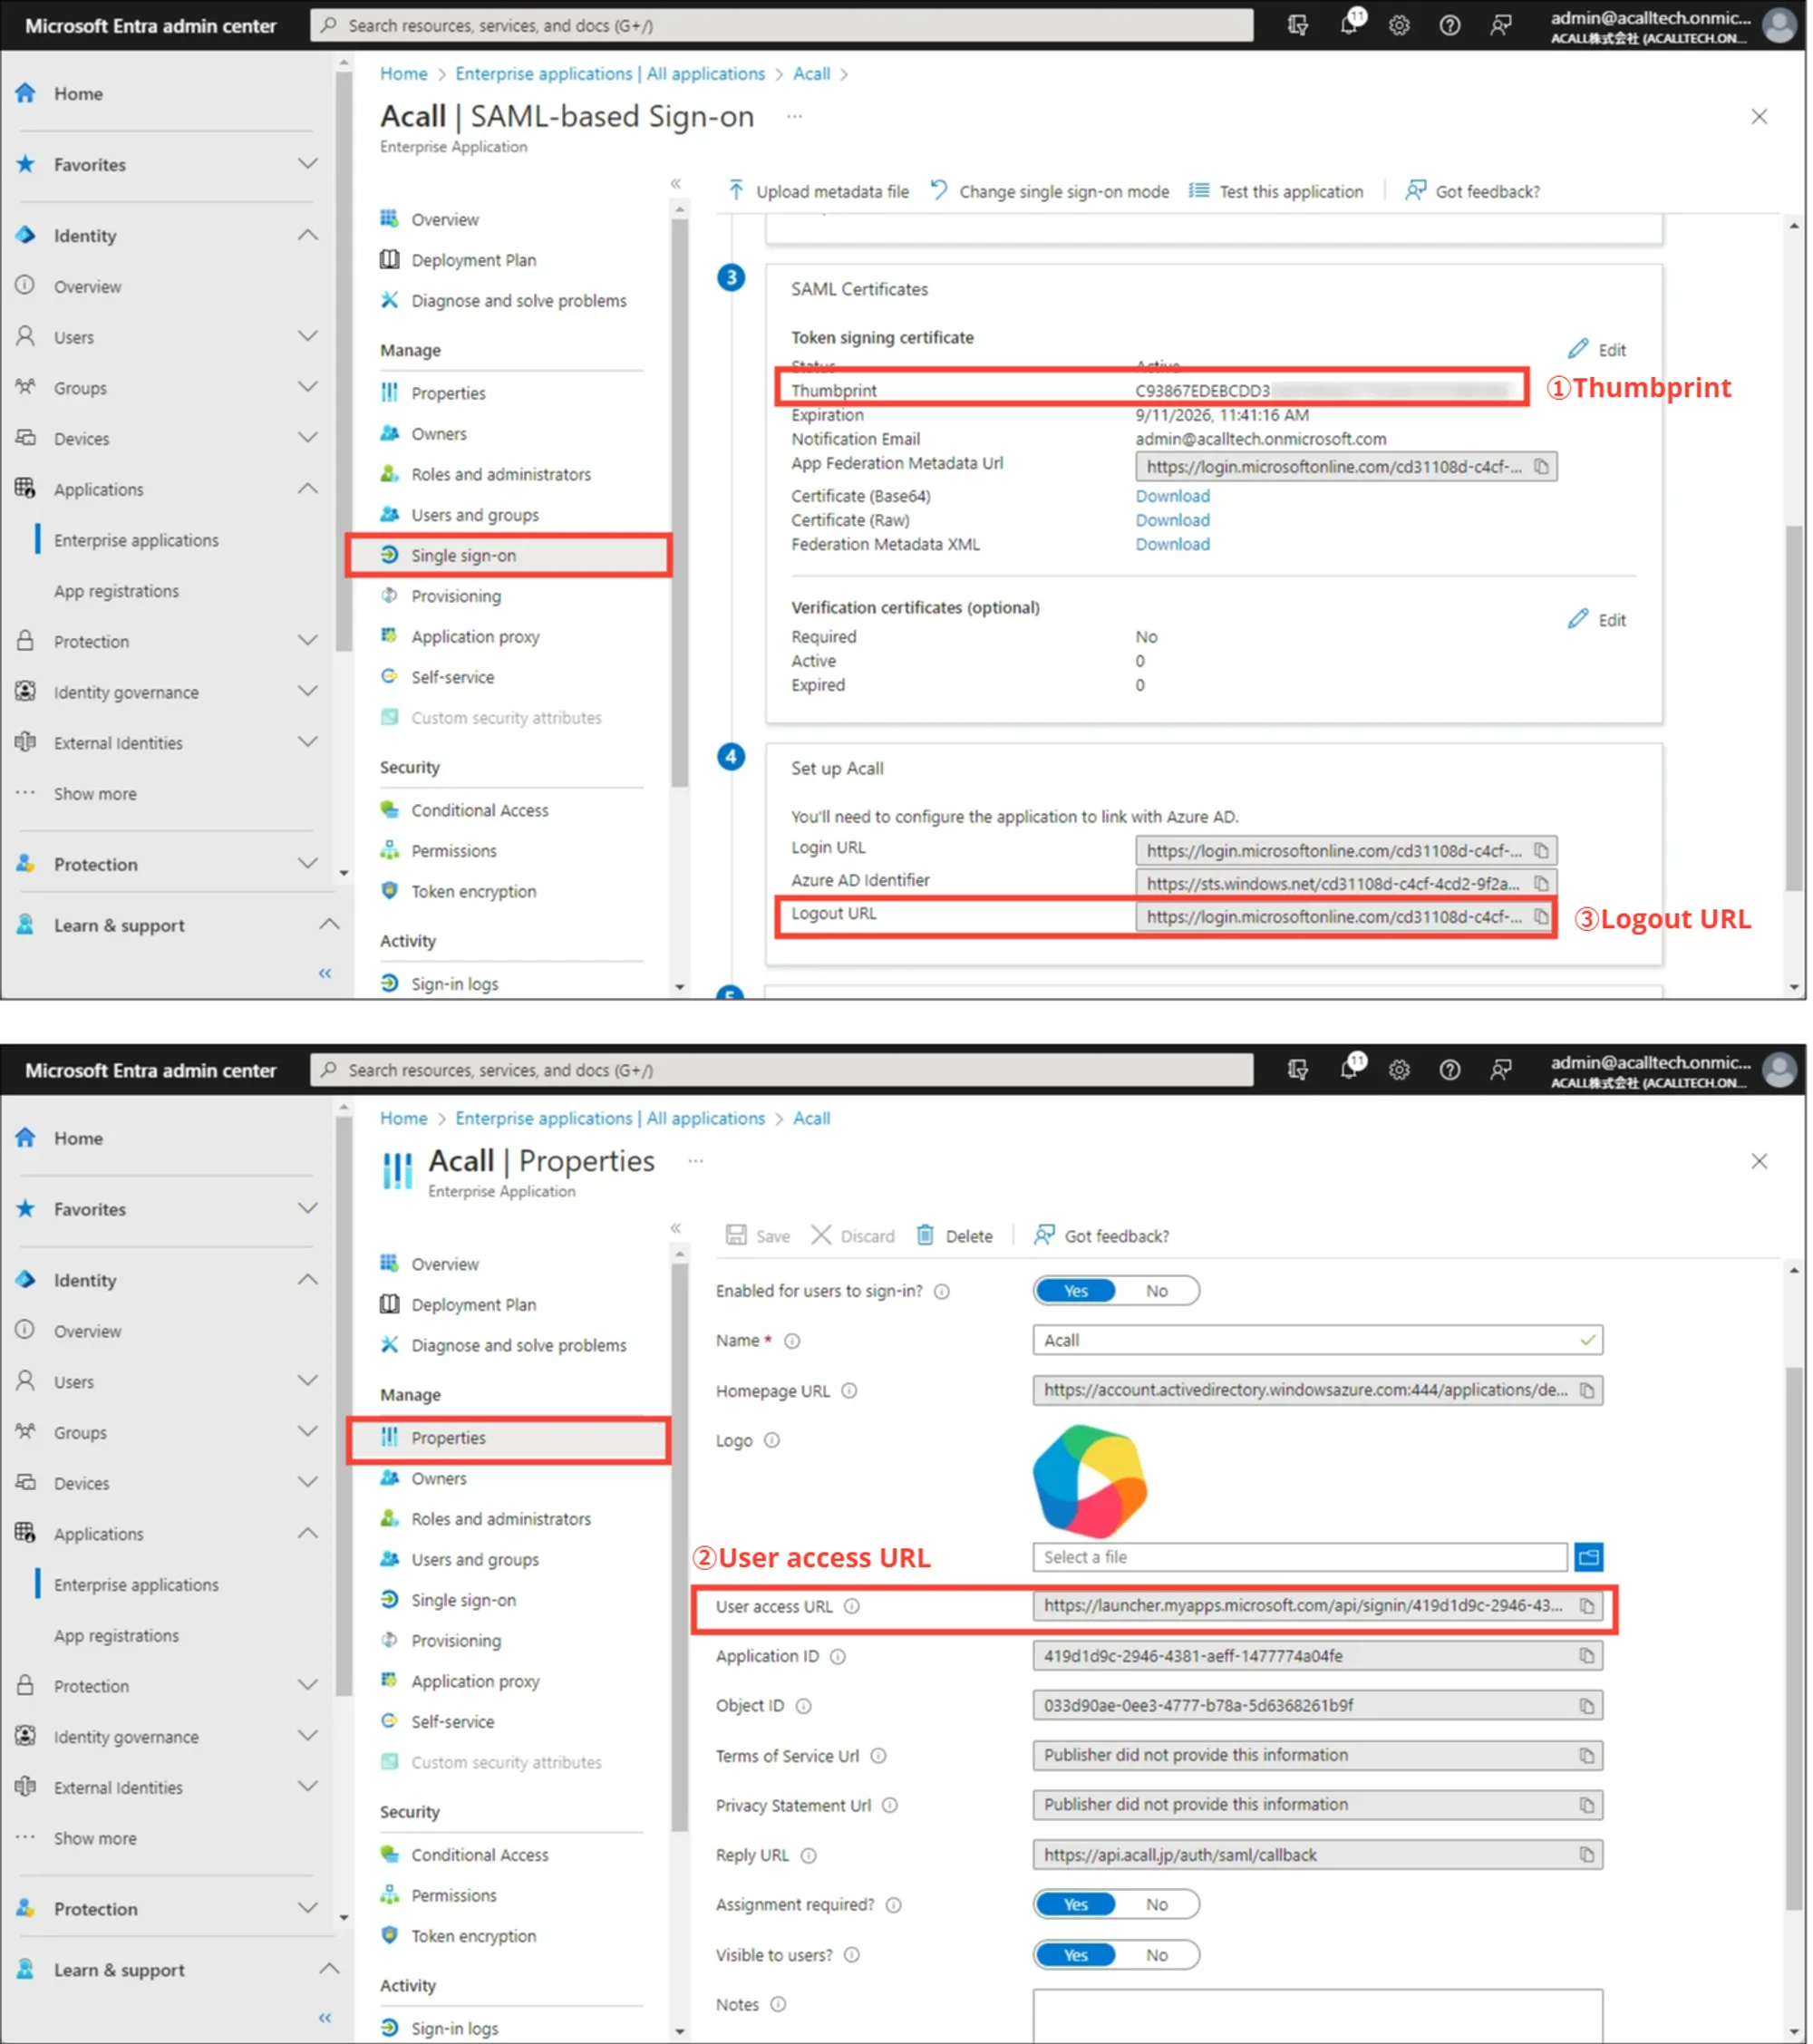
- Thumbprint
- User access URL
- Logout URL ※Only if you wish to use SLO (single logout) function.
Note:
Customers using multiple Acall environments, please provide the information for all the apps you have created.
Set Reply URL (Assertion Consumer Service URL)
Once Acall completes SSO setting, Acall will send you ‘Reply URL (Assertion Consumer Service URL)’.
Note:
For customers using multiple Acall environments, we will provide information for each app you have created.
In addition to the "Response URL (Assertion Consumer Service URL)," we will also provide the value for the "Identifier (Entity ID)." Please make sure to configure both accordingly.
Please configure the Acall app following the steps below.
Open Acall application and click [Edit] in “Basic SAML Configuration” section.
Replace “Reply URL (Assertion Consumer Service URL)” and save.
Test SSO
Test SSO login to Acall Portal or Acall Mobile. If you are not able to log in or face any problems, please reach out to Acall with the following information.
- Screenshot of the error
- Date/Time of your test
- Steps you took
- Email address of the account
Comments
0 comments
Article is closed for comments.