Contents
If you want to use either or both SSO and provisioning, you must first create an enterprise application for Acall ("Acall app").
This page describes how to create an Acall app.
Create Acall App
Note
Customers using multiple Acall environments need to create multiple apps.
For more details, please refer to "Can SSO and provisioning be used even when using multiple Acall environments?"
Open Microsoft Entra admin center.
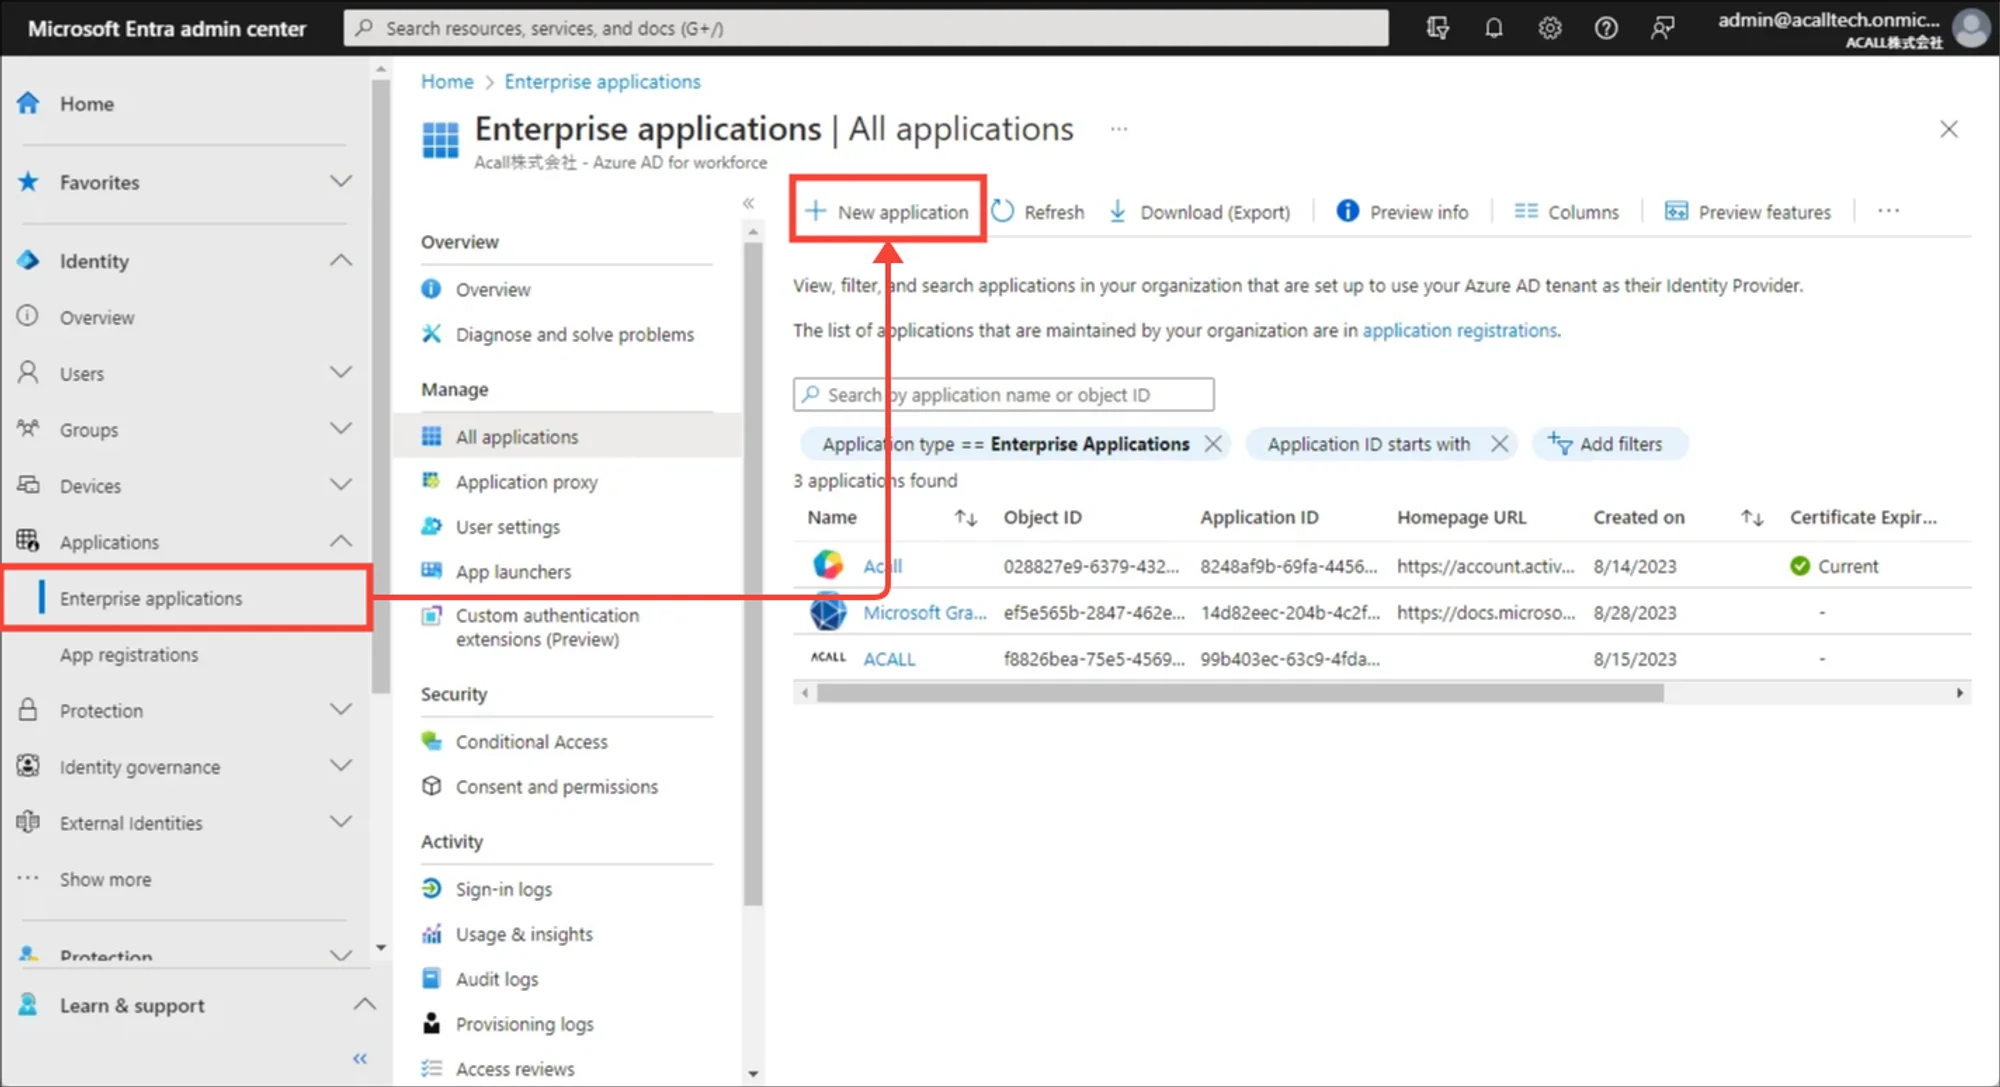
Open [Enterprise applications] and click [+ New application].
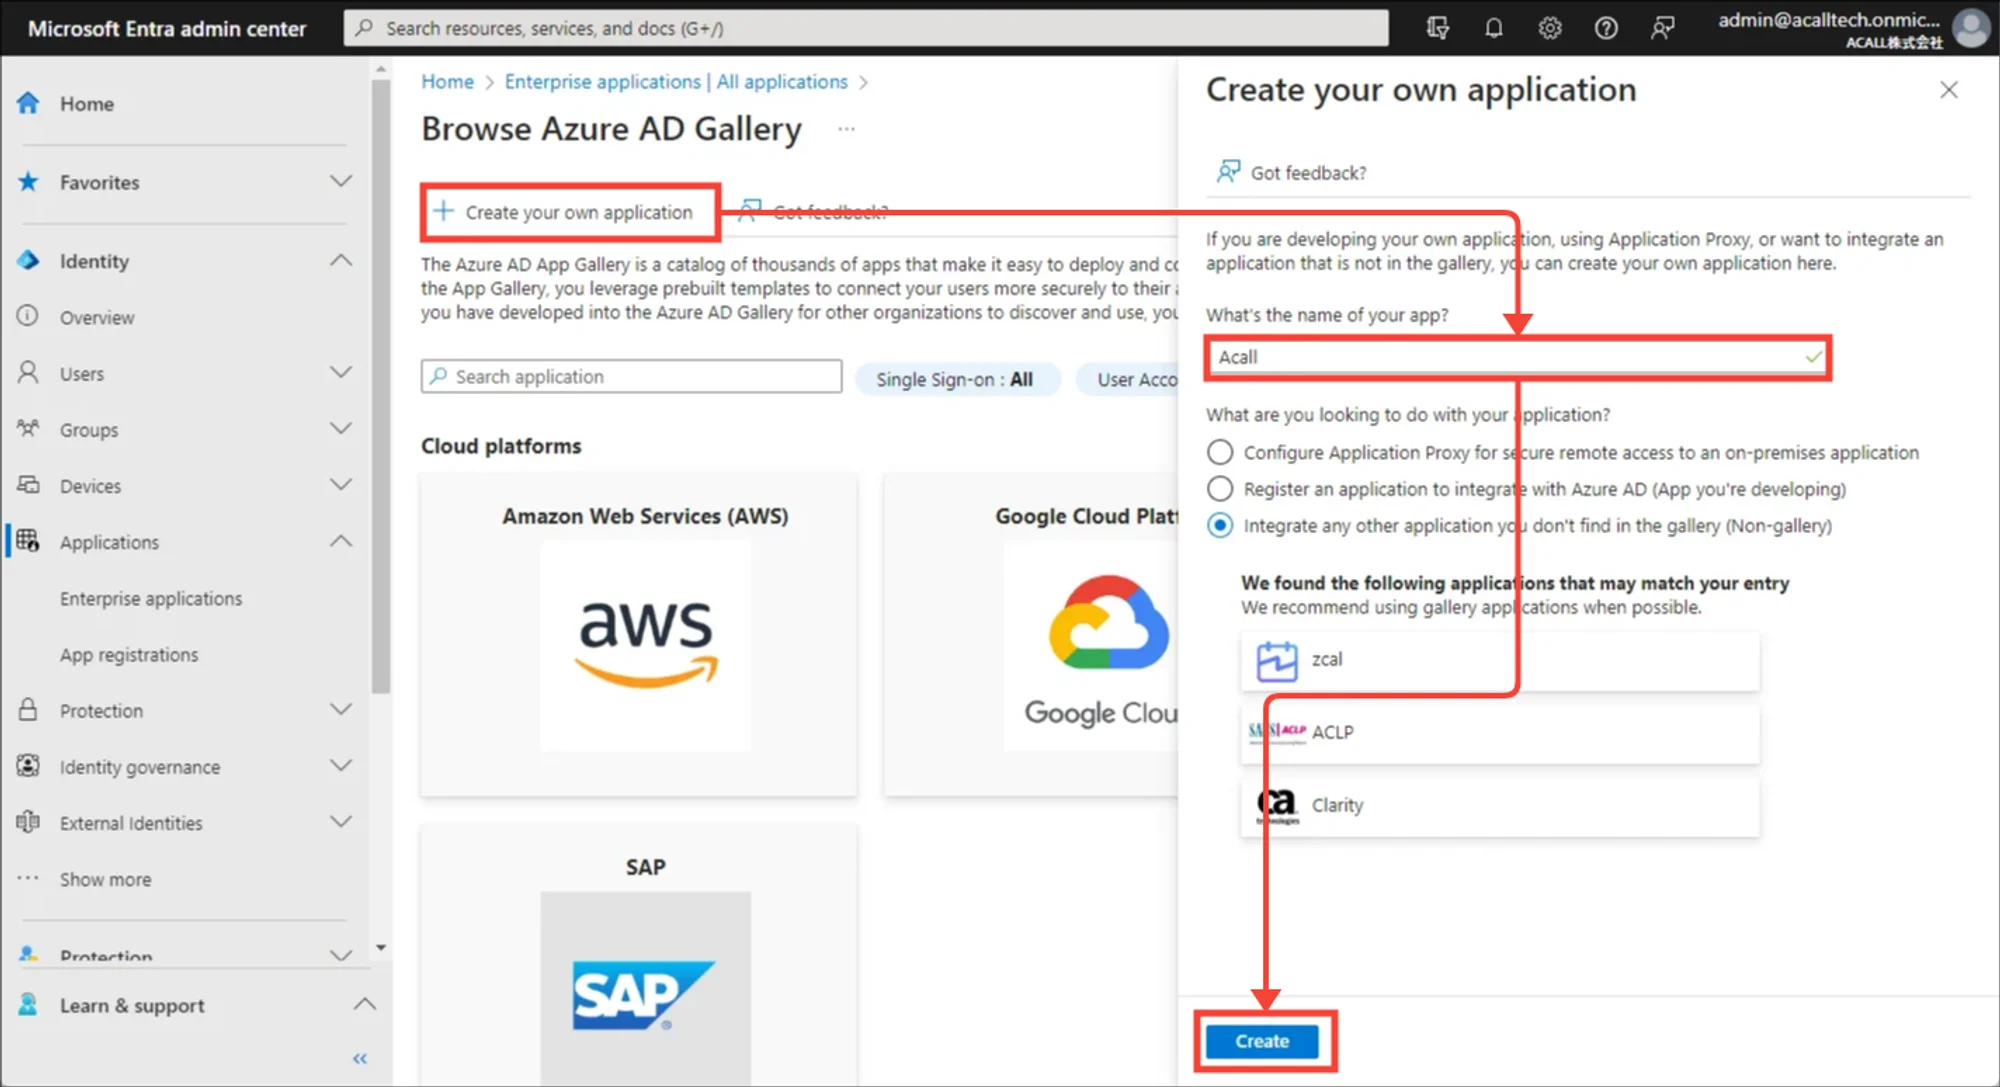
Click [Create your own application] and name ’Acall’ then click [Create].
Assign User To Acall App
Assign users who need to be enabled for Provisioning and SSO to Acall application.
💡 Note
If you have Microsoft Entra ID P1 or P2 license, group-based assignment to Acall app is available.
However, app assignment using group hierarchic structure is not supported.
💡 Note
If you provision groups, please refer to "Assign Groups To Acall App" in "[Entra ID] Group Provisioning Settings".
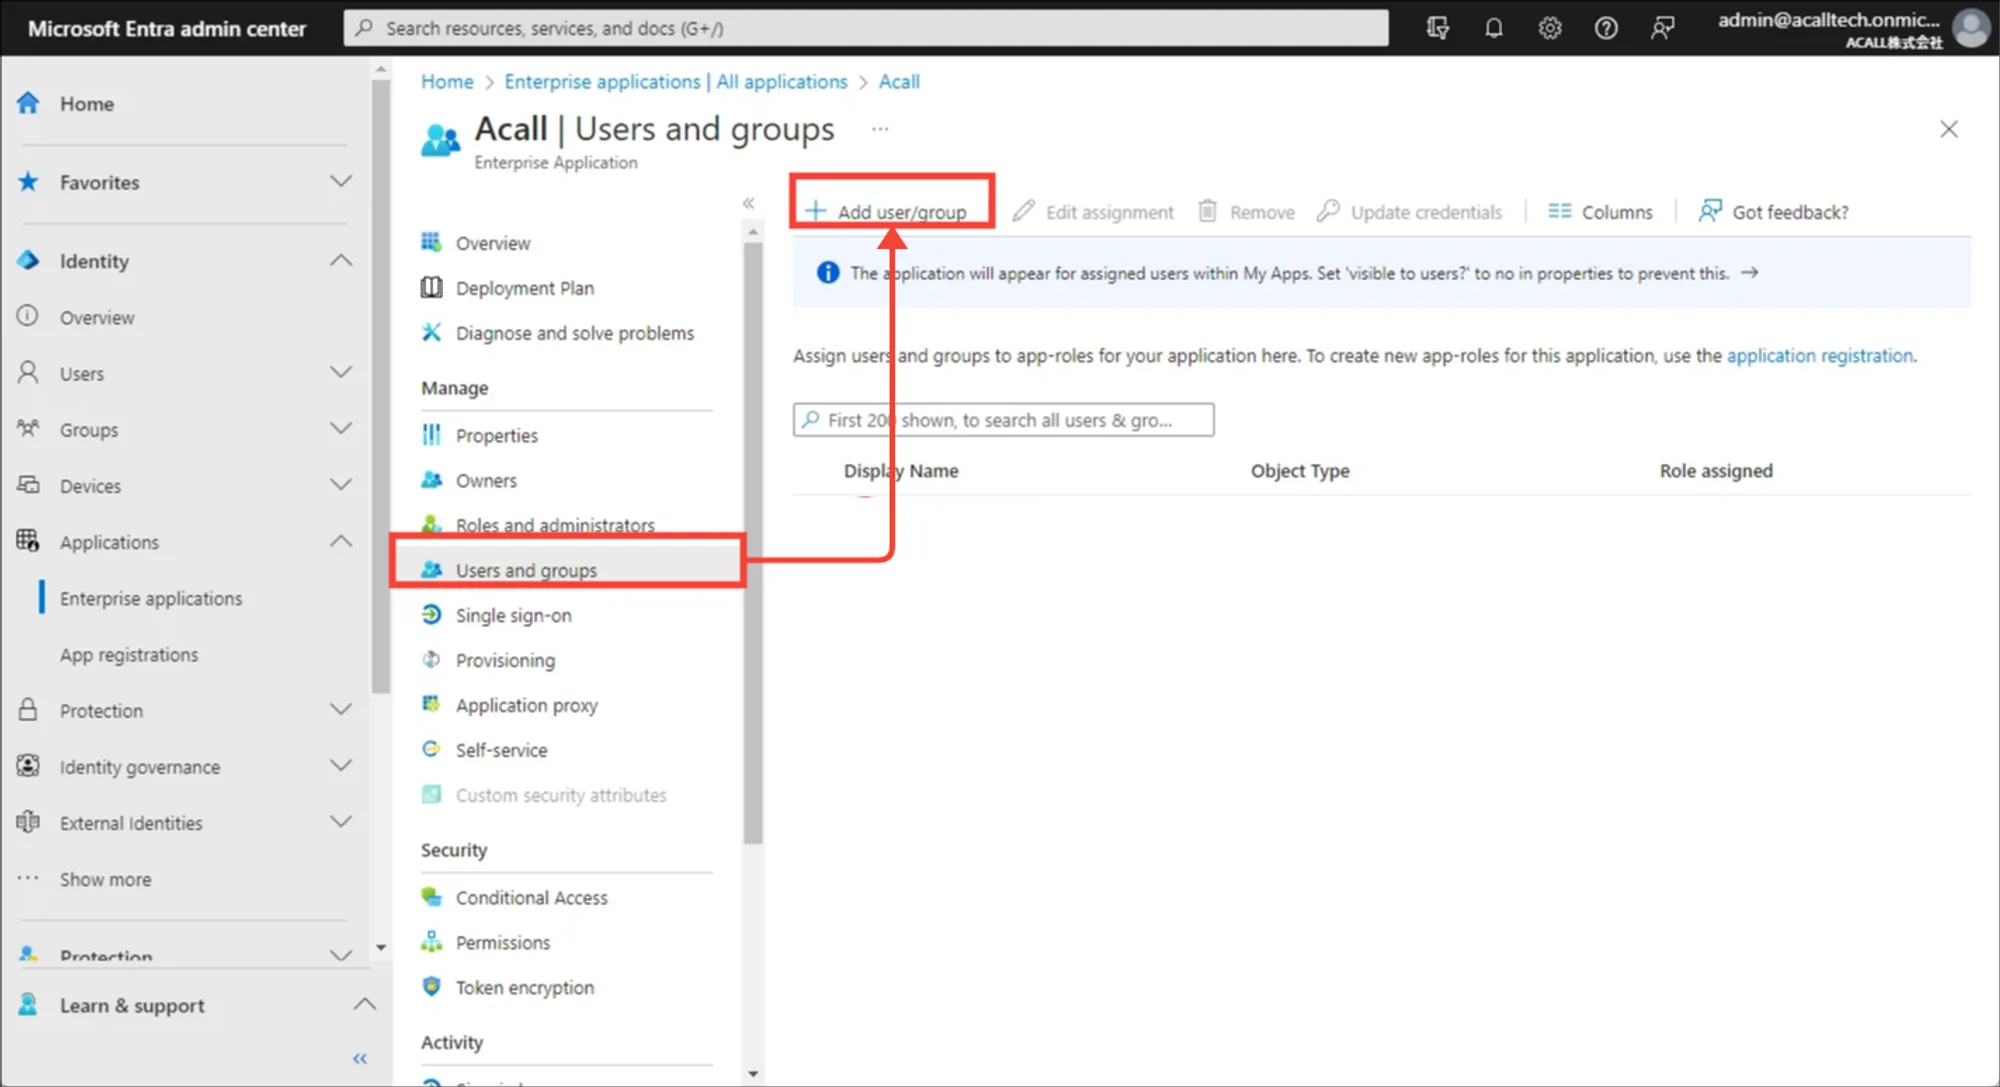
Open [Users and groups] menu of Acall application and then click [+ Add user/group].
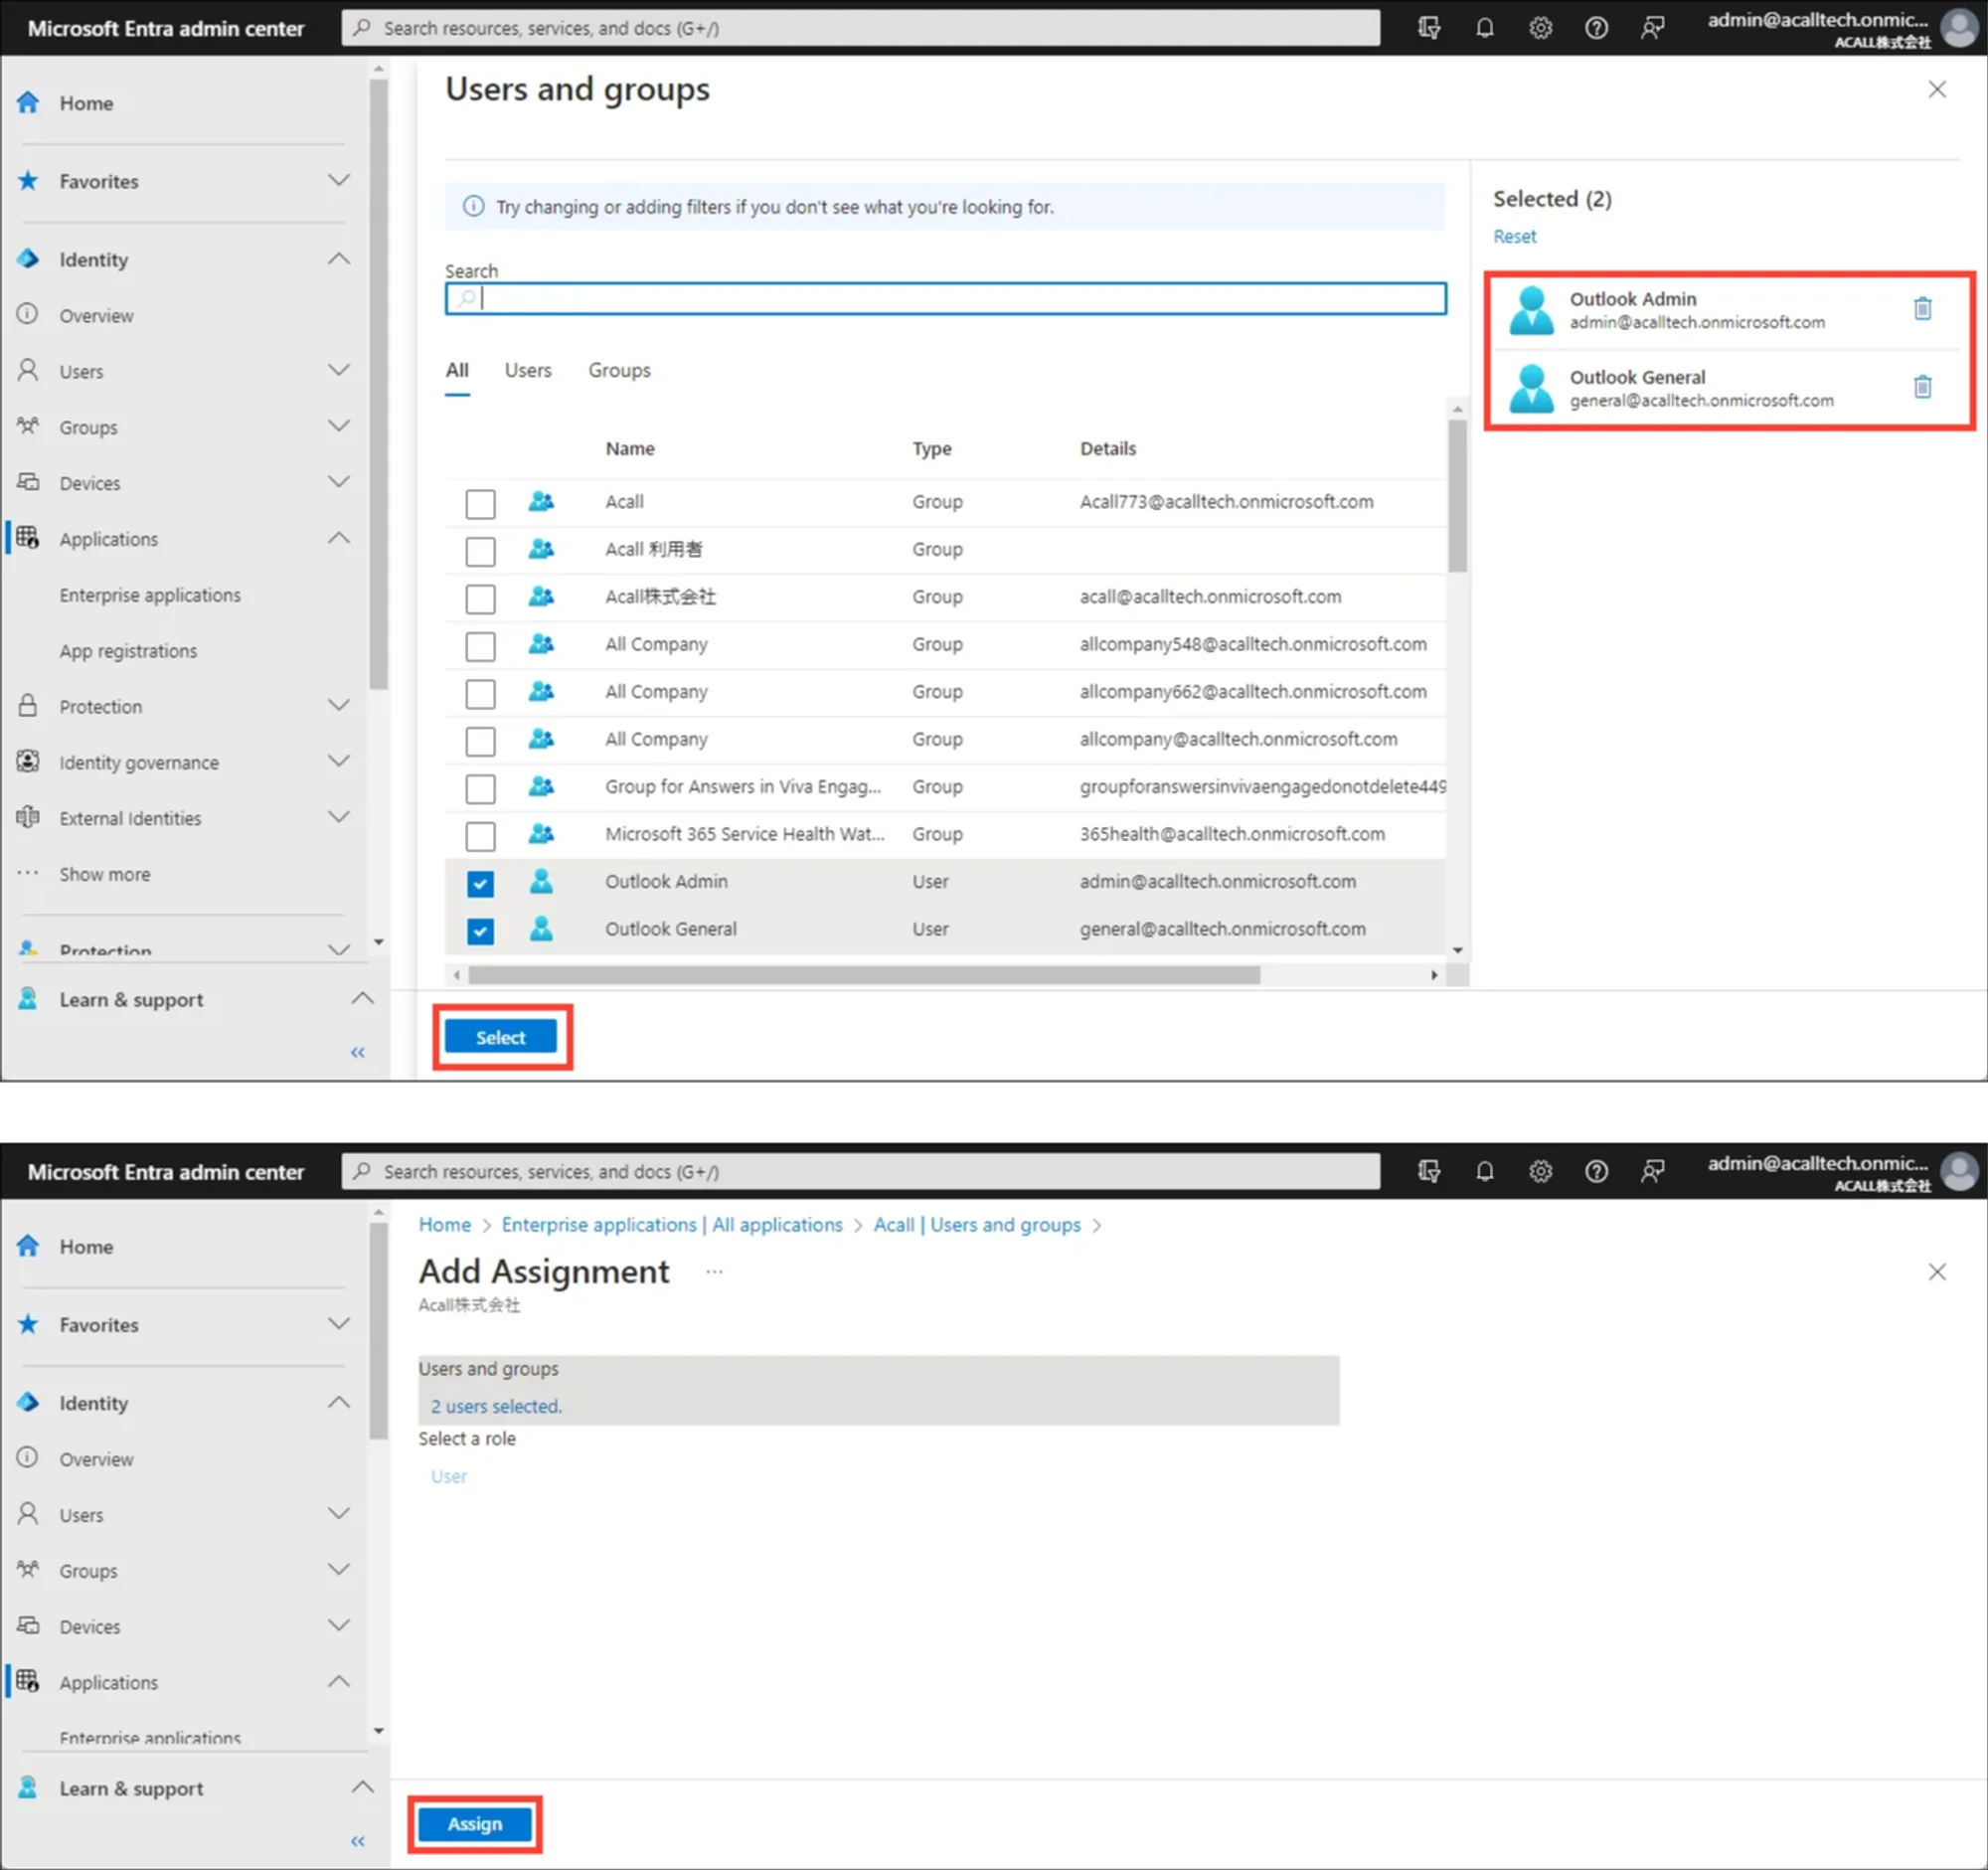
Select user or group that the user belongs to, and then assign to Acall application.
(Optional) Set the logo image for the application
Set a logo image makes it easier to recognize the Acall application on the app list.
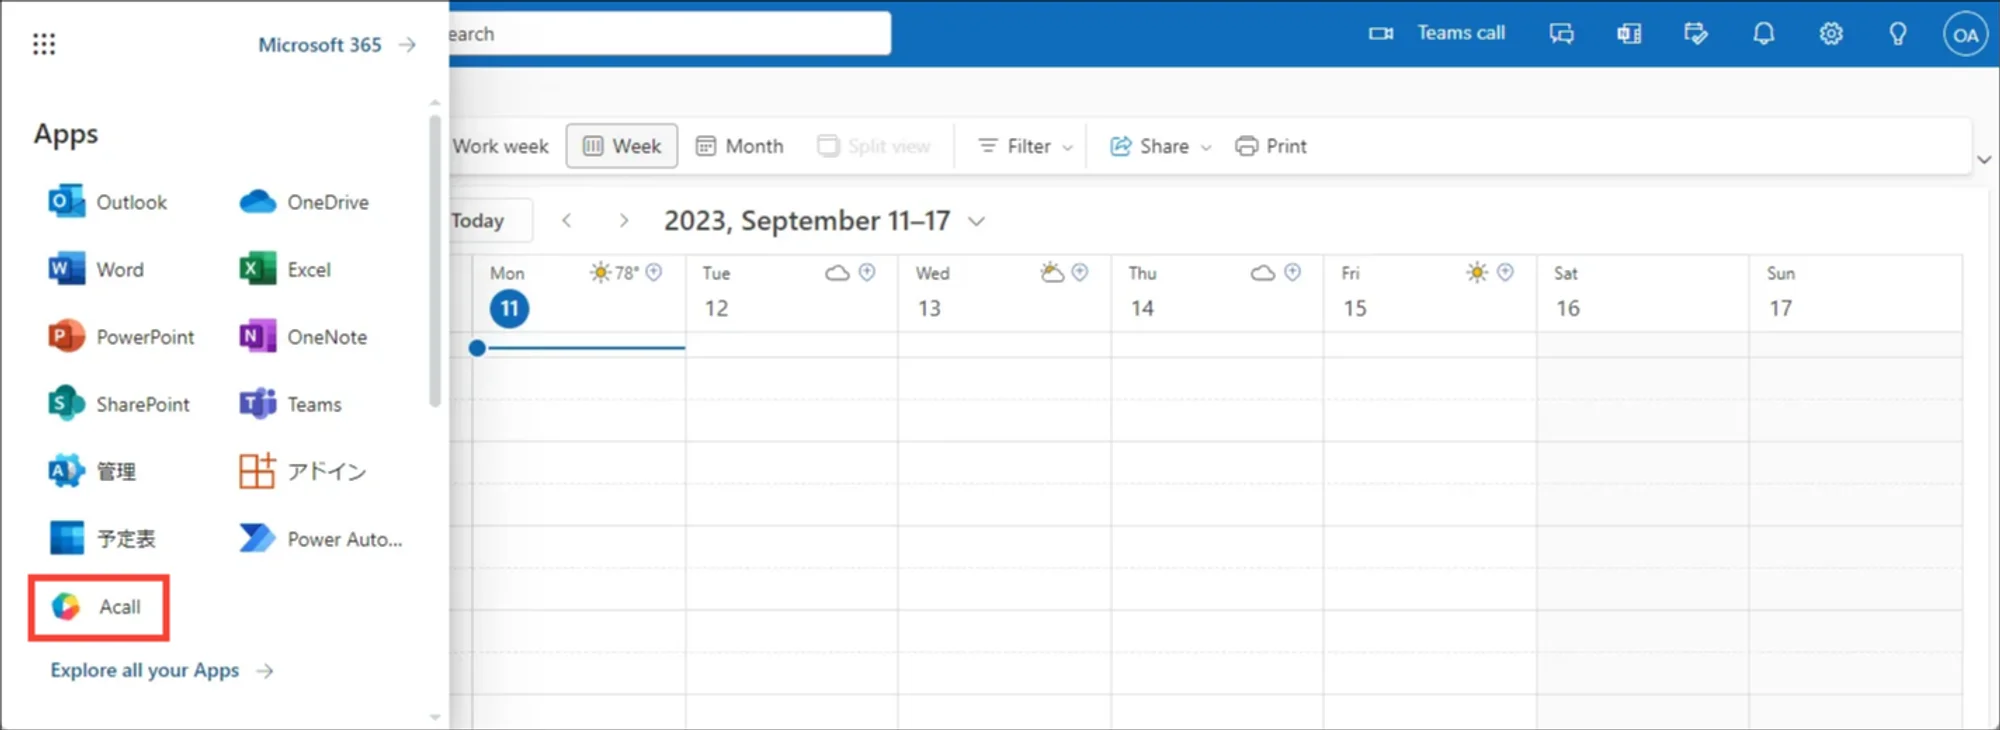
If you want to set the logo image, please follow the steps below.
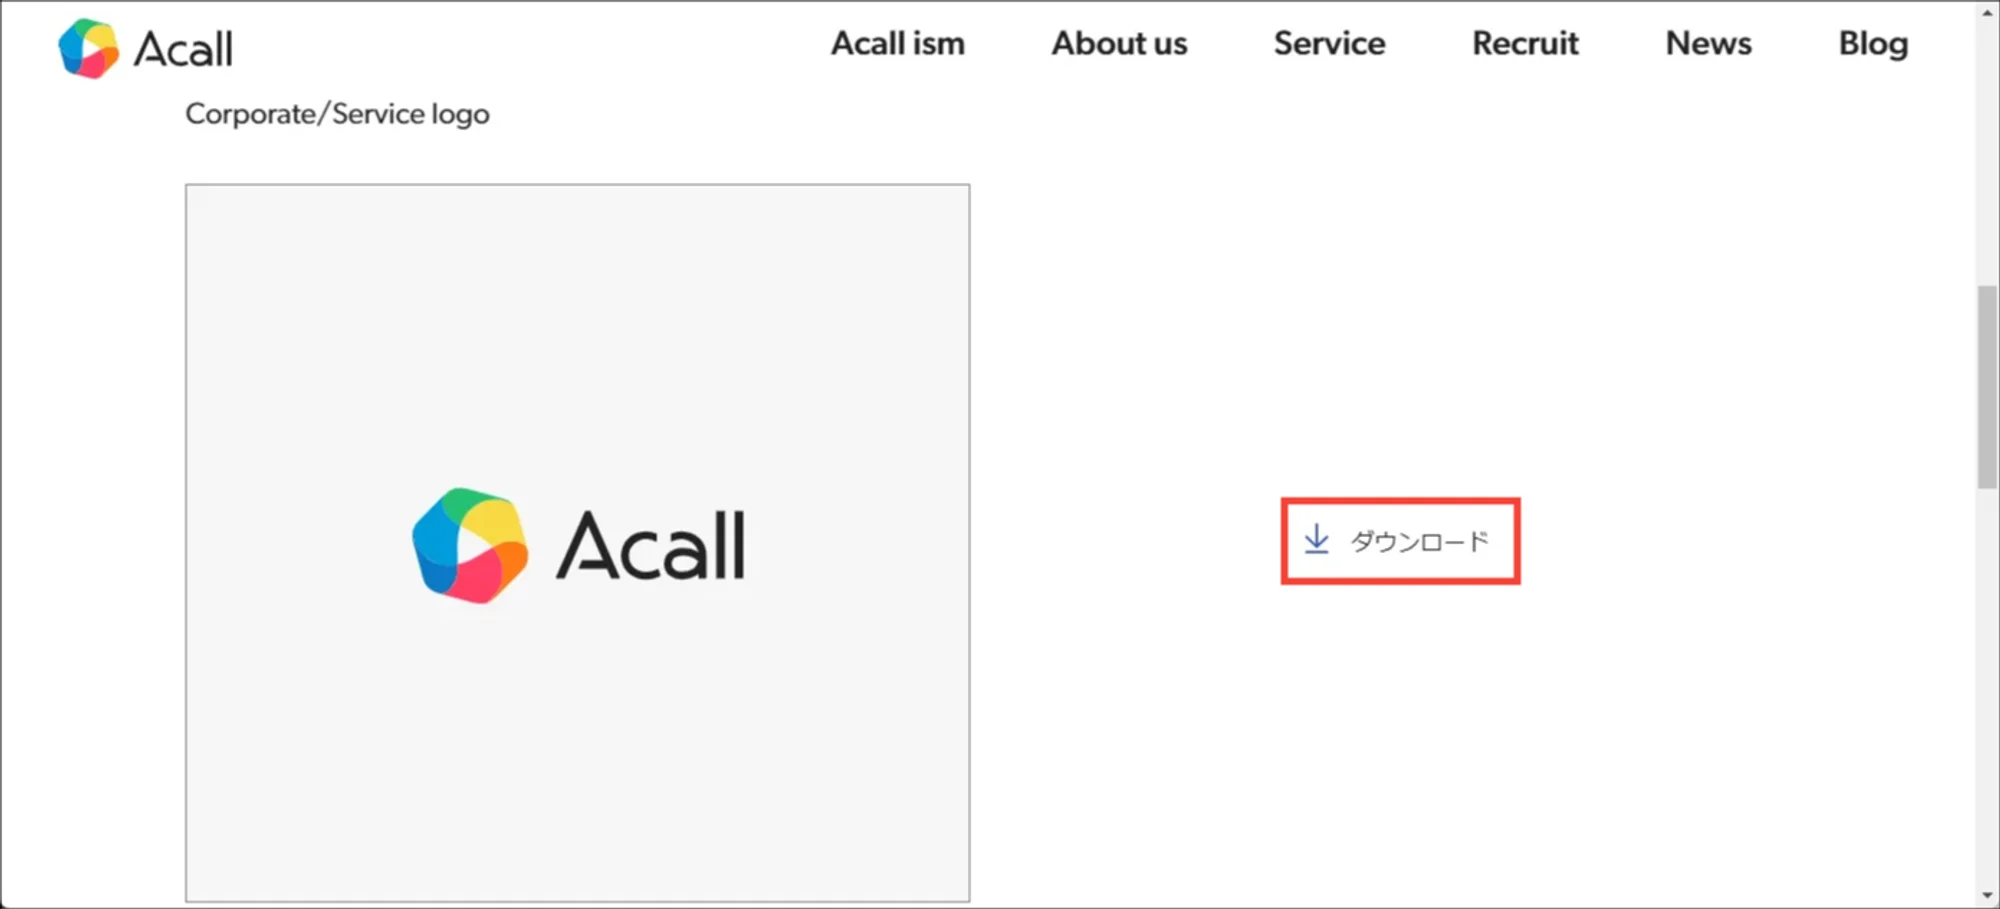
Download service logo image file from Acall press kit page.
Open [Properties] menu of the Acall application, click the folder icon for the logo setting, and select the downloaded file.
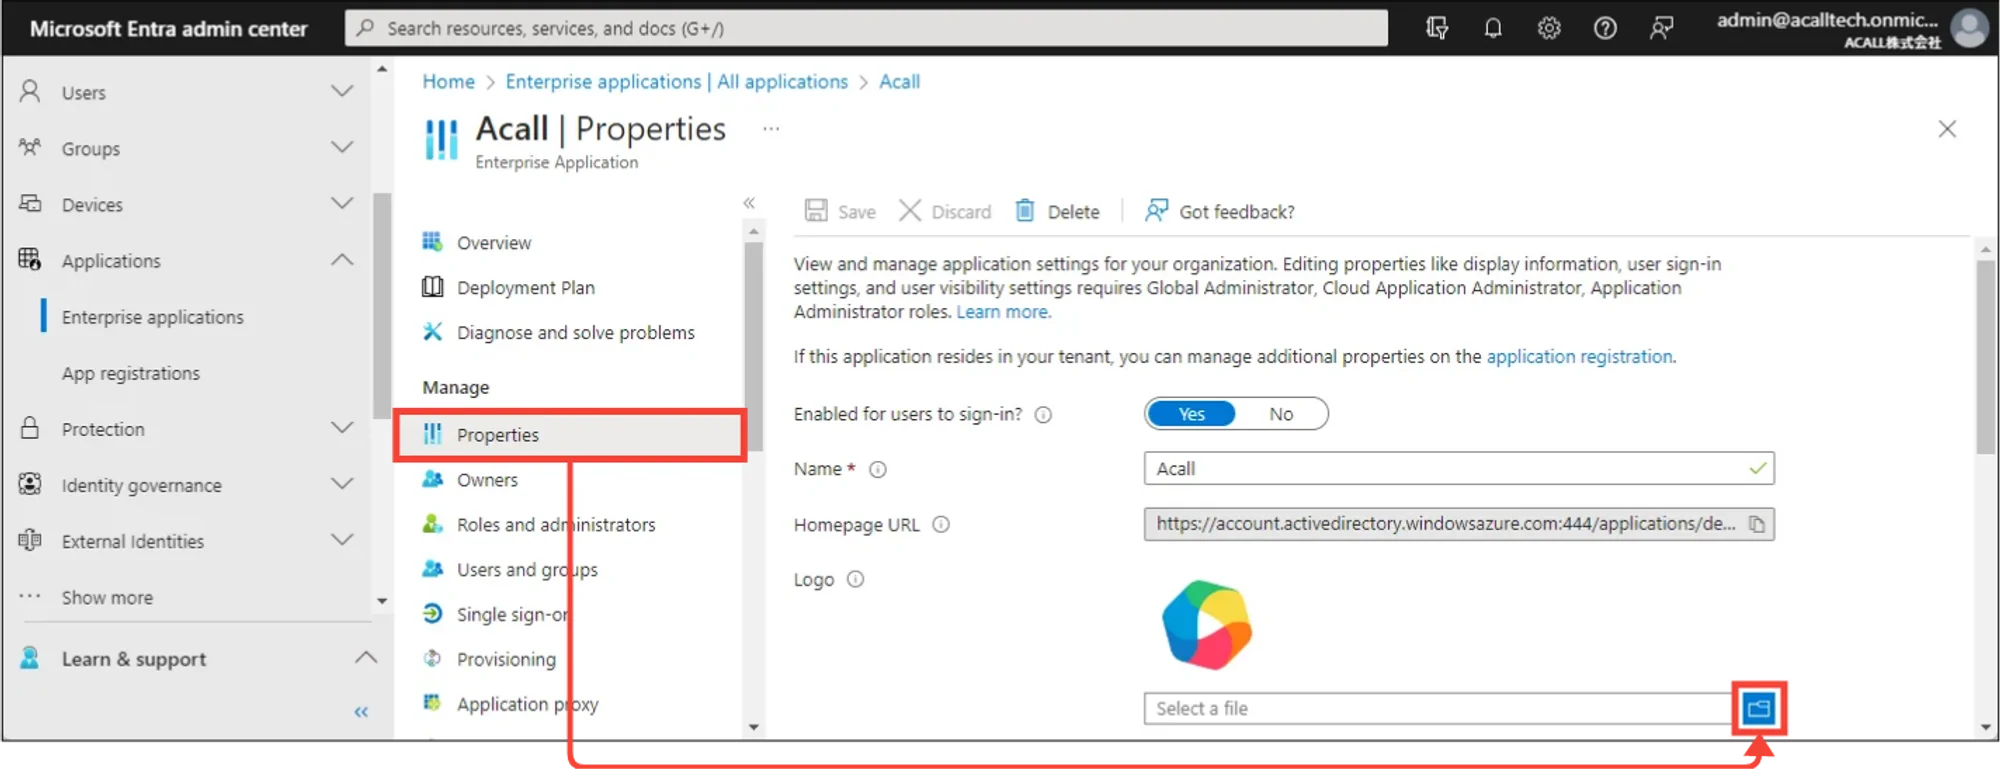
Click "Save" "Upload Complete" to save.
Comments
0 comments
Article is closed for comments.