Contents
This page explains how to reserve a Workspace on Outlook Calendar and how to edit and delete reservations.
There are two types of appointments: "internal meeting," to which only registered workers on Acall are invited, and "external appointments," to which non-registered workers (guests) are invited.
💡 For administrators
This page is for customers who have met the following conditions.
・Select "Create reservation on Outlook calendar" as meeting reservation method
 ・Select Meeting Room Reservation Method
・Acall and Outlook Calendar linking setting is complete.
 ・Link Acall and Outlook Calendar
 ・Connect Workers with Outlook Calendar
 ・Import Meeting Rooms and Equipment from Outlook
Reserve a workspace on Outlook Calendar (internal meeting)
Create internal meeting on Outlook Calendar.
Open Outlook Calendar and click [New event].
On the creation screen, enter the following items and click [Save].
⚠️
If you are use desktop version of the application, please set the format to "HTML".
| Input items | |
| Title | Title of the meeting |
| Date |
Date of the meeting ※required
|
| Meeting room |
Meeting room for the meeting ※required |
⚠️
If meeting room (workspace) is not selected, the meeting will not be synced with Acall.
Reserve a workspace on Outlook Calendar (external meeting)
Create external meeting (appointment) on Outlook Calendar.
You need to install Acall add-in when you create external meeting (appointment).
By installing add-in, you can sync your appointments on Outlook with Acall and send appointment codes.
・Install Acall Office Add-in
・Install Acall Office Add-ins in Bulk (Administrators)
If you don't use ACALL add-in, the appoint will be synced with Acall as an "internal meeting" even if a meeting room (workspace) for external guests is selected.
Open Outlook Calendar and click [New event].
On the creation screen, enter the following items and click [Save].
⚠️
If you are use desktop version of the application, please set the format to "HTML".
| Input items | |
| Title | Title of the appointment |
| Date |
Date of the appointment ※required
|
| Meeting room |
Meeting room for the appointment ※required ※The behavior of registering an appointment using Acall add-in without entering a meeting room depends on the customer's environment. For details, please refer to "In case appointment/meeting is created without selecting a meeting room" below. |
⚠️
If meeting room (workspace) is not selected, the meeting will not be synced with Acall.
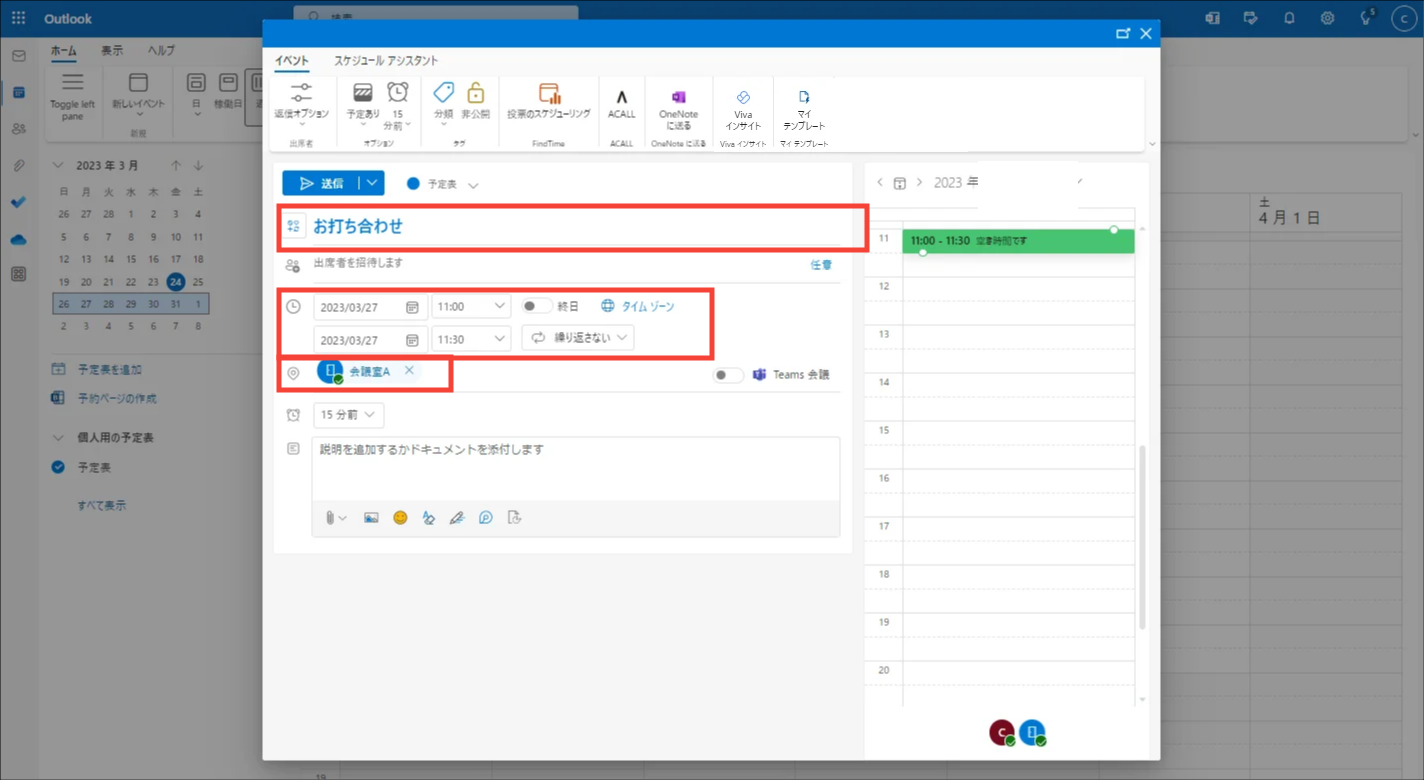
Enter guest (visitor) information. Click the [Acall add-In] icon.

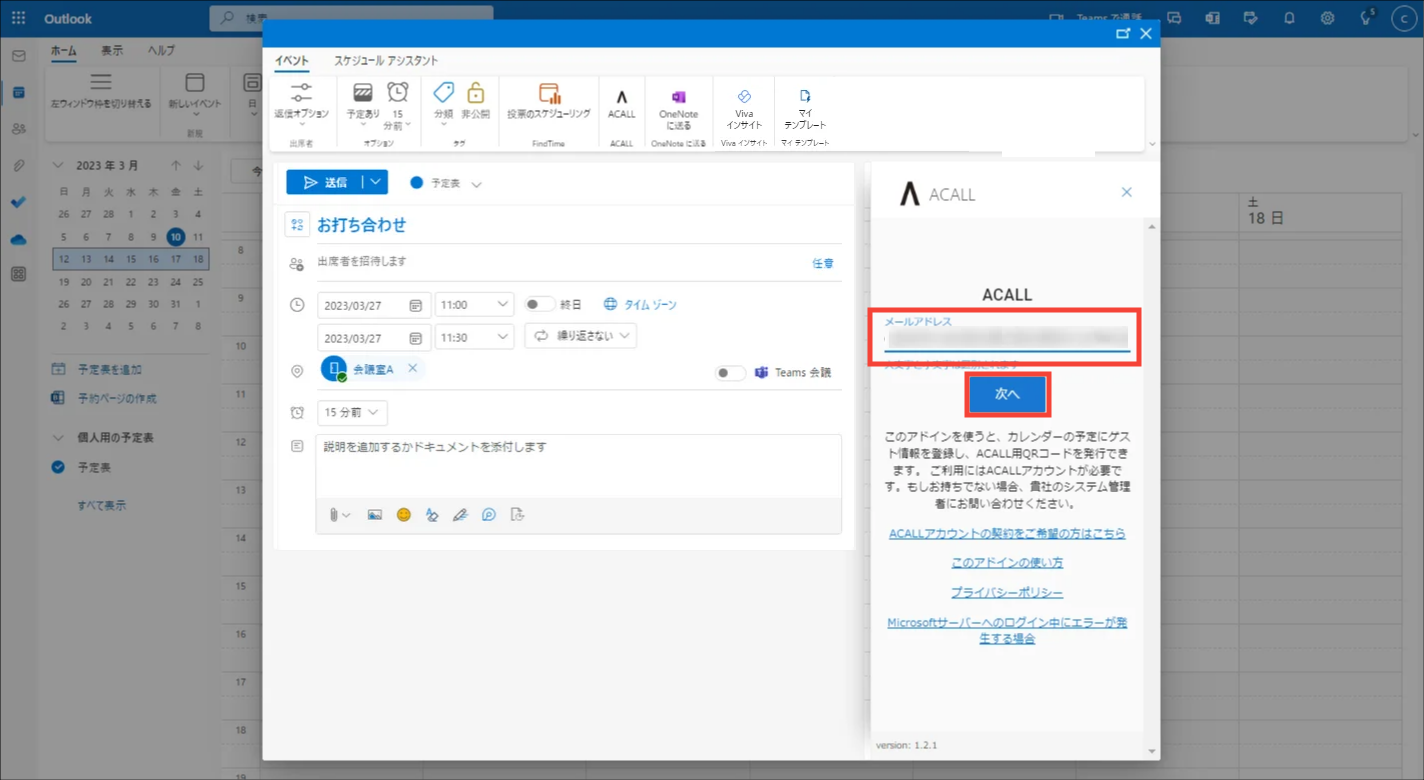
On the Acall add-in login screen, enter your e-mail address registered in Acall and click [NEXT].
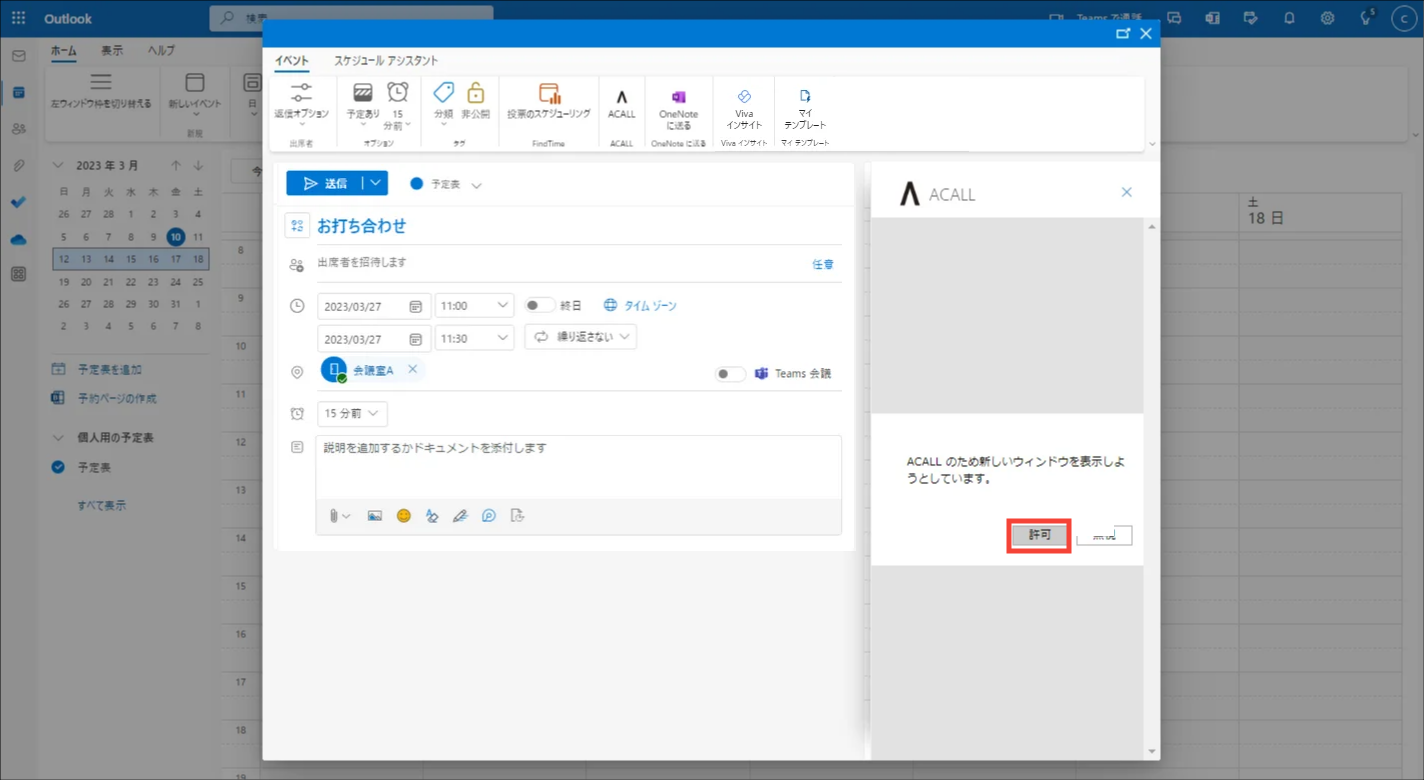
If the following message is displayed, click [Allow].
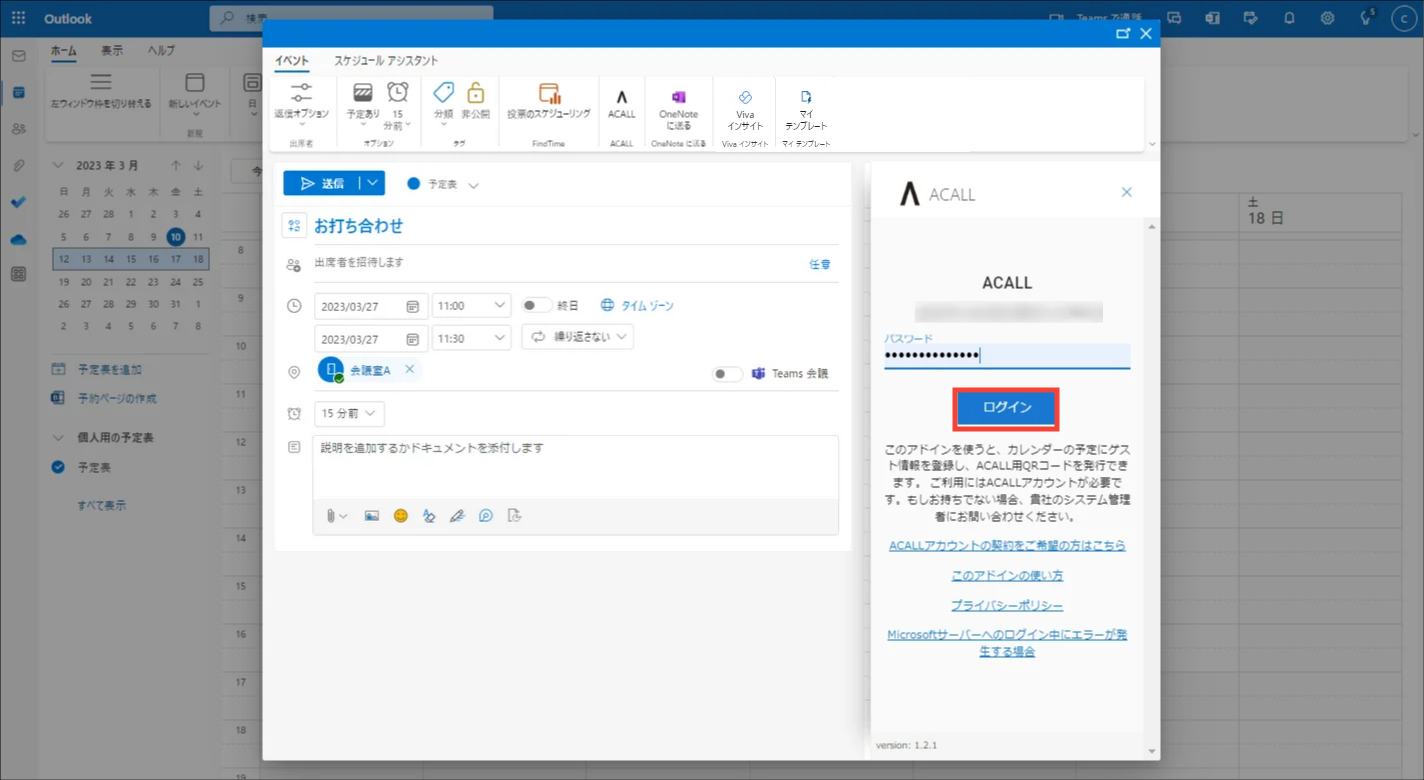
Enter your password registered in Acall and click [LOGIN].
Enter guest (visitor) information on Acall add-in screen.
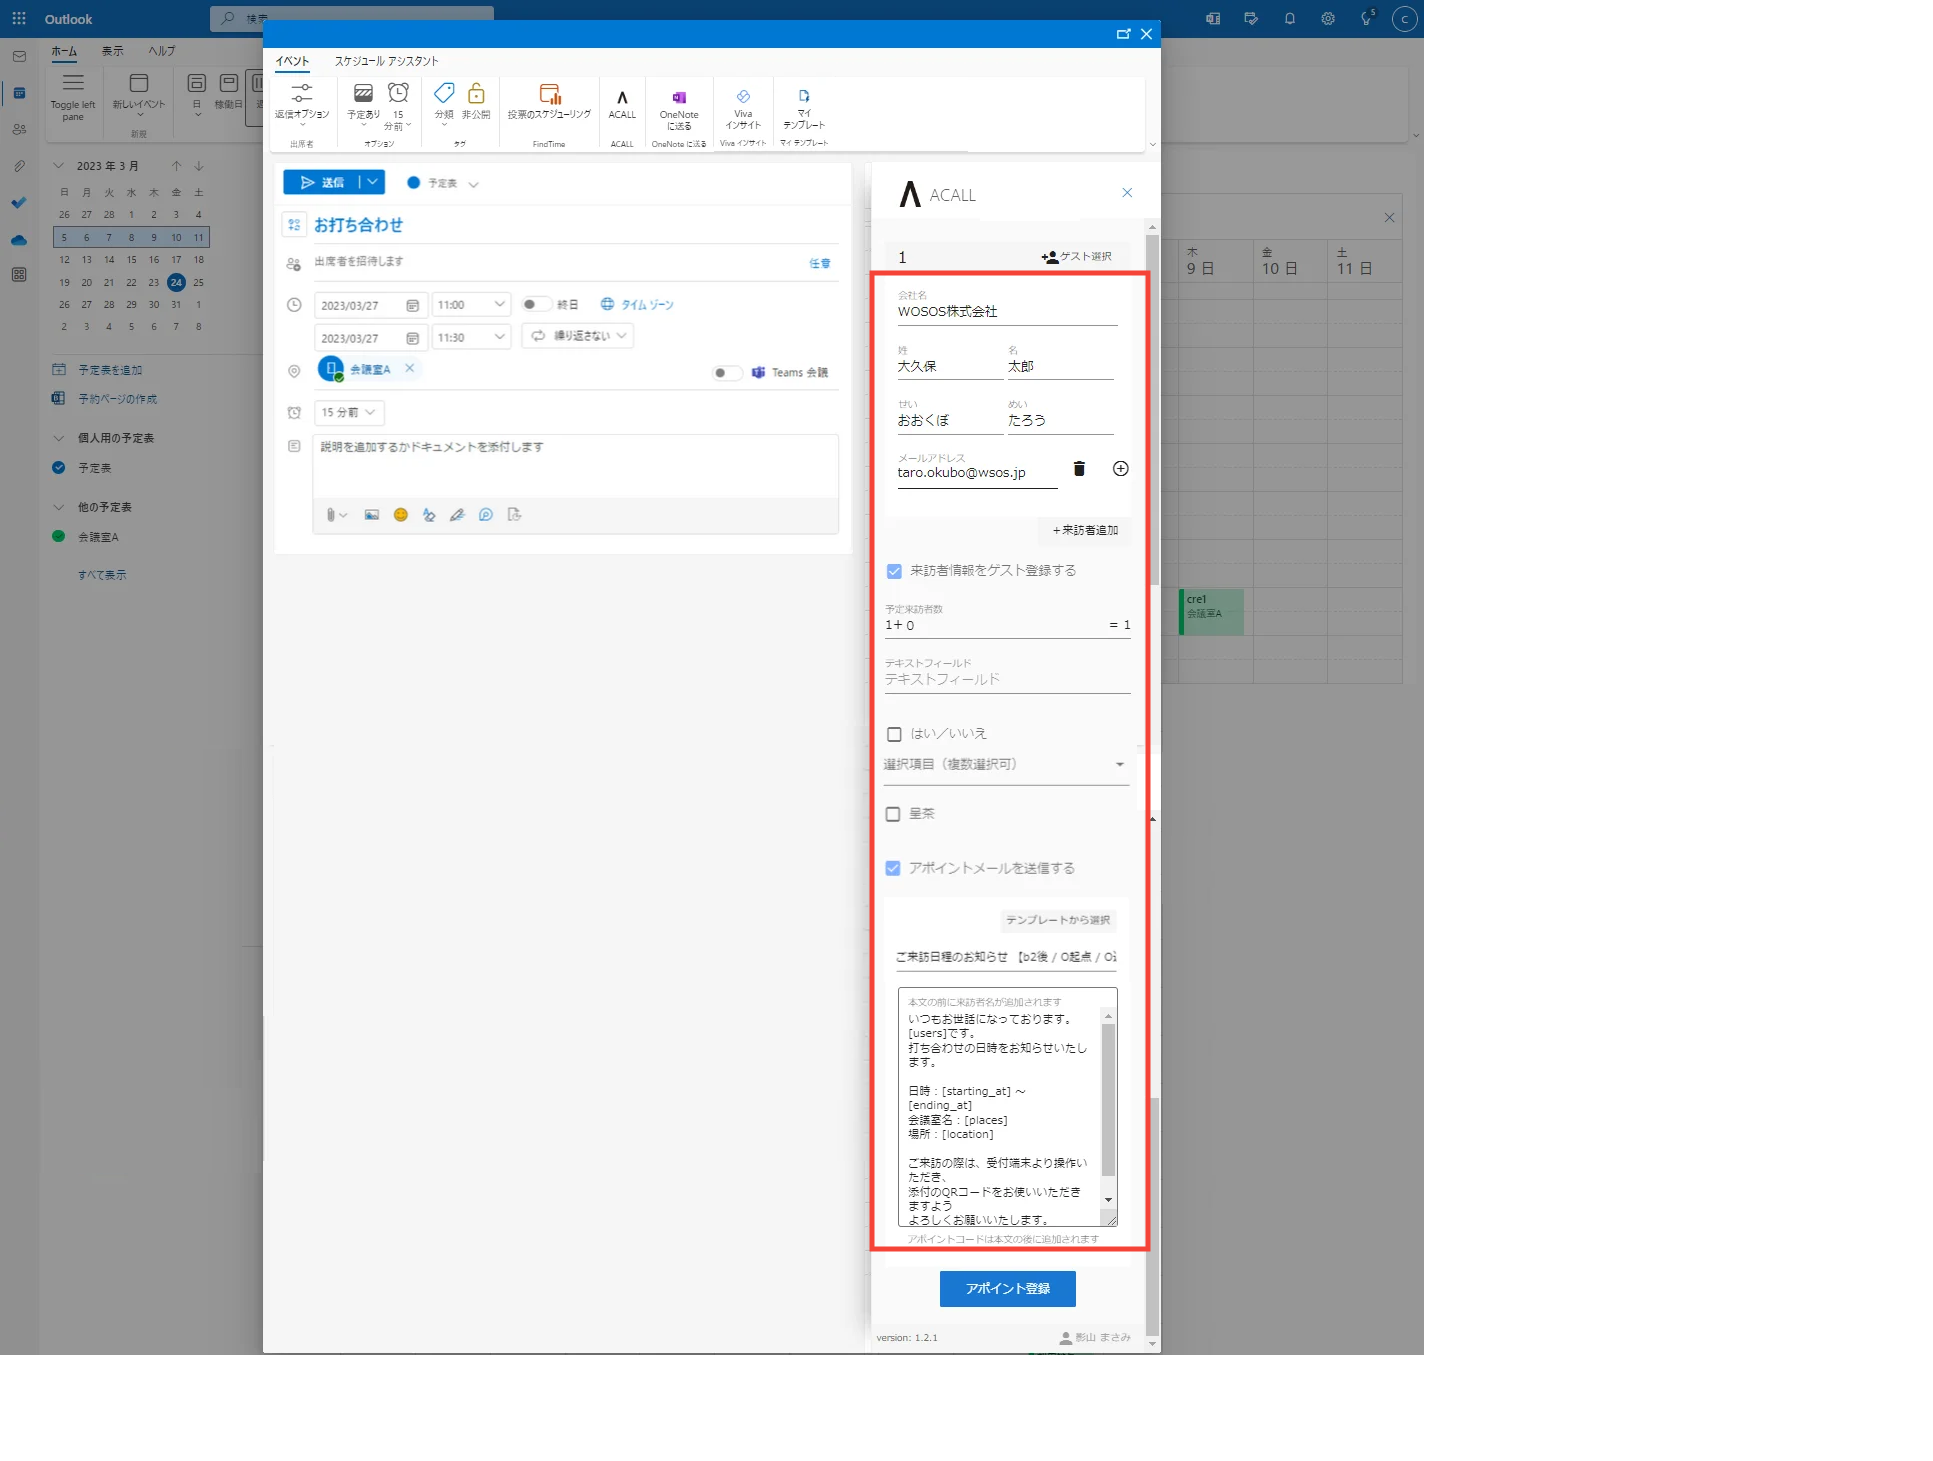
| Item | Input Item |
| company | Company name of the guest |
| family name・given name | Guest's name ※Family name is required |
|
Guest's email address
Appointment code will be sent to this email address.
|
|
| + ADD GUEST |
If there are multiple guests, click [ADD GUEST] and enter information of each guest.
|
|
save in guest book |
By checking [save in guest book] checkbox, the guest information will be registered in the guest book on Acall.
Next time entering the guest information, you can pull the guest information from the [SELECT GUEST] menu. |
| guest count |
If the information of guests other than the main guest is unknown, just enter the number of guests in [guest count].
|
| appointment code |
If the Appointment Code Setting is set to [Manual], this field is required. If [Automatic] is selected, the this field will not be displayed. This setting can be changed by the administrator in [Company Setting] > [Appointment Code Setting] > [How to create appoint codes] on Acall. |
|
send email |
If you check [send email] checkbox, e-mail with an appointment code will be sent to the guest when the appointment creation is complete.
|
|
CHOOSE FROM TEMPLATES |
Select one of the registered e-mail templates.
You must select a template when sending appointment e-mail, but you can edit the subject and body of the e-mail in the below field. |
💡 Note
Administrators can create email template.
 ・Setting Email Templates
After completing the guest information, click [REGISTER APPOINTMENT].
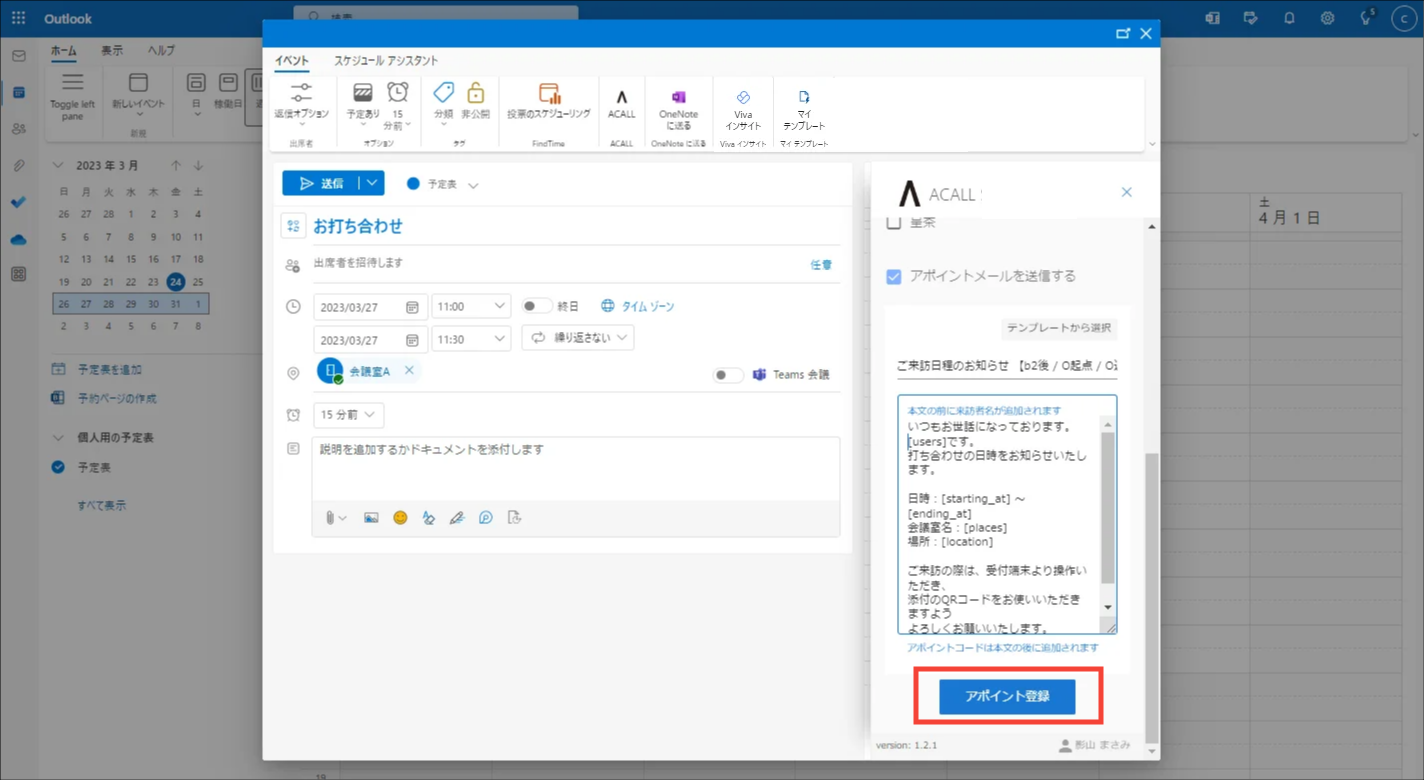
Please check the detail if the following note is displayed.
Click [Send] and complete appointment creation.
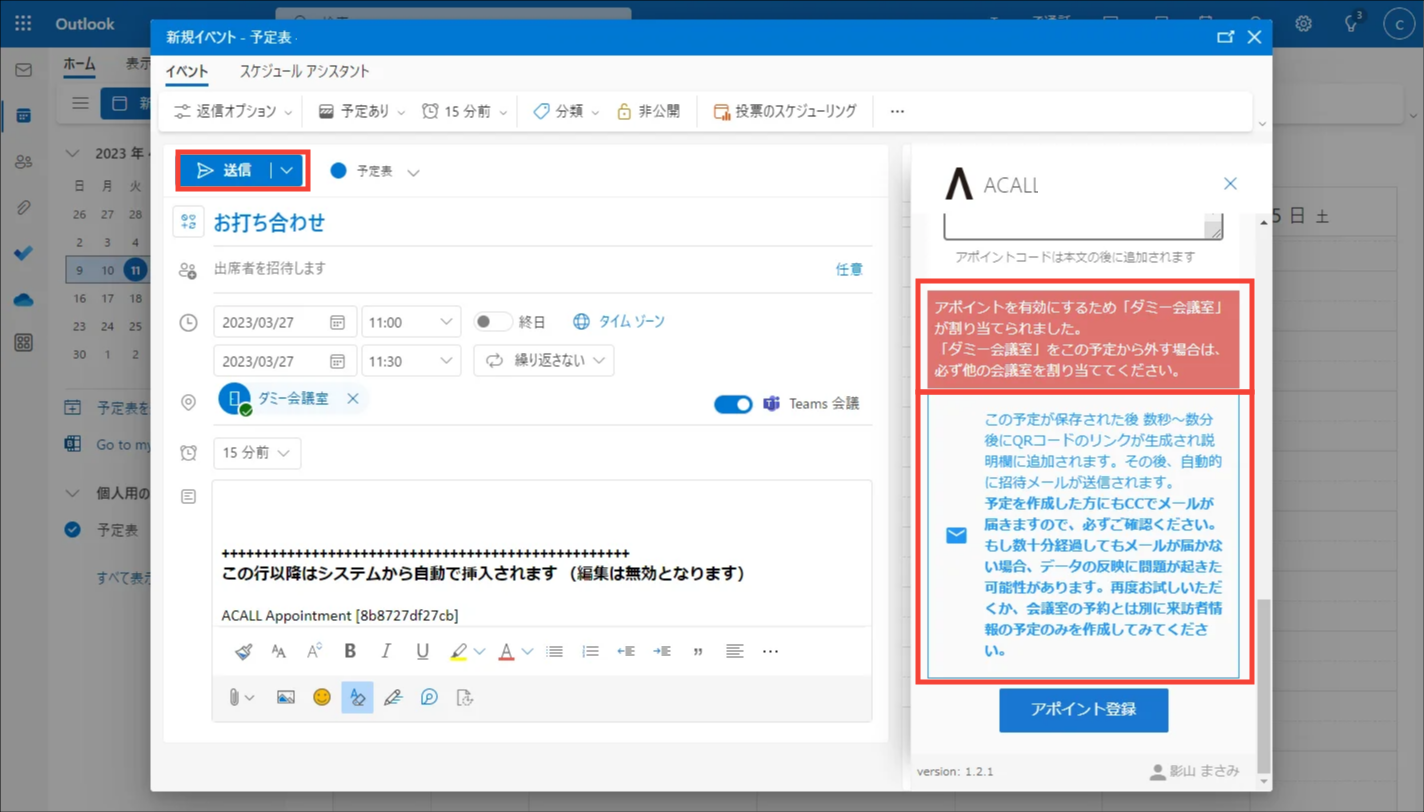
💡Note
If meeting room (workspace) is not selected, the meeting will not be synced with Acall.
The behavior of registering an appointment using Acall add-in without entering a meeting room depends on the customer's environment.
For details, please refer to "In case appointment/meeting is created without selecting a meeting room" below.
Appointment is created on Outlook Calendar.
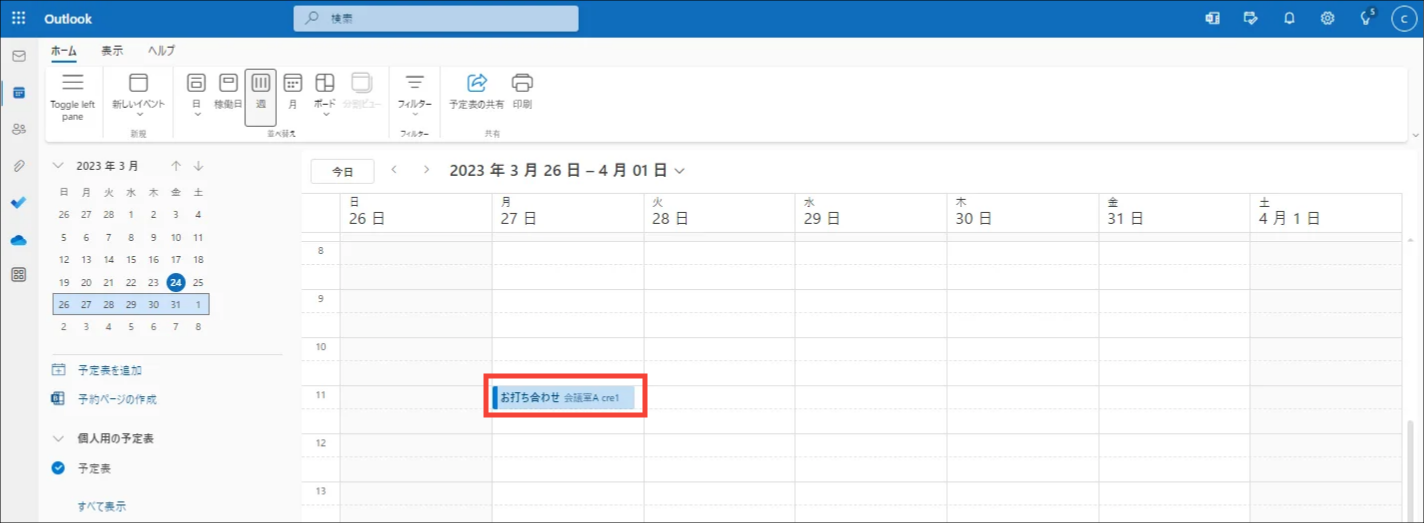
Appointments created on Outlook Calendar will be automatically synced with Acall.

💡 Note
It may take a few minutes to be synced.
If it does not synced after a few minutes, please refer to "Appointments created on calendar are not reflected in Acall".

If meeting room (workspace) is not selected, the meeting will not be synced with Acall.
You must select a meeting room (workspace) when you create appointments.
If an appointment is created in Acall add-in and the [send email] checkbox is checked, email with an appointment code will be sent to the guest when the appointment is synced with Acall.
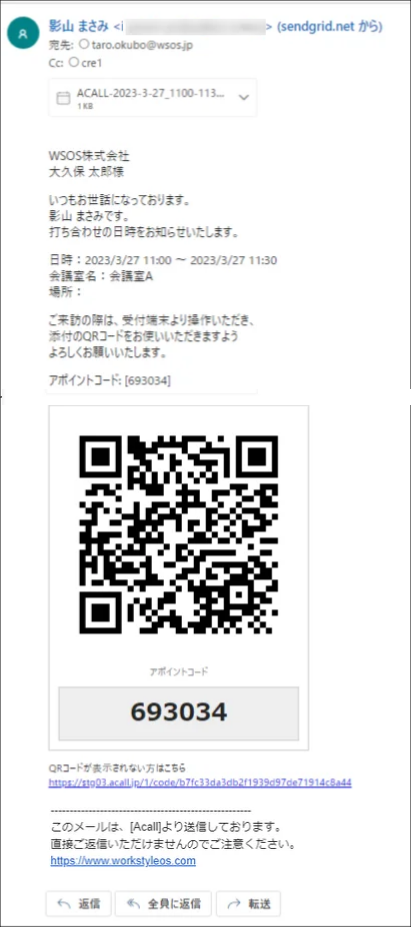
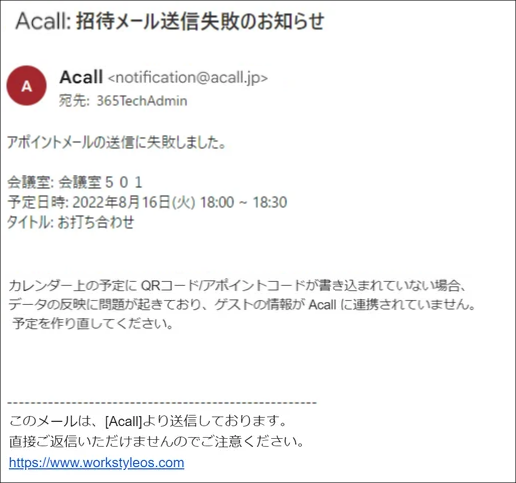
If sending e-mail with an appointment code fails for some reason, it will be notified to the user who created the appointment by e-mail.
💡 Note
In case you receive this e-mail, please re-create appointment.
In case appointment/meeting is created without selecting a meeting room
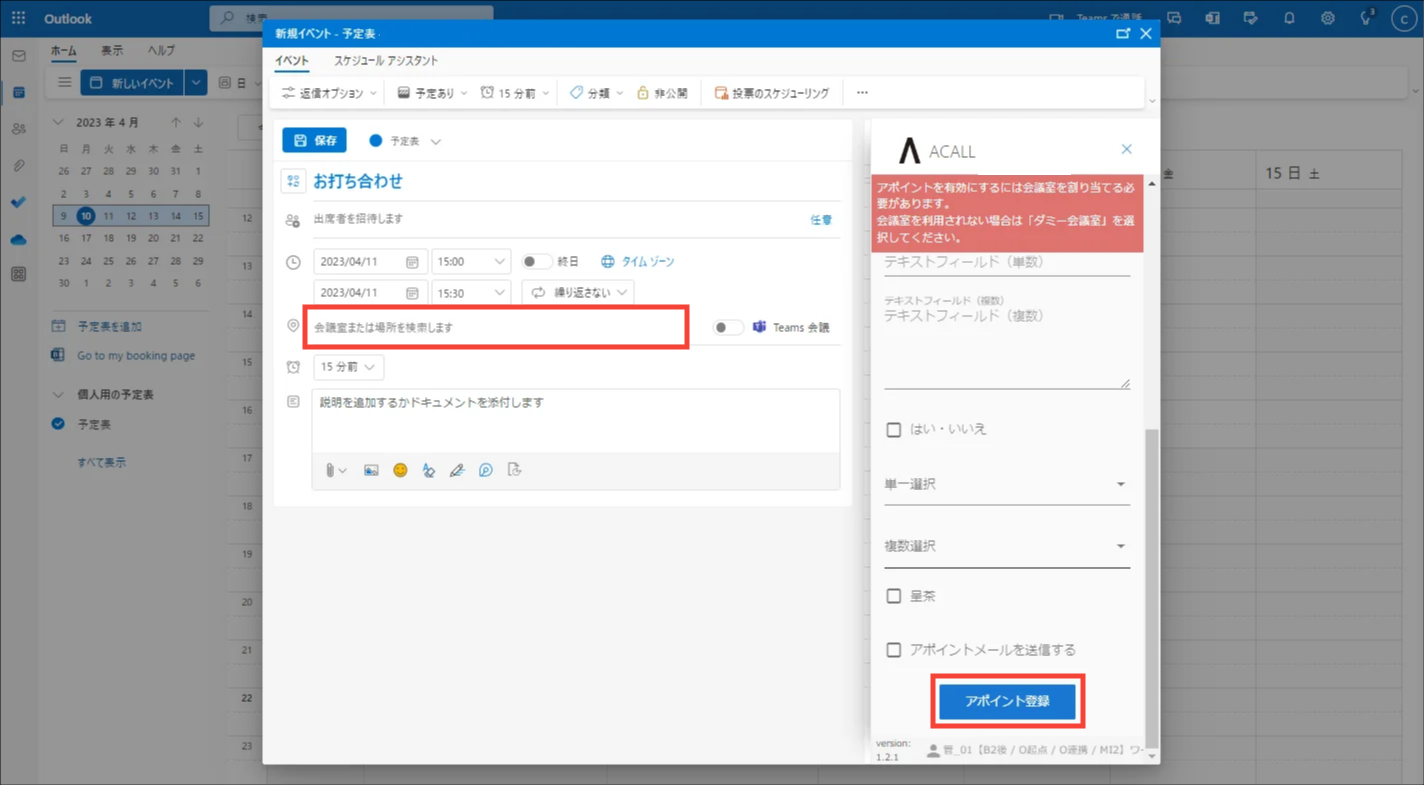
The behavior of registering an appointment using Acall add-in without entering a meeting room depends on whether "Meeting room for appointments" is created or not.
💡 Meeting room for appointments
When creating appointments on Outlook calendar, you must select a meeting room that has been imported into Acall.
If you have appointments that do not need a meeting room, you must prepare an alternative meeting room to select when creating the appointment.
・Create Meeting Room for Appointments on Outlook
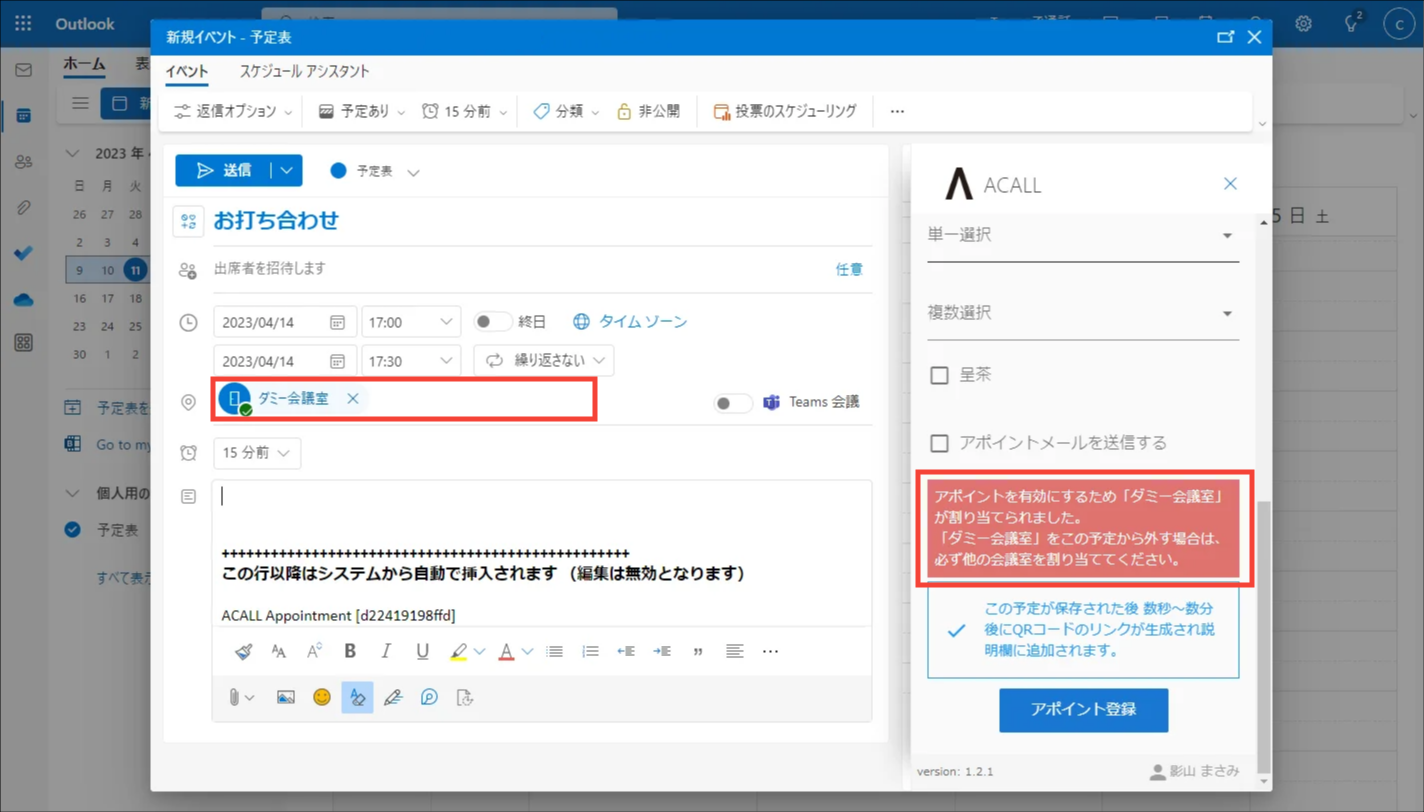
・Customers created a meeting room that is allowed overlap
The meeting room is automatically selected when the [REGISTER APPOINTMENT] button is clicked in Acall add-in.
・Customers created as many meeting rooms as you need / Customers who have not prepared meeting room for appointments
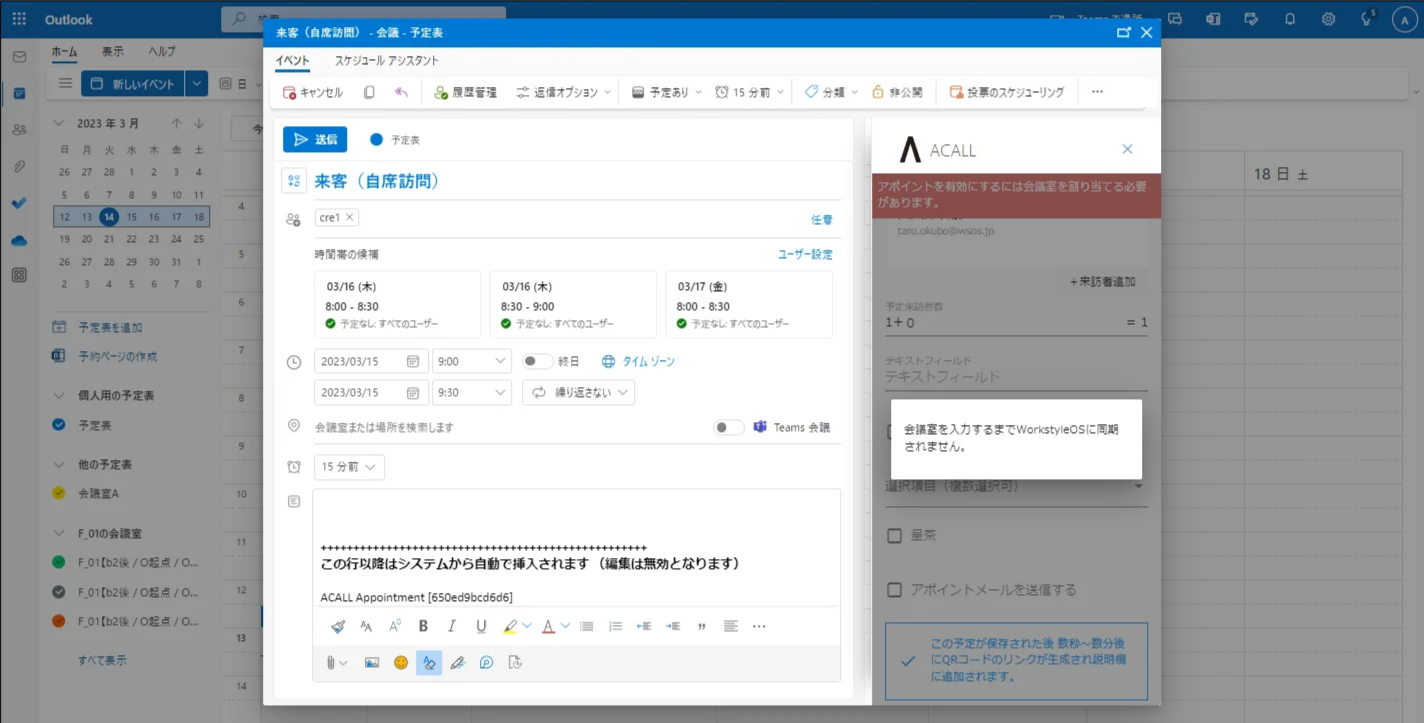
When you click [REGISTER APPOINTMENT], "Will not be synced to Acall until the meeting room is entered" message will be displayed.
If meeting room (workspace) is not selected and saved, the meeting will not be synced with Acall.
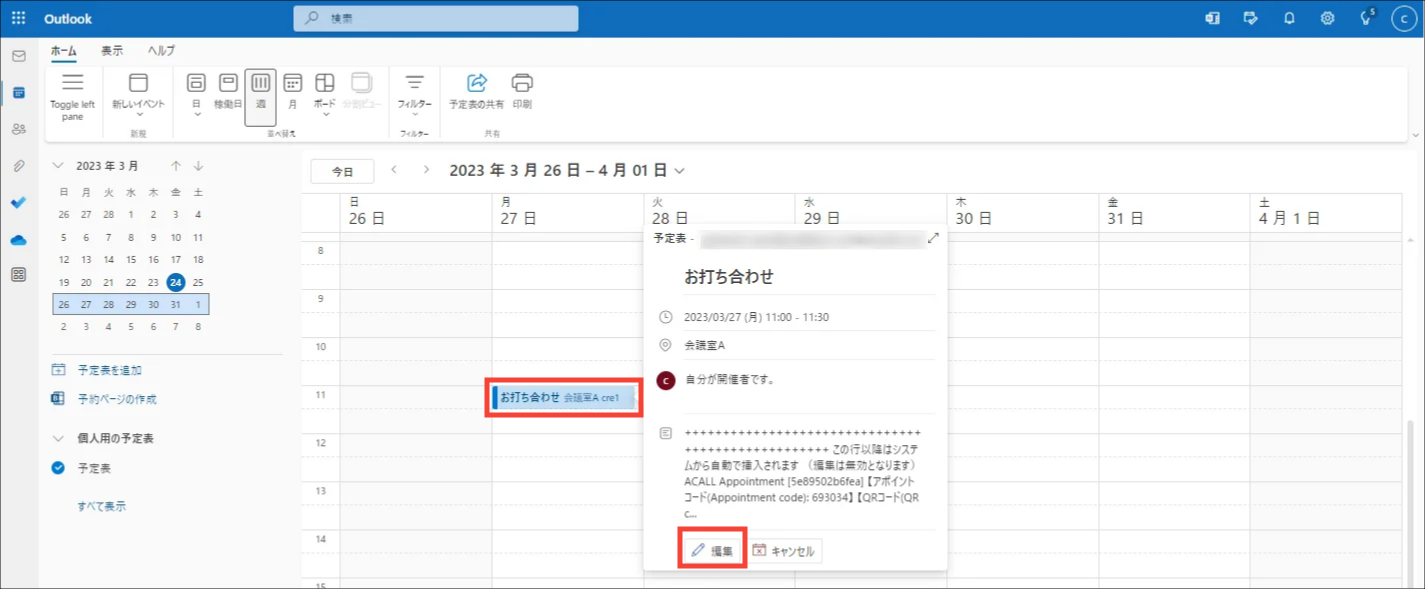
Edit appointments on Outlook Calendar
Click the appointment you wish to edit and click [Edit] on Outlook Calendar.
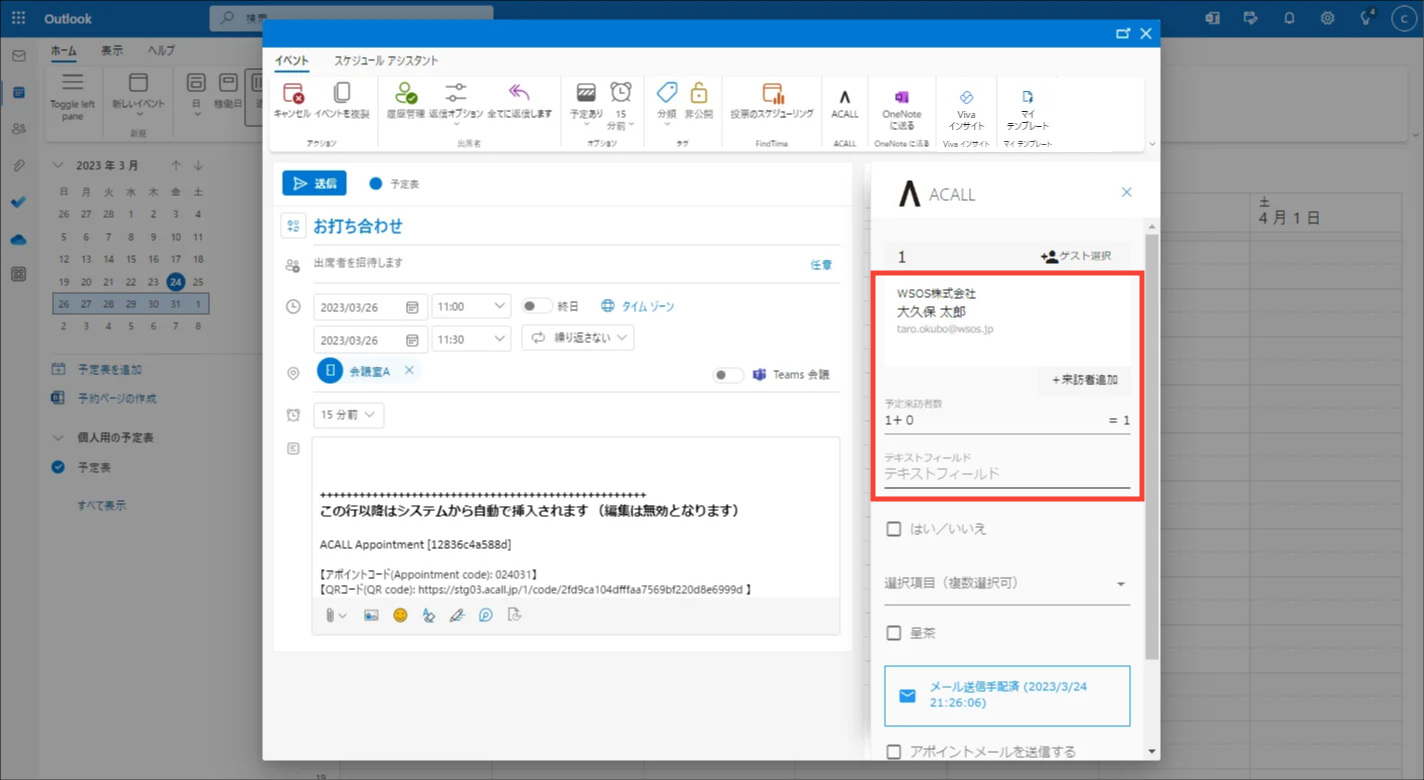
Edit the information you wish to change.
To change the guest information, click [REGISTER APPOINTMENT] after making changes.
Check [send email] checkbox and click [REGISTER APPOINTMENT]. Email with an appointment code will be re-sent to the guest. 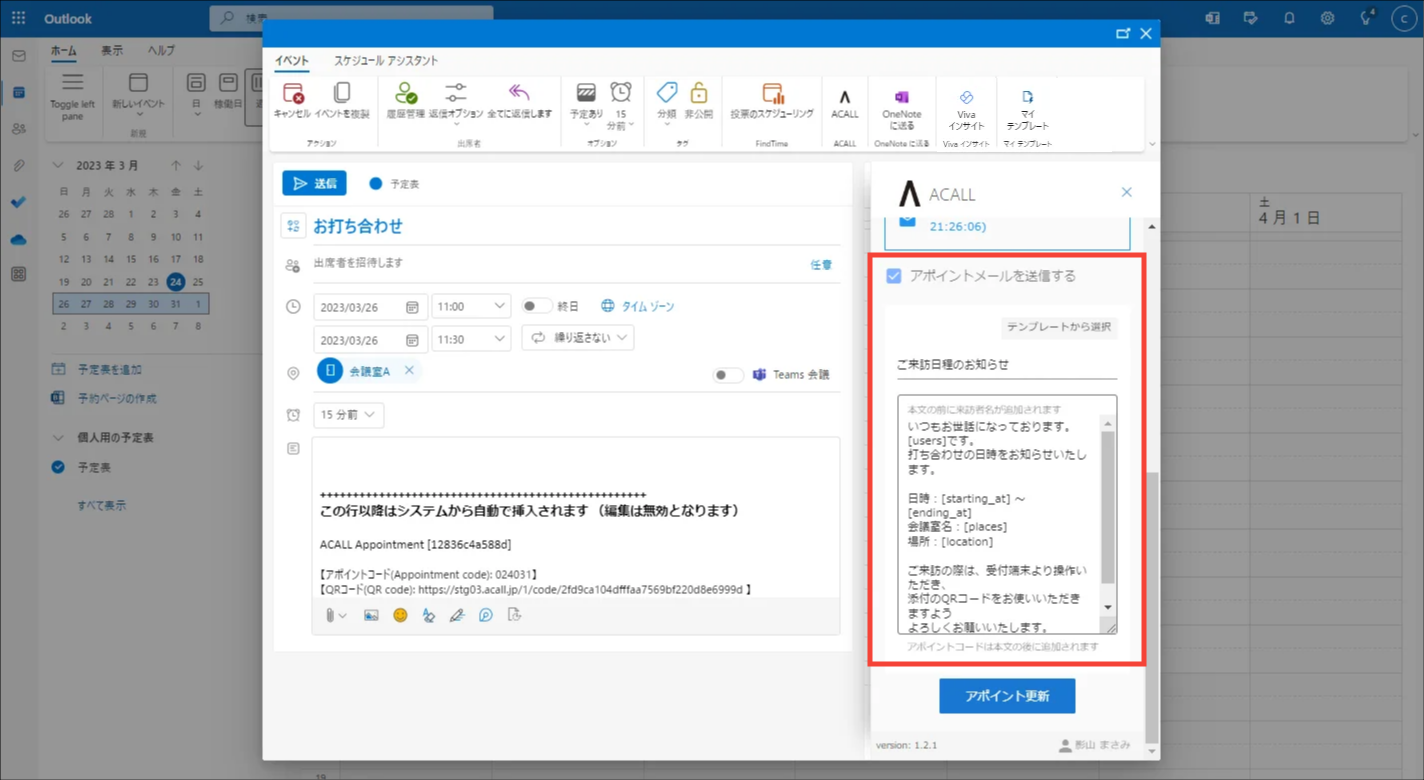
⚠️ Note
・When resending appointment e-mail, we commend to change the contents of the email template. For example, "Notice of Date and Time Change" in the "Subject" field to make it easier to distinguish the new appointment code from the old one.
Click [Send] and complete editing.
Appointments edited on Outlook Calendar will be automatically synced with Acall.
💡 Note
It may take a few minutes to be synced.
If it does not synced after a few minutes, please refer to "Appointments created on calendar are not reflected in Acall".

If meeting room (workspace) is not selected, the meeting will not be synced with Acall.
You must select a meeting room (workspace) when you create appointments.
If you check [send email] checkbox, e-mail with an appointment code will be sent to the guest when the edited appointment is synced with Acall.
Delete appointments on Outlook Calendar
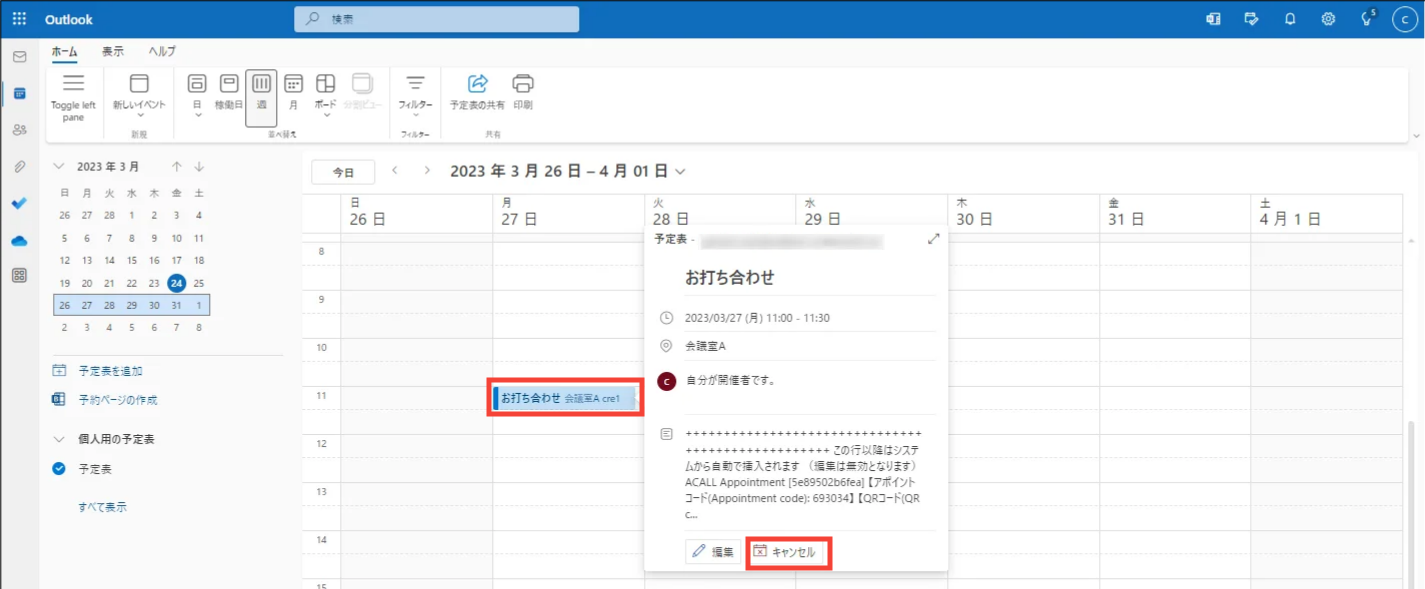
Click the appointment you wish to delete and click [Cancel] on Outlook Calendar.
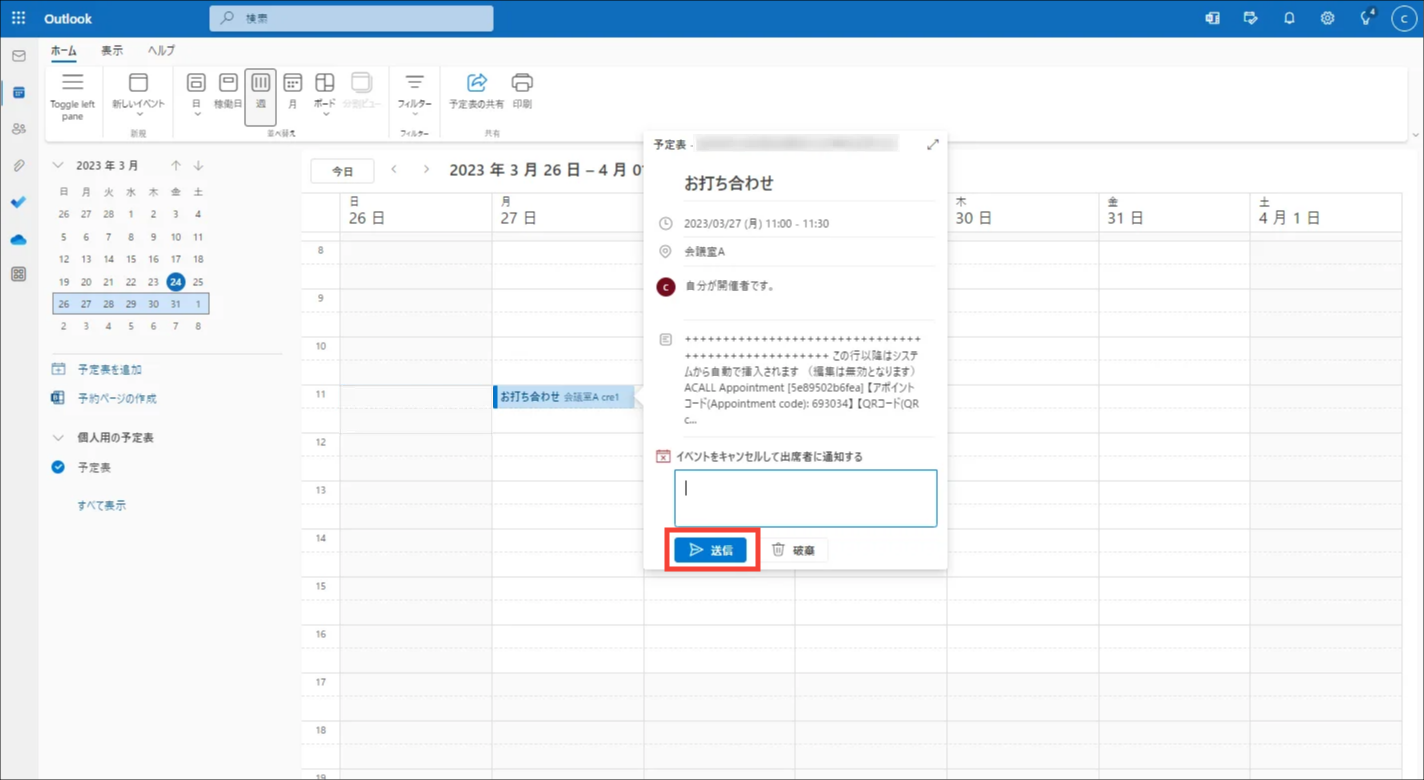
Click [Send].
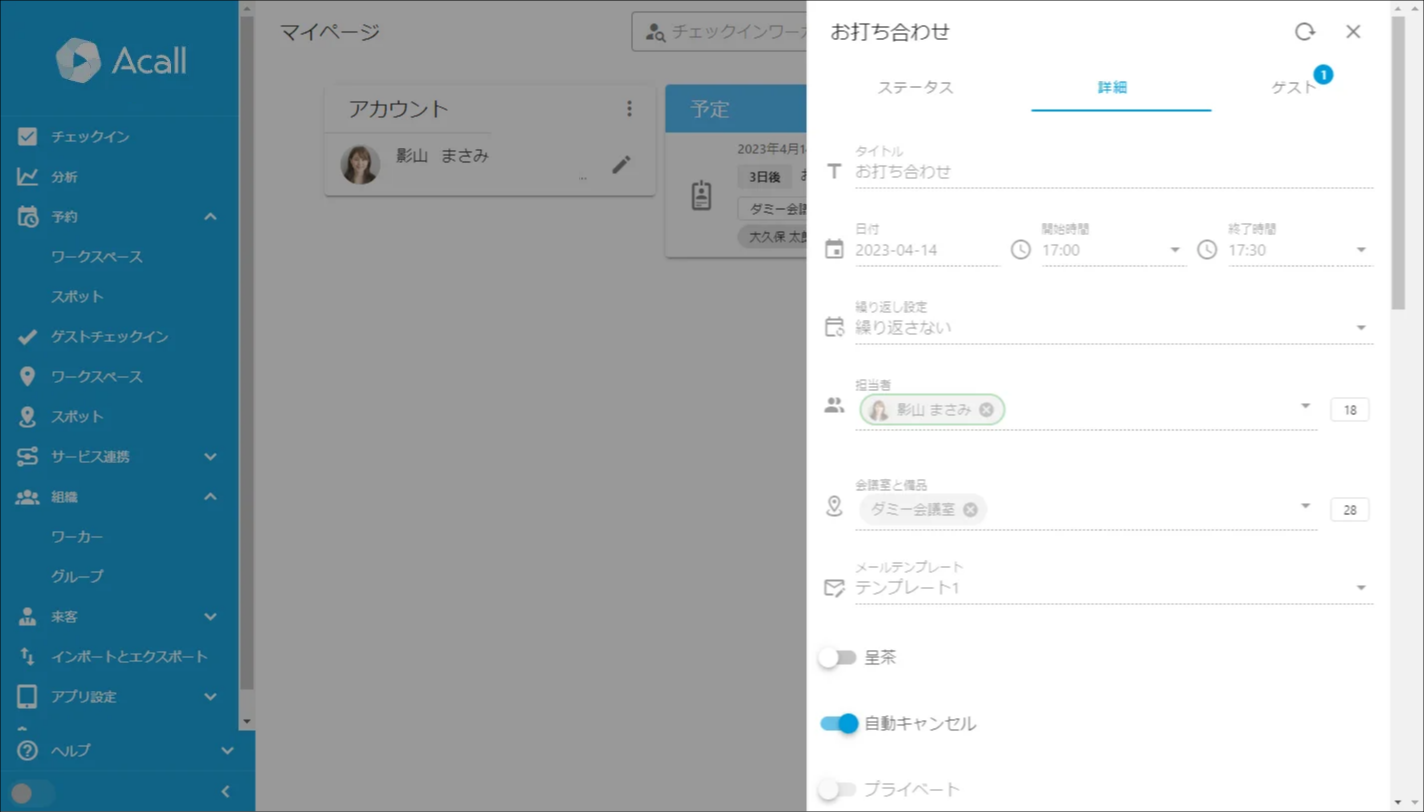
Appointments deleted on Outlook Calendar will be automatically synced with Acall.

Edit/delete appointments on Acall
Appointments that were created on Outlook Calendar can not be edited/deleted on Acall.
Please edit/delete on Outlook Calendar.
Comments
0 comments
Article is closed for comments.